Python is a very powerful and flexible programming language, enabling engineers to perform complex mathematics analysis, implement Artificial Intelligence solutions and develop a range of other complex engineering solutions. The ability to use Python within the Field Programmable Gate Array (FPGA) space has however previously been limited. With the release of the PYNQ framework, Python developers for the first-time were able to exploit the capabilities and performance provided by programmable logic. While FPGA developers also benefited as they were able to integrate the high-level capabilities of Python with their FPGA designs.
Let’s take a look in more detail at how we can do this
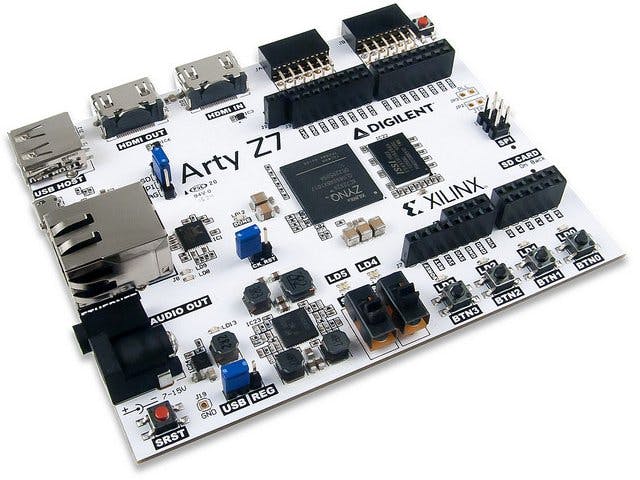
To get the PYNQ image up and running on Digilent Arty Z7-20 Once we have the image, we need to burn the ISO file to a MicroSD card, ideally this card should be at least 8GB. To burn the ISO image to SD card Iused win32 Disk Imager.
image up and running on ourArty Z7 once we have the image, we need to burn the ISO file to a MicroSD card,ideally this card should be at least 8GB. To burn the ISO image to the SD card, I used win32 Disk Imager.
Once the image is written to the SD Card, it is time to insert the card into the Arty Z7-20 ensure the configuration jumper is set to boot from SD and connect an Ethernet cable (to computer) before powering it on. The Arty Z7-20 can be powered from the on board USB-JTAG-UART port (J14) or from some other type of power source such as a battery or external power supply. Jumper JP5 (near the power switch) determines which power source is used.
After a few seconds you will see the Done LED illuminate, indicating the Xilinx Zynq has been configured, followed by activity on the Ethernet LEDs. Once the boot sequence is complete and the PYNQ framework is ready. The four LEDs and two RGB LEDs will flash several times before leaving the four LEDs illuminated.
We are now ready to leverage Python on Arty Z7-20, we do this by using Jupyter notebooks running on the Arty Z7-20. To connect to the Arty Z7-20 and its Jupyter notebooks, we need to open a browser on the same network as the Arty Z7-20, entering the address Pynq:9090 this will open the initial page as shown below. It is from here that we can develop our Python based applications.
Once on the landing page, open the getting_started directory and read the information on the Jupyter notebooks, Python environments and advanced Python features. These will provide a great introduction on how to get started using the development environment.
While the Linux image with its Jupyter notebooks and Python run on the processor cores of the Zynq, the programmable logic is used to provide several interfaces and programmable logic overlays. These overlays can be loaded and used from within the Jupyter environment as your Python script executes. The PYNQ image comes with a base overlay which supports all the inputs and outputs (IO) on Arty Z7-20.
Of course, it is possible to develop custom overlays. These custom overlays are developed using either a traditional flow of Vivado Design Suite including SDK and High-Level Synthesis using Vivado HLS or SDSoC Development Environment. To enable integration within the Python environment, the software (SW) drivers for the programmable logic (PL) are exploited using Python’s C Foreign Function Interface.
Developing own overlays allows users to be able to accelerate applications, however before users spend time on developing their own overlays, they should review the offerings of the PYNQ community. As within the PYNQ community, there exists several overlays and Jupyter scripts available from the extended PYNQ community which users can exploit when developing their own applications.


Comments
Please log in or sign up to comment.