

Software apps and online services | ||||||
 |
| |||||
| ||||||
So far every project I have created has used a physical FPGA or Programmable SoC sat on my desk.
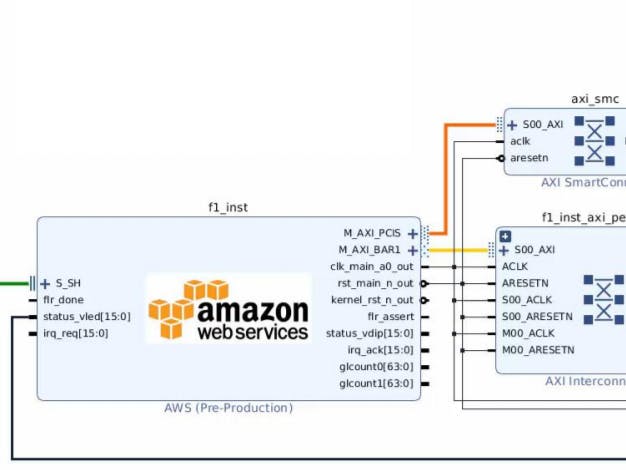
However, FPGA are also available now in the cloud on the Amazon Web Service EC2 F1 instances. This also opens up a very high performance FPGA device and allows us to use it and pay for its use by the hour.
In this project we are going to look at how we can create a AWS instance and then how we can use Xilinx SDAccel to create a simple hello world project.
To do this we will need to do the following things
- Create a AWS account if you do not already have on
- Create AWS account keys
- Create a S3 Bucket and Folders
- Use AWS IAM to set up the correct policies for the development
- Create a remote desktop instance we can work with
- Create and build a SDAccel project
- Generate the AFI Images for the FPGA build
Note if you are new to using AWS once your account is created you might need to request permission to increase your allowed number of F1 instances from 0 to 1.
Note for the example we will be working in the AWS US East Region, it is important that everything we create uses this region.
Creating the environmentThe first we need to create and launch the AWS instance that we will be working with. For simplicity sake I will be using a F1 instance for the development and implementation.
Log into your AWS account and select the EC2 console.
StorageThe first step on the instance creation journey is to create a storage bucket and two folders for this we use the Amazon S3 service.
We do this via the Services menu and select S3 under storage.
This will present you with a page which allows you to create a bucket
Click the create new bucket option
Enter a name for the bucket, this has to be universally unique.
With the bucket created the next step is to create two folders one for the log and another for the DCP.
Select the bucket and within the bucket select create folder
Create Two folders - DCP and log
The next step is to create the keys so we can access the AWS instance remotely
The first step is to create a user from the AWS EC2 console, select services again and open the IAM. Using this we are going to create a user and provide policies to enable them to develop and generate code with the instance.
The first thing to do is create a new group and apply policies to it within IAM select groups
Enter a group name and select the following policies
With a group created the next step is to create a user.
Click create a new user and select programmatic access
We can then add the user to the group
This will then create the access keys we need download these as the CSV and keep this information safe.
We will use these to configure the AWS Instance CLI.
Creating the instanceWith this created we are ready to create the AWS instance using the EC2 console, select launch instance
This will open up the AMI type selection in the search bar type FPGA and select FPGA Developer AMI.
This will then show page of the hourly fees, click on continue
On the next page select F1.2x Large instance
We then need to configure the instance, this is quite simple as we leave most of it unchanged
The one thing we need to do as we want to add a remote desktop is to add in a RDP type in the security group. Make sure to set the source to 0.0.0.0/0
With this complete we can review and launch the instance.
Before you go back to the EC2 console you will be asked if you want to use a existing key pair or create your own. Select new key pair.
Save the new key pair and if we are working with windows and PuTTY then we need to format the file first before we can use it.
Back in the EC2 Console we will see the instance has been launched
What we want to do now is connect to that instance, at the moment we have no desktop so we need to connect via SSH and configure it. To do this I used PuTTY as I am windows based.
This required me to save the key pair I just downloaded in a different format.
Using PuTTYGen open the pem key file and save it as a ppk file format.
We can then open a SSH terminal using the command
putty -i C:\Users\aptay\Downloads\AWS_Adiuvo.ppk -ssh centos@ec2-54-165-44-191.compute-1.amazonaws.com 22
The ec2-54-165-44-191.compute-1, amazonaws.com is the DNS address of the instance which is available in the EC2 console.
This will open PuTTY and log us in to a SSH session which we can use to configure the instance parameters such as
- Configure the AWS CLI
- Clone the AWS FPGA toolkit
- Add a remote desktop so we can log in remotely
The first thing we want to do is configure the AWS CLI in the SSH terminal issue the following commands
$ aws configure
AWS Access Key ID [None]: CSV Access key we just downloaded
AWS Secret Access Key [None]: CSV Access Key we just downloaded
Default region name [None]: us-east-1
Default output format [None]: json
With that stage complete the next step is to clone the AWS FPGA tool kit, again in the SSH terminal issue the command
git clone https://github.com/aws/aws-fpga.git $AWS_FPGA_REPO_DIR
The final thing we are going to do with the SSH is set up the remote desk top, issue the following commands in the SSH window
sudo yum install -y kernel-devel
sudo yum groupinstall -y "Server with GUI"
sudo systemctl set-default graphical.target
sudo yum -y install epel-release
sudo rpm -Uvh http://li.nux.ro/download/nux/dextop/el7/x86_64/nux-dextop-release-0-5.el7.nux.noarch.rpm
sudo yum install -y xrdp tigervnc-server
sudo systemctl start xrdp
sudo systemctl enable xrdp
sudo systemctl disable firewalld
sudo systemctl stop firewalld
sudo passwdcentos
This final command will enable you to set a password to enable a remote log in, this stage can take a few minutes.
Once completed however we are in position to start working with SDAccel and creating the example application.
SDAccelTo connect to the remote desktop I used mstsc.exe from the windows start menu. I then added in the public IP address which was presented on the EC2 console.
This will present you with a log in screen
We are then ready to get started with our SDAccel application, the AWS FPGA tool kit contains everything we need to get up and going.
The first thing to do is open a terminal and navigate to the cloned directory and source the sdaccel_setup.sh script. This will set up the environment for the AWS F1 instance we want to work with.
With that completed it is time to launch SDAccel which is achieved by typing in the command
sdx
This will cause the SDx gui to open, the first thing we need to do is click add custom platform and install the AWS platform.
For this project we are going to use one of the example applications which comes with the AWS FPGA tool kit.
As such we will create the workspace in that directory.
/home/centos/src/project_data/aws-fpga/SDAccel/examples/xilinx/getting_started/host/gui
The first thing we need to do before we can create a project is to add the custom AWS platform. This platform is contained within the AWS FPGA Tool git repository we cloned.
You can find the AWS platform under
<install location>/AWS_FPGA/SDAccel/AWS_platform
Once imported we can create a new empty SDAccel application project, apart from entering a name leave all other options as the standard.
With the project created the next step is to import the source files from the example directory.
Right click on the src directory and select import->general->file
Select a file system and import all the source code files in the directory
The next step is to then select the function for acceleration, click on the lightning bolt control panel and this will open up a dialog box. This allows us to select the functionality we wish to accelerate, in this instance it is vector_add
With this we are now ready to perform our build, there are three targets we can make
- Software Emulation - This is pure SW flow for initial development an speed
- Hardware Emulation -This uses co simulation of the hardware element
- System - This is the final build of the development
For this example we will be generating the HW emulation and the System
To change between the build variant we can select this from the active build configuration drop down and start a build by selecting the hammer on the menu bar.
Once the HW emulation is built we can click the Green Run arrow, in the console we will see the result of the simulation.
With the HW emulation OK the next step is to change the build to System and build the complete project. This may take a while.
Generating the Amazon FPGA ImageOnce the build in SDAccel is complete we need to generate the files such that it will work with the AWS F1 instance to do this we use the script provided by the AWS FPGA tools.
This script is called create_sdaccel_afi.sh we need to tell it the name of the xclbin file and the names of the bucket and folders we created earlier.
$SDACCEL_DIR/tools/create_sdaccel_afi.sh -xclbin=<input_xilinx_fpga_binary_xclbin_filename> -o=<output_aws_fpga_binary_awsxclbin_filename_root>
-s3_bucket=<bucket-name> -s3_dcp_key=<dcp-folder-name> -s3_logs_key=<logs-folder-name>
This will take a few minutes
Once this has been completed we need to see when AFI is ready we can do this by issuing the command
cat *afi_id.txt
We can use these AFI IDs to check when the AFI will be ready by issuing the command
aws ec2 describe-fpga-images --fpga-image-ids afi-07d2462c9b1c7522a
Initially when the AFI is not available you will see this show as pending
Once completed you will see this show available
We can then run the code on the example using the command
sudo sh
source /opt/xilinx/xrt/setup.sh
./<application name>
When I ran this the example application also showed the same result as in the
All told, it is very simple if a little lengthy, however once the instance is created we can re use it for more applications.
Make sure you close the instance properly otherwise you will run up a large bill, it is also worth setting a budget on AWS and warning for when you hit that budget.
Now we understand how we can accelerate applications in the cloud, we can start developing applications for computer vision or machine learning and accelerating those.
You can find the files associated with this project here:
https://github.com/ATaylorCEngFIET/Hackster
See previous projects here.
More on on Xilinx using FPGA development weekly at MicroZed Chronicles.


Comments