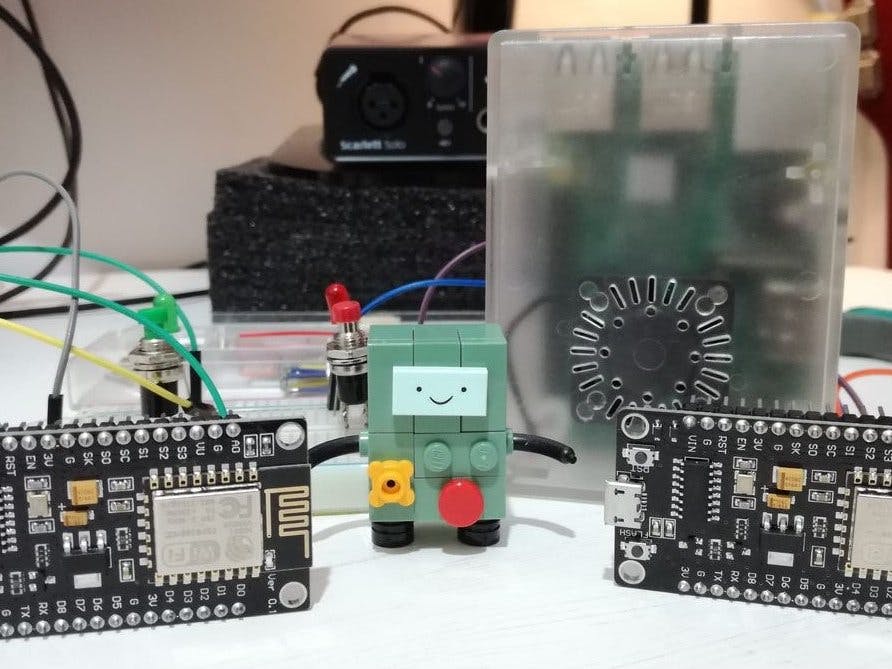
In any IoT project we have a number of unique requirements and restrictions. The communication strategy to connect devices and send data between them is critically important.
In this guide we will explore a powerful, simple and lightweight messaging protocol over the wire: MQTT
Originally published on my blog.
Full source code of the project here.
What's the MQTT Protocol?In the embedded world, we assume by default that the end-devices are going to work under a variety of processing capacity, energy or communication constraints. And specifically on the subject that concerns us in this post, how we are going to implement the communications of our system is going to have a direct implication on the consumption of resources and energy of the devices.
In this guide we are going to explore MQTT, a lightweight communication protocol over TCP invented in 1999 by Andy Stanford-Clark from IBM and Arlen Nipper from Arcom, initially designed for battery-operated devices to supervise oil pipelines. Later in 2010, IBM released it as a royalty-free protocol. In 2014, OASIS announced that the MQTT v.3.1.1 had become an OASIS standard and a lot of MQTT clients were developed for all programming languages.
The most commonly used broker is the Eclipse's Mosquitto library: an open-source implementation of the MQTT v3.1 and v.3.1.1 standards providing a lightweight method to transport messages, enabling the pub/sub pattern for low power sensors, mobile devices, embedded computers, and microcontrollers. You can install the Mosquitto broker on your PC as well as on any embedded system with Linux support, such as the Raspberry Pi.
Main Features
- Data agnostic: you can use it to send sensor data, images or even OTA (over the air) updates
- Lightweight and bandwidth efficient: smallest frame is only 2 bytes long
- Per-queue QoS levels
- Runs on top of the TCP/IP stack, so you can use it to encrypt the data with TLS/SSL and to have a secure connection between clients
- Simple to develop: clients exist for all operating systems and programming languages
- Central broker: different devices can communicate with each other without having to worry about compatibility
- Session awareness: provides an identity-based approach for subscriptions
- Flexible subscription topics using single-level and multi-level wildcards
Basic Terminology
- Broker: the software application that receives messages from publishing clients and routes the messages to the appropriate subscribed clients
- Client: a device that can publish messages to a topic or subscribe to messages from a topic
- Topic: an identifier (a string) used by the broker to filter messages for each connected clients. It is sent by clients to the broker in a subscribe request to express the desire in receiving messages published by other clients. It is sent by the clients when publishing messages to any other client that subscribed on the same topic
- Publish: the action of sending a message from a client to the broker
- Subscribe: the action of informing the broker about an interest in receiving future messages published by other clients on that topic. A client can subscribe to multiple topics
- Unsubscribe: the action of informing the broker that a client doesn't want to receive messages of the specified topic
And now, before jumping into the real thing, let's make sure first that we are on the same page with our development tools.
MQTT Broker With Raspberry Pi and BalenaOS
As I said before, Mosquitto can be installed on any PC (Windows, MacOS and Linux), so if you don't have any RPi at hand you can install Mosquitto locally and use the static IP of your computer.
In my case, I am working on a mini home-automation project in which I need to integrate several devices, show data in a webapp and analyze that data to execute certain actions. As you can see, a full development stack is involved here (database, a backend, a frontend) and for this kind of setup, there is nothing better than working with containers. Did anyone say Docker?
How can we use Docker on a Raspberry Pi with automated deployments, without having to waste hours configuring Raspbian? This is one of the things you can achieve with Balena. And before you ask: yes, it's free, but "only" for your first 10 devices...
Here's a short video of the process to create a new Balena app (it took me around 15 minutes from start to finish):
Finally, in the upper right corner, you can check out your newly created balena remote git repository. Click on the "?" button to see how to configure your project or check the docs here.
Now, time to set up the MQTT broker:
- Create a new github project and add this docker-compose.yml file
- Add your balena remote endpoint we saw earlier in the dashboard
- Push your changes first to github and then to balena
- Done! Within a couple of minutes, you will see in the balena dashboard how the mosquitto container is created and started
ESP8266 Development Environment
I'd recommend you to use Linux because it offers a number of advantages over Mac or Windows that can help you avoid certain frustrations. For example, in a standard Ubuntu installation, I have been able to work with Arduino boards, ESPs and even STMs without having to worry about installing a single driver. And believe me: that it's pure pleasure.
In any case, keep in mind that sometimes it is inevitable to go through Windows since there is some specific vendor development software that is only available for this operating system. So, always check your requirements and make sure you know beforehand what software do you need to work with your devices.
For the experiments conducted in this guide we don't need anything fancy so, luckily, we can stay on Linux.
PlatformIO + VS Code (or Atom)
Forget about using the Arduino IDE. It's anything but functional and practical. It lacks every functionality that makes up a good IDE.
Luckily, we have PlatformIO, an extension for VS Code and Atom that turns these fantastic editors into authentic IDEs for our embed experiments.
From the docs: "It takes care of toolchains, debuggers, frameworks that work on most popular platforms like Windows, Mac and Linux. It supports more than 500 development boards along with more than 30 development platforms and 15 frameworks."
It also allows you to manage your libraries and keep them updated as well as debugging your code easily.
What are you waiting for? Go ahead and install it right now.
Next thing you want to do is download a couple of libraries: PubSubClient and ArduinoJson. Or you could simply clone the repository of this guide.
And now, let's begin!
Since I will be working with several ESP8266 for a while on different projects, I thought it would be a good idea to take some time to preconfigure the modules and forget about hard-coding my wifi network credentials in the scripts and then put dummy text before uploading the project to github. I'm sure I would end up pushing the password and never notice.
Getting this with an ESP8266 is quite simple with the help of the SPIFFS and ArduinoJson libraries. To encapsulate the basic functionalities related to our device (network connection and flash memory management) I have created a small class called NodeMCU.
As you can see, one of the constructors accepts a single argument with which we will pass the stringified JSON that we want to persist in memory. In the setup() method it will try to recover the data from the memory or it will fail if it doesn't find the right data to connect to the local network.
Apart from this NodeMCU wrapper, I have also created another one to work with MQTT in a more direct and clean way, with all the external libraries included. Make sure to check out the full code here.
Now that we have our boards properly configured, we can move on to the first experiment.
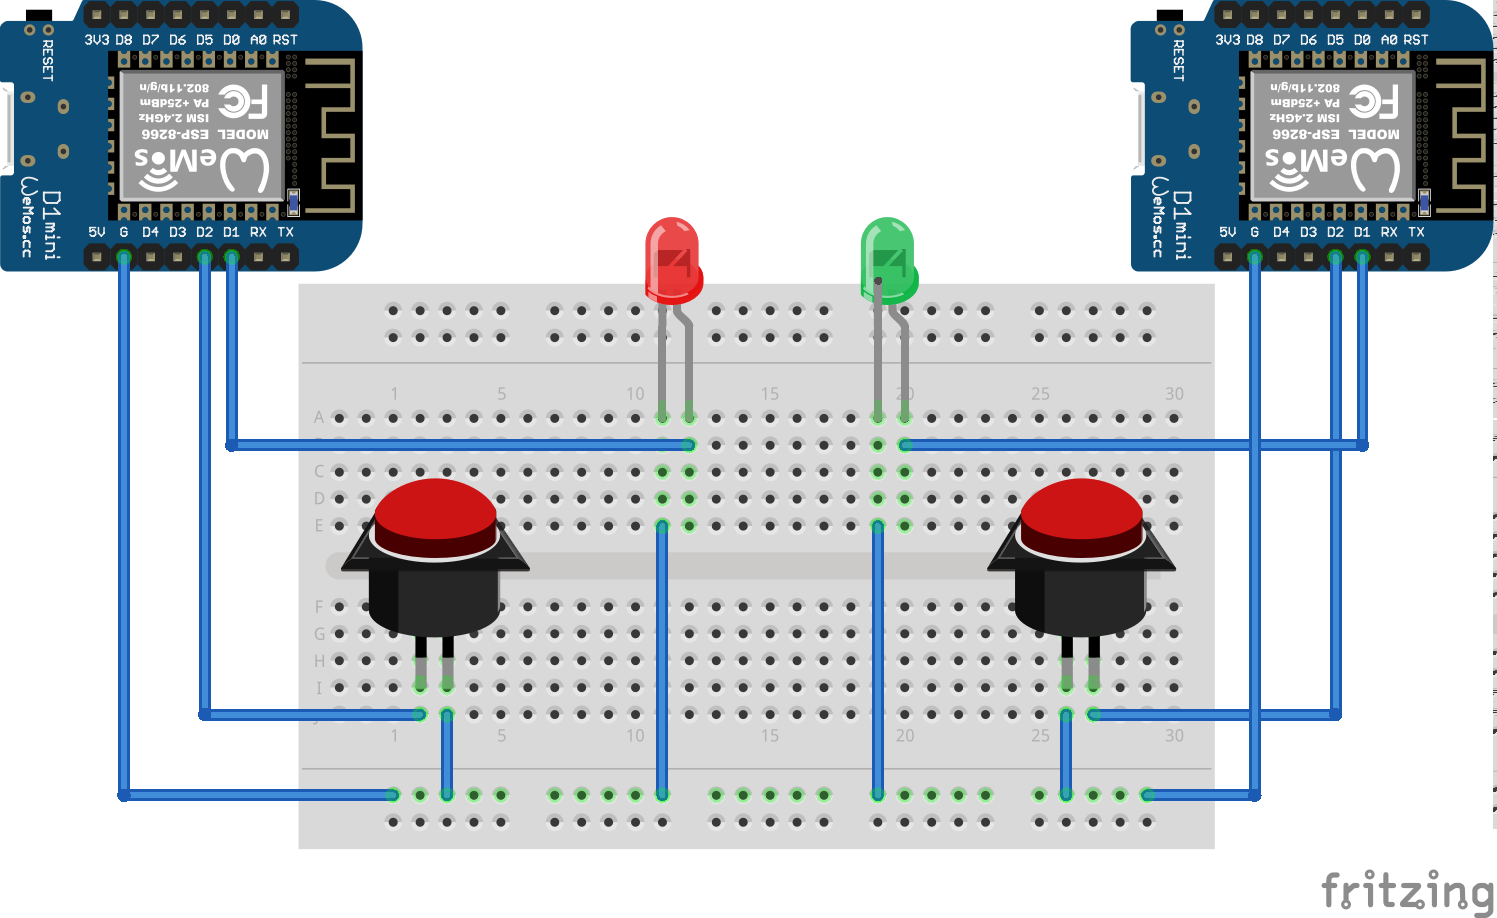
Connecting Two Devices With MQTTIn this first experiment we are going to focus on the core functionality of the MQTT protocol: publish/listen to messages to/from a topic, and use this to toggle an LED. As a trigger to send the messages I have used 2-way switches, not very suitable for prototypes as you can see in the GIF below, but much cooler the typical flat buttons of four pins that are usually used in most of the tutorials.
The workflow is simple: when we press the button of the device on the left, it will toggle the LED from the right; and vice versa. The only trap is that each device listens to all the messages that are published, so we need to filter out the self-published messages to avoid acting on itself.
You can find the code for this first experiment here.
One of the most interesting features of the MQTT protocol is that the broker keeps track of the connection between itself and all the connected clients. The broker knows at all times when one of its clients has disconnected. How? Very simple: it continuously pings its clients and when one of them stops responding for a certain period of time (timeout), it assumes that it has been disconnected.
This timeout is defined by the client when it sends the initial connection request to the broker, so it is totally configurable by the client. In this connection request is where we can also include the parameters for the Last Will and Testament (LWT) message which includes: the payload, which topic to publish it, the QoS, and whether the message should be retained or not.
And here appears a new feature of MQTT: retaining a message. This allows us to tell the broker that, whenever we send a "retain" flagged message to a topic, it should store it and keep it safe. Now, when a new client subscribes to that topic, it will receive that retained message. Think it as a welcome note for newcomers.
We can combine these two MQTT functionalities to track the status of our devices, and this is what we are going to do in this experiment. Of course, the PubSubClient library offers us the API to easily work with LWT messages on our Arduino-like boards.
This is the standard algorithm used to manage LWT messages (credits to knolleary from stackoverflow):
- When a client connects, it publishes a RETAINED message to a topic unique to it ("clients/{{clientId}}/status") with a payload of 1
- It also, on connect, sets an LWT message to be published to the same topic, but with a payload of 0. This should also be a RETAINED message
- When a client disconnects cleanly, it publishes a RETAINED message to the same topic with a payload of 0
- When a client disconnects abruptly (ping fails for the defined timeout), the broker will publish the LWT message as the new RETAINED message
Here you have the code used and here more details about LWT from HiveMQ (parts 8 and 9).
The wiring for this experiment is just the same as before but without the buttons.
In this guide we have worked with one of the most widely used variants of ESP8266 (NodeMCU) to implement some of the basic concepts of the MQTT communication protocol.
We have also seen how to use the internal storage of our module to store configuration files and speed up our prototypes development.
Now you could apply the techniques we have learned here in some real project you may have in mind, implementing an efficient and straightforward communication system to send, for example, data from our sensors to a local server for later analysis.
MQTT is much more than what we have seen here today, but I hope that at the very least these experiments have helped you understand the core concepts of this protocol and how to use them. Keep experimenting and learning!


Comments