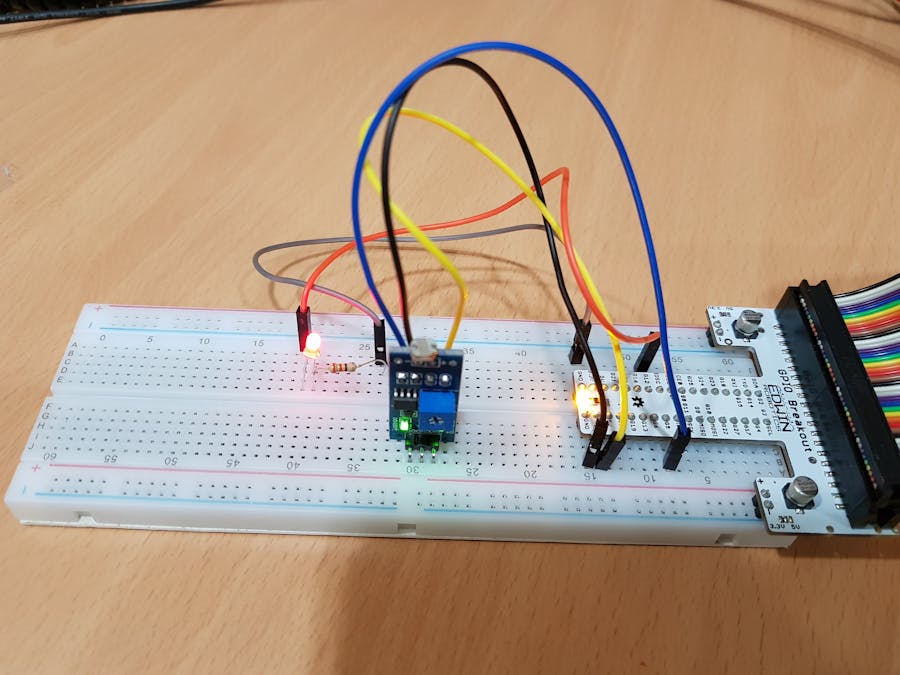
It took me some time to figure out reading the status of the Digital Light Sensor is straightforward and it simply depends on reading the GPIO value!
The idea of the project is very simple, just switch on LED in light when the sensor detects light and the other way around.
So let's move forward and check the wiring diagram below and by the way I didn't find a diagram for the Digital Light Sensor so I kept it as a text !!!!
Setting Up the Board- Digital Light Sensor: GPIO # 5
- Red LED: GPIO # 12
It is up to you also to change the pin numbers, but make sure they are reflected correctly in the UWP code.
The part I like, coding!This project is has only on page which contains the C# code and there is no UI required this time.
Step 1: Creating the UWP Application
- Open Visual Studio 2017/2015
- Select Blank App (Universal Windows)
- Enter the project name "DigitalLightSensorApp"
Photo goes here!
Step 2: Open the MainPage.xaml.cs and let's code
Remove all the using and only include the following
using Windows.UI.Xaml.Controls;
using Windows.Devices.Gpio;
Declare the sensor and LED GPIO pin member variables
private GpioPin _sensorPin;
private GpioPin _ledPin;;
Declare the GPIO pin number variables
private int _sensorGpioPinNumber = 5;
private int _ledGpioPinNumber = 12;
Create the initialization method
       private void Initialize()
       {
           // Get the default Gpio Controller
           var gpioController = GpioController.GetDefault();
           //Open the sensor Gpio Pin and set the mode to input
           _sensorPin = gpioController.OpenPin(_sensorGpioPinNumber);
           _sensorPin.SetDriveMode(GpioPinDriveMode.Input);
           _sensorPin.ValueChanged += HandleSensorLightDetectionChange; ;
           // Open the LED Gpio Pin and set the mode to output
           _ledPin = gpioController.OpenPin(_ledGpioPinNumber);
           _ledPin.SetDriveMode(GpioPinDriveMode.Output);
           handleLightStatus();
       }
Call the handleLightStaus method in the HandleSensorLightDetectionChange event
       private void HandleSensorLightDetectionChange(GpioPin sender,
                                         GpioPinValueChangedEventArgs args)
       {
           handleLightStatus();
       }
Create the handleLightStatus method
       private void handleLightStatus()
       {
           // if no light sensor detected light, then turn off the LED
           if (_sensorPin.Read() == GpioPinValue.High)
           {
               //Turn off the LED
               _ledPin.Write(GpioPinValue.Low);
           }
           else
           {
               //Turn on the LED
               _ledPin.Write(GpioPinValue.High);
           }
       }
I found that the "High" value returned from sensor Gpio Pin indicates that there is no light detected and "Low" indicates that light is detected.
The full code can be found below:
using Windows.UI.Xaml.Controls;
using Windows.Devices.Gpio;
namespace DigitalLightSensorApp
{
   public sealed partial class MainPage : Page
   {
       private GpioPin _sensorPin;
       private GpioPin _ledPin;
       private int _sensorGpioPinNumber = 5;
       private int _ledGpioPinNumber = 12;
       public MainPage()
       {
           this.InitializeComponent();
       }
       private void Initialize()
       {
           // Get the default Gpio Controller
           var gpioController = GpioController.GetDefault();
           //Open the sensor Gpio Pin and set the mode to input
           _sensorPin = gpioController.OpenPin(_sensorGpioPinNumber);
           _sensorPin.SetDriveMode(GpioPinDriveMode.Input);
           _sensorPin.ValueChanged += HandleSensorLightDetectionChange; ;
           // Open the LED Gpio Pin and set the mode to output
           _ledPin = gpioController.OpenPin(_ledGpioPinNumber);
           _ledPin.SetDriveMode(GpioPinDriveMode.Output);
           handleLightStatus();
       }
       private void HandleSensorLightDetectionChange(GpioPin sender, GpioPinValueChangedEventArgs args)
       {
           handleLightStatus();
       }
       private void handleLightStatus()
       {
           // if no light sensor detected light, then turn off the LED
           if (_sensorPin.Read() == GpioPinValue.High)
           {
               //Turn off the LED
               _ledPin.Write(GpioPinValue.Low);
           }
           else
           {
               //Turn on the LED
               _ledPin.Write(GpioPinValue.High);
           }
       }
   }
}


Comments
Please log in or sign up to comment.