I live in South Asia where you will find serious cases of smog (smoke and other air pollutants combined with fog) in the winter months following November. I also have to move around quite a lot in the city as part of my job, which means inhaling quite a lot of pollutants. I wanted to know the levels of air pollution there is across various regions in the city. For that purpose we could always employ MQ sensor series and others such as BME680 (for VOC gases) interfaced with ESP8266, but for my particular problem I also need coordinates to better analyze the data, such as air quality around my home, in office and while traveling around various rural and urbar areas. That's where I came along Ubidots which makes this quite a breeze. I can now simply add coordinates data along with my sensor values and Ubidots will simply pick it up and visualize it for you if you want. You can also have a history check in your map if you want to track your device whereabouts as in my case
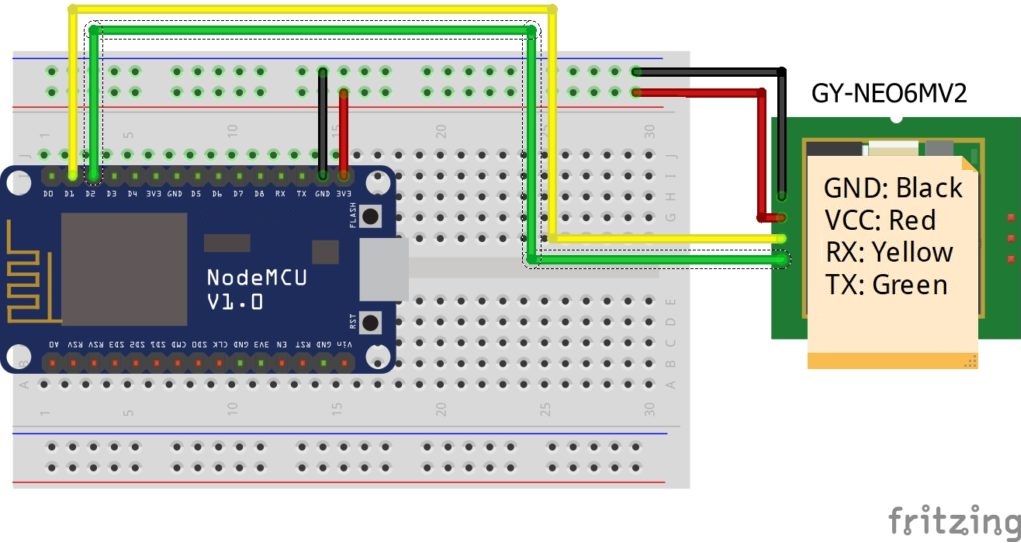
RX => D1
TX => D2
GND => GND
VCC => 3V3
Procedure- Wire up the GPS module as shown in schematic below.
- Install the Ubidots library for ESP8266
- Create an account at Ubidots. In the dashboard, choose the dropdown from the top-right dropdown and you will find your API credentials. Copy the token from there and replace it in the code provided below, along with your wifi ssid and password.
- After running the code, open up the serial monitor. After successfully connecting to Ubidots you will find "OK" being printed every time data is sent successfully.Note: GPS module may take some time to start returning data
- Now returning to your dashboard go to "Devices" and you can see new device (probably with the name ESP8266) now registered besides "Demo". After opening it you will find "Mode" set to "Auto" by default. Change it to your variable name (which in our case is Dummy Sensor) and you will see coordinates automatically picked up by the Ubidots itself.
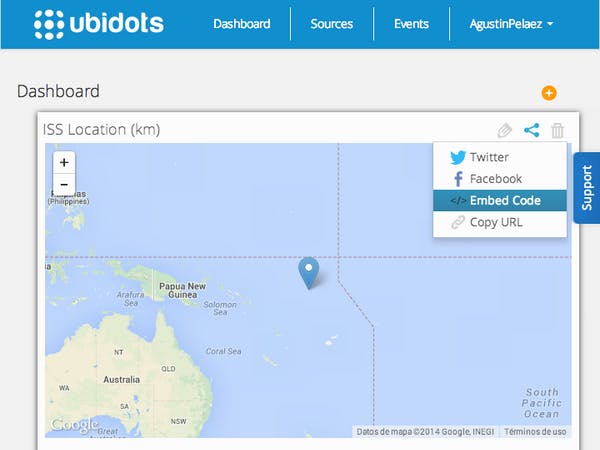
- From the dashboard, add a map widget by clicking on the plus sign, select your device (optionally checking "history") and that's it, you are done


Comments
Please log in or sign up to comment.