For our end-project for school we (Vincent & I) wanted to create something awesome, something with lights, buttons, Raspberry Pi, thermal printer and an app. We wanted to make something smart and eventually we got the idea:
A Smart Fridge!And we made it. It was a lot of work and it took too many hours, but it was all worth it!
We used a lot of online resources, from StackOverflow to the Raspberry Pi forum, so we want to share it with you, to thank the community. We first want to show the project and then explain how you can create your own Smart Fridge and finally we'll show you some of the tricks we did to make it.
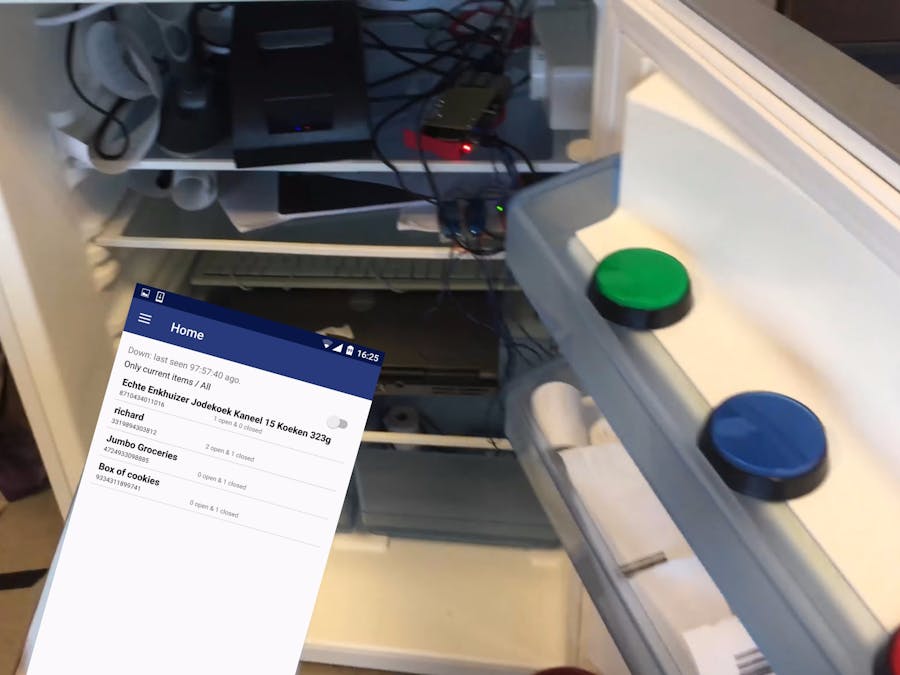
What is the Smart fridgeThe smart fridge is a fridge that knows what is in your fridge. It uses a Raspberry Pi in the fridge to send the changes to the a server that holds the changes and serves the information to the app.
AppThe app is (currently) the only method to view the contains of the fridge and the only way of controlling the fridge. On the homescreen you can see which items and how many items are in your fridge. There are two counters: open and closed, the open counter is for the opened packages and the closed counter is for the untouched items. With the switch you can switch between the items that are in the fridge and all items(the items that were in your fridge at some time, but are not in there at the moment). You can also see whether the fridge is online or offline. If the Raspberry Pi hasn't send a message to the server in 10 minutes, it is presumed offline.
On the jobs page you can create a job(shutdown, restart, print a text or a barcode). These jobs are send to the server and the Raspberry Pi will do it.
The log page is the page where you can see what happened, from making or creating a job to which item was added or removed from the fridge, even at what time. With this feature you can get to know when the cookies were stolen.
The shopping list page shows you what you need to buy to fill the fridge to the highest amount since resetting the list. With the left button you can print the shopping list and it will come out of the fridge in less than 10 seconds (depends on WiFi and other jobs).
The Raspberry Pi sends a request whenever you scan something with the barcode scanner. With the buttons you can set the direction of the to be scanned item (red=out, green=in, blue=open in). The Raspberry Pi has no database, so it doesn't matter for the app if the fridge is offline. The thermal printer prints whatever you want to print.
HINT: Don't turn the fridge on, because it won't do good to the electronics.
The server saves the data send from the Raspberry Pi and the App and serves them to the devices. It logs everything that happens, logging in, downloading the contains, creating a job. Also the errors are logged in a table. The whole documentation of the server/API can be seen at https://arendjan.github.io/slate/.
Create it yourself!All our code is available on our Github and can be downloaded to be installed on your Raspberry Pi, server or Android Phone, but that is not necessary.
Software
Before installing you need to obtain an userId, this is a secret string that identifies your fridge from the other fridges on our/your server. Go to http://pws.svshizzle.com/generateUserId and fill in your email address (we won't spam you, but when you spam our server, we will send you a message). You will then get your userId.
The only thing you need to do(software) is download the installer script (https://github.com/ArendJan/pws/blob/master/install.py) and run it twice. You need to run it twice, because it installs a Python package and it is not loaded the first time, only the second time. We also created a sh script, but we haven't tested it yet.
Start the installation script with this command:
sudo python install.py --userId oeserid
The sh script with:
sudo bash ./install.sh -I oeserid
Replace oeserid with your personal userId you got from our website. If you don't add --userId (or -I) and your userId, you need to change the settings.py file in /smartfridge.
The installer installs everything in the smartfridge folder it creates in the folder you run the installer from (best to do is the home folder: ~ or /home/pi). It also creates a cronjob that starts the software at boot. Besides the smartfridge folder, it also adds a small python file (start.py) in the folder one layer up from the smartfridge folder ( ~ ). This is because Python can't include a file from the same folder it is started from, so we need to start it one layer up. Because you need to run it with sudo rights, it chmods the whole smartfridge folder to permission 777, so you can view/change the code.
Printer
The printer isn't easy to install, because the Raspbian kernel has some parts missing for for easy installation of the thermal printer. On an ordinary computer with for example Ubuntu it is possible to write directly to the printer with:
echo "Hello" >> /dev/usb/lp1
This way it is really fast and easy to use, but the printer isn't recognized, so we need to use CUPS. The easiest method to setup is following this tutorial: http://scruss.com/blog/2015/07/12/thermal-printer-driver-for-cups-linux-and-raspberry-pi-zj-58/.
To test if it will work, create a .txt file with some text and run this command:
sudo lpr 'filename.txt'
If your text comes out of the printer, you are done with the software!
Hardware
The hardware part of the fridge is the most difficult part. The scanner and the printer are fairly easy, just plug and play, but the buttons are a bit more difficult.
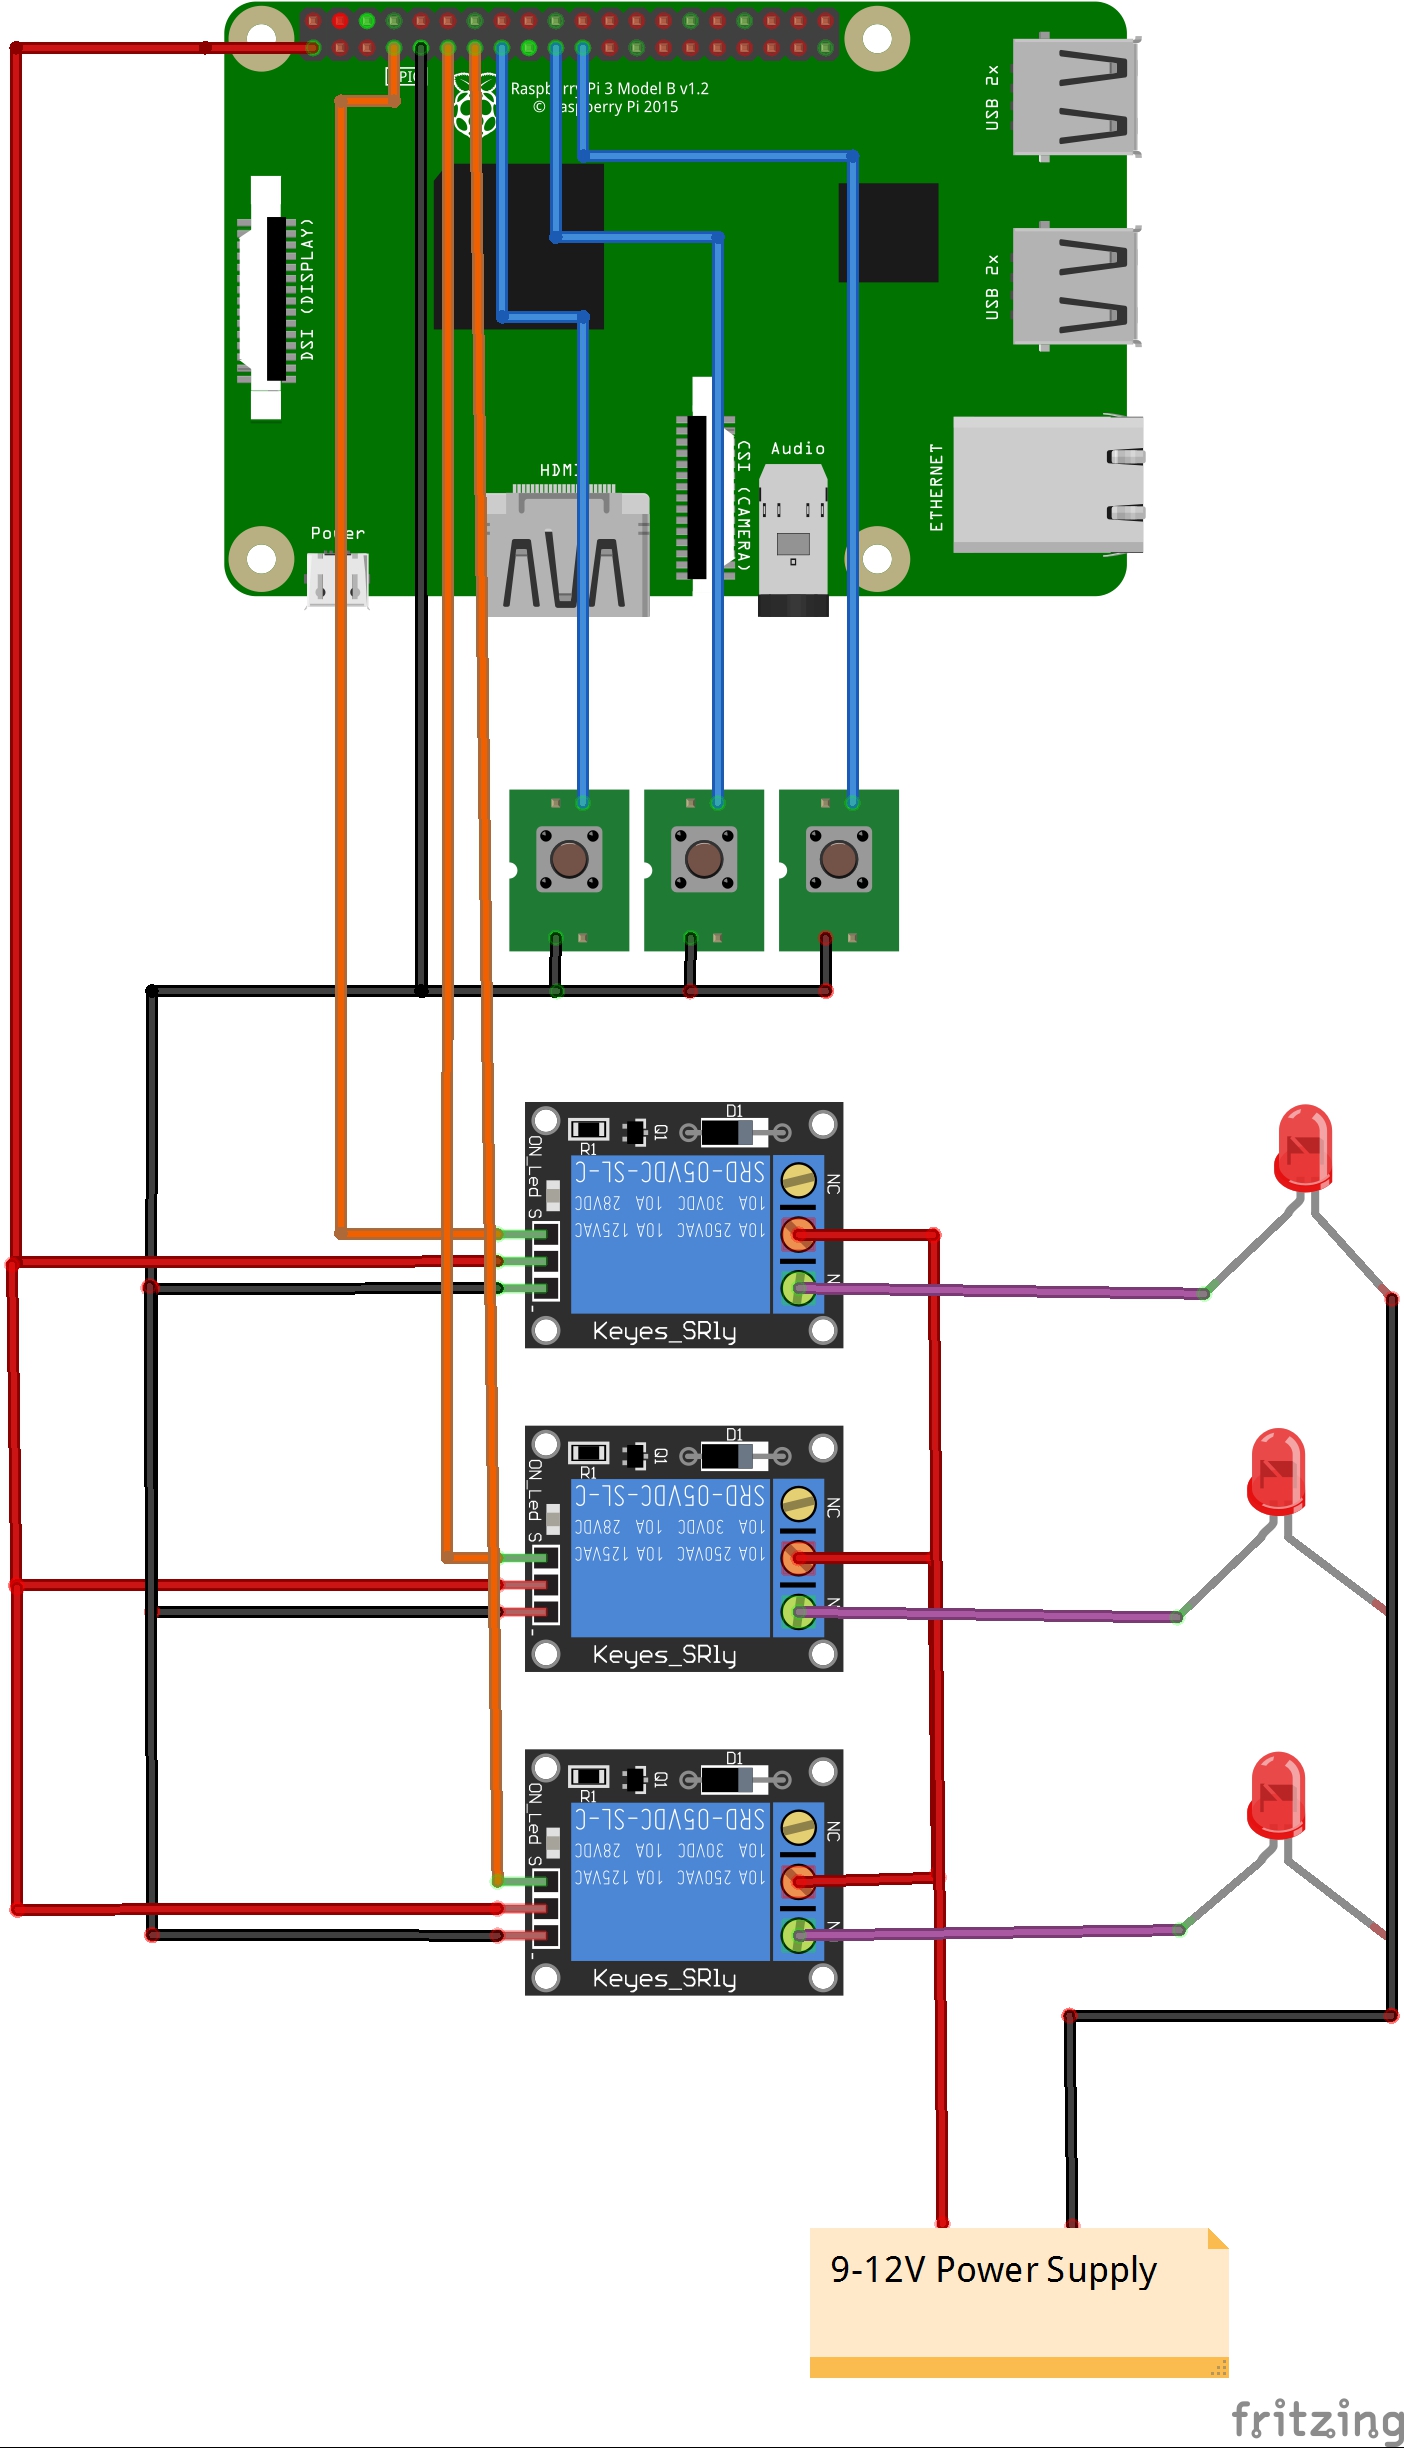
Every button has a momentary switch and a build-in led. For the switch we use a internal (RPi) pull up resistor, so we have less cables and components. The LEDs are driven by relay modules with a power supply, because the operate best at 12V, a cheap one is proficient.
After the setup of the hard- and the software, the easiest way of starting the code is restarting the Raspberry Pi, by running sudo reboot. You can test it by creating a job in the app or adding/removing an item.
NOTE: The barcodes are checked on the dutch Jumbo website, so only items that are available in dutch shops will have a correct title. If you find a UK/US shop that is easily hackable, please let us know and we'll try to implement it on our server.
Own server/AppServer
If you want to have control over everything, you can install the servercode on your own server. Upload everything from the server folder (at least the PHP and API folder) to your server (root folder only necessary if you want to show our website). Then change the settings.php file in the PHP folder to your own situation (database login). The $masteruserId variable is only necessary for the website (print a text). To use the server you need to change settings.py on the Raspberry Pi, the URL variable (needs to be the API folder, followed by a / ). When logging in on the App, you need to change the APIurl, also the API folder.
App
The App is made in Android Studio, and we've tried to make it as hack-able as possible. You don't need to worry about sending requests to the server, because we make an smartfridgeAPI class. This class will send the requests to the server, but also save the userId and APIurl. To use the API in your app, you only need to make a smart fridge object, override the return methods and start the function.
Example:
Smartfridge smartfridge = new Smartfridge(getActivity()){
@Override
 public void containsDone(ArrayList<Item> items) {
       createList(items);
 }
@Override
 public void containsError(String e) {
 errorFunction(e);//Shit, vincent did something wrong.
 }
};
smartfridge.contains();
In this example we want to receive the contains of the fridge. First we override the functions containsDone and containsError. These will be run when the smartfridgeAPI received data or something happened. Then we run the contains function.
Every of the smartfridgeAPI functions are built like this: Override [functionName]Done(optional params) and [functionName]Error(String error) and then run [functionName](optional).
Backup
Most of the data downloaded is also saved, which you can get by running:
SmartfridgeSave.get[functionName]Backup(getActivity())
Use in own app
To use the Smartfridge API you need to copy these files:
model.Item
model.LogItem
request.RequestClassPost
request.RequestReturn
smartfridge.Smartfridge
smartfridge.SmartfridgeSave
We used packages to keep every part of the app (activities, adapters, models and the smartfridge/request classes) tidy.


Comments
Please log in or sign up to comment.