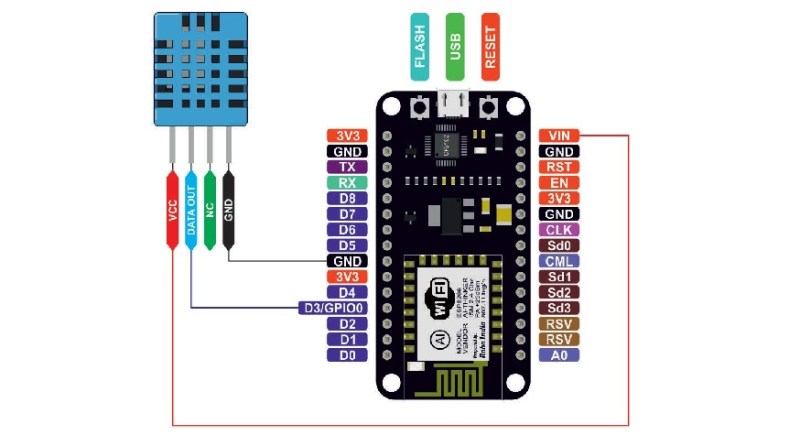
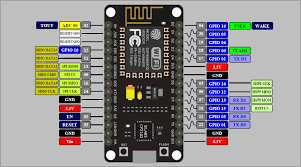
We have so many IoT clouds. IBM Watson IoT cloud is also one among them. Ready to tinker with IBM Watson IoT cloud in combination with NodeMcu and DHT sensor?
Will not consume much time. Let's respect each other's time. Let's stay together for a couple of minutes.
1. We must create an IBM ID in IBM cloud
2. Login with respective credentials
3. Hover over Createresource, top right corner.
4. Search for the Internet of Things platform in the catalog.
5. Click on Create, if you have already created, click on view existing.
6. Hover over Launch.
7. After launching, it will show you the below image prompt. It's prompting to re-login.
8. So, feel free to re-login as per the prompt. And Launch again.
9. Click on AddDevice at top right corner.
10. It will prompt to enter DeviceID and DeviceType.
11. Enter details, DeviceType:ESP8266,DeviceID:dev01, these details should be given by default. Click Next.
12. Click Next.
13. Provide your AuthenticationToken. Remember this token. Click Next.
14. Good to go!. Click on Finish.
15. It's recommended to note down the DeviceCredentials.
16. Click on Security.
17. You will witness the below screen.
18. Hover over ConnectionSecurity. Tap on the pencil mark.
19. Keep SecurityLevel from TLSwithTokenAuthentication to TLSOptional. TLS Optional is for unsecured MQTT communication which will be communicated through the default communication port of 1883.
20. Click OK.
21. Save it. Top right corner.
22. Go to Devices.
23. Upload the code to your NodeMCU with mentioned changes in the code.
24. After uploading, open the Serial Monitor in Arduino.
25. Go to the cloud, it will show Status Connected. (**if all instructions are properly followed)..
26. Click on ESP8266 under Device Type.
27. Hover over, RecentEvents and wait!..
28. Wait ;) HOLDON!..
29. Bravo...Buddy!....
30. Now to visualize on a graphical dashboard. Go to, Boards.
31. Click on, USAGEOVERVIEW. The first white box.
32. Hover over, AddNewCard.
33. Select Gauge in Devices.
34. Select the Devices. Click Next.
35. Select Connectnewdataset.
36. Put status in Event.
37. Modify the settings as shown. Click Next.
38. Word of Caution: Make sure that your NodeMCU is connected.
39. Choose your taste of colors and Submit.
40. Congrats.....
41. This data changes in real-time. Let's provide some heat ;)
42. Let's allow to cool down ;}
43. This graphical dashboard changes in the real-time. Feel free to further tinker with the platform. HappyL-earning!.


_18_R9mQzXSt3k.jpg?auto=compress%2Cformat&w=40&h=40&fit=fillmax&bg=fff&dpr=2)


Comments
Please log in or sign up to comment.