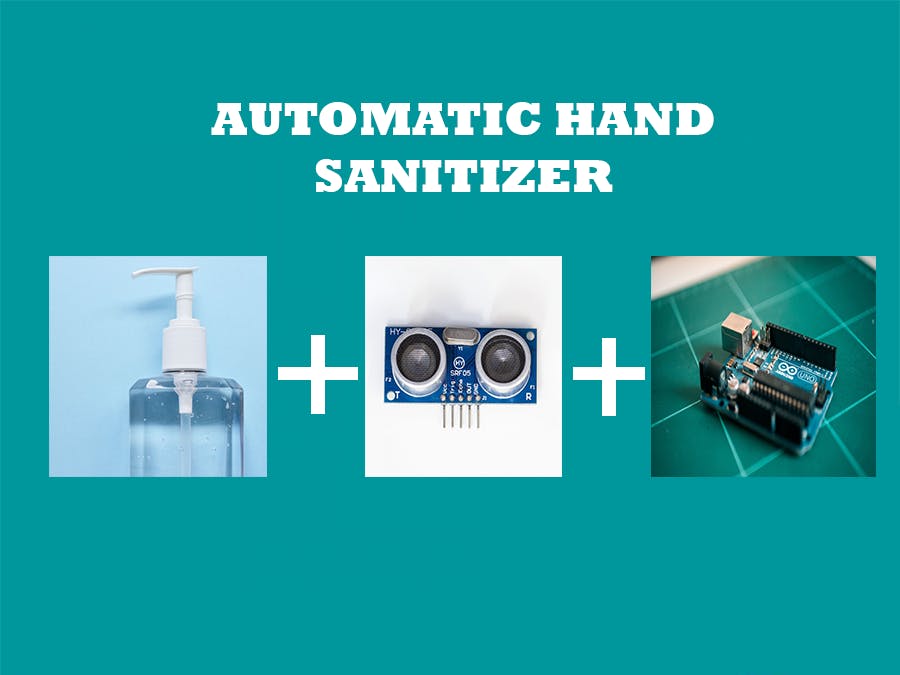
In this corona period hand sanitizer is an essential thing. Because it can kill the Covid -19 virus. but use the of normal sanitizer bottle become very danger. When an infected person press the bottle trigger, The virus may spread from this hand sanitizer bottle. We can solve this by using Automatic hand sanitizer bottle. Automatic means, no need to trigger with our hand. Just place your hand near the bottle. the bottle will automatically trigger.
Interfacing of Servo motor and interfacing of Ultrasonic sensor is explained in my previous articles. Links are given in the end of this article.
You can see a sample video.
How it's work ?Here, we use an Ultrasonic distance sensor, Servo motor and Arduino board. here I am using Arduino Uno. You can also use any other microcontroller. When we place our hand in front of the distance sensor, it will help to the Arduino to measure the distance from the sensor to object (here the hand). if the object in the desired range, Arduino will write the servo to 180. Servo motor is mounded on the hand sanitizer bottle. And the trigger of bottle is connected to servo by a thread. When servo motor rotate, the trigger will press.
Buy electronic components with free shipping on utsource.net
Step - 1
First I am going to create a sketch
Open Arduino IDE and open a new window.
Here I am using Servo motor. So we need to use the "Servo.h" library for better communication between Arduino and servo motor. Then we define the "echoPin" on digital pin 4 and "trigPin" on digital pin 5. And also declare the variable for calling Servo motor.
#include<Servo.h>
#define echoPin 4
#define trigPin 5
Servo Myservo;
We need to declare two variables. First one is "duration". This is for store the total travel time of sound wave. And other is "distance", for store the calulated distance.
int long duration;
int distance;
Step - 2
Now we need to program the setup part.
First set the attach pin of servo motor by Servo.attach() on the digital pin 3. Then set the echoPin as "INPUT" and trigPin as "OUTPUT" by using the keyword pinMode().
void setup(){
Myservo.attach(3);
pinMode(echoPin,INPUT);
pinMode(trigPin,OUTPUT);
}
setup part is completed. Then loop part,
Step - 3
In void loop() part we need to read the total travel time of sound and calculate the distance. The code is explained here.
digitalWrite(trigPin,LOW);
delayMicroseconds(2);
digitalWrite(trigPin,HIGH);
delayMicroseconds(10);
digitalWrite(trigPin,LOW);
duration=pulseIn(echoPin,HIGH);
distance=(duration*0.034/2);
Now we need to write the servo motor to 180 degree only when the distance is less than or equal to 5 cm. Else the servo position keep in 0 degree.
if(distance<=5){
Myservo.write(180);
}
else {
Myservo.write(0);
}
Then add a delay instruction for wait 500 millisecond for the next read.
delay(500);The coding part is completed. You can get the complete code in attachment section.
Step - 4
Now we need to setup the circuit.
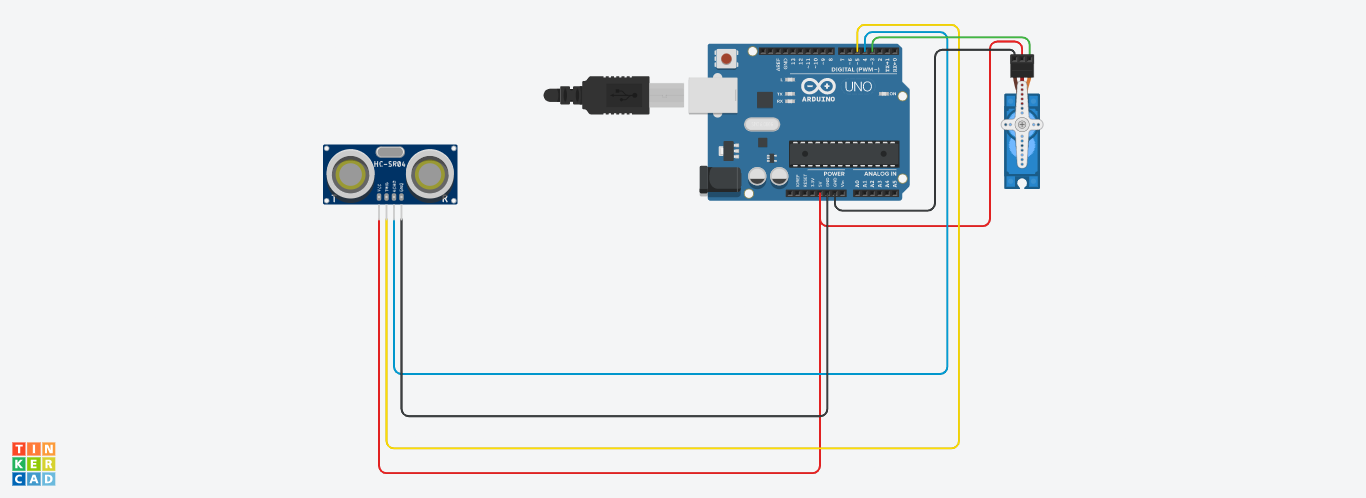
There is only one 5V female Header available in Arduino Uno. So, We need to Joint three male to male jumber wire connect together. After that one end of this jumber wire connect to Arduino board and other to Vcc of the Servo Motor and Vcc of the HC-SR 05. There are two GND connects available in Arduino Uno. So connect the one GND to GND of Servo motor and other GND connect to GND of HC-SR 05. The electronic connection is completed.
Then take a thread and tie one end with trigger of the bottle and other end tied with arm of the servo motor. Mound the Servo motor on the bottle.
You can use 12V SMPS adapter to power the Arduino with the DC jack.
The hardware setup is completed.
Don't copy-paste my code. Understand each lines and make your own.
You can join our telegram group here or search INNOVATION.
Follow me on,
Instagram : five_volt_player
Facebook : Akshay Joseph
Github : akshayjoseph666
Stay Home, Stay safe, Stay Creative and let Break The Chain


_ztBMuBhMHo.jpg?auto=compress%2Cformat&w=48&h=48&fit=fill&bg=ffffff)


Comments
Please log in or sign up to comment.