


Hardware components | ||||||
 |
| × | 1 | |||
 |
| × | 1 | |||
 |
| × | 1 | |||
 |
| × | 1 | |||
 |
| × | 4 | |||
| × | 3 | ||||
 |
| × | 1 | |||
Software apps and online services | ||||||
 |
| |||||
| ||||||
 |
| |||||
 |
| |||||
| ||||||
Hand tools and fabrication machines | ||||||
 |
| |||||
 |
| |||||
 |
| |||||
Remember the nights when you wake up at night just to switch OFF your AC/Cooler and switch ON the Fan because your room has turned too cool and you are having trouble sleeping? After your sleep got ruined post-midnight or whatsoever, you end up being sleep deprived and your next day gets ruined too. Well, days of those nights are over as this IoT application in home-automation will do away with your sleeping trouble and the task of switching ON/OFF your fan or cooler.
This application of IoT and Temperature sensor will help regulate the temperature of your room automatically while you are asleep. It can also share the current temperature of the room via Telegram or Twilio SMS service so that you can manually control the switching actions in the room in case there are children or old/sick parents in that room.
So, with this device, you can save electricity as your AC/cooler will be turned OFF after sometime when it is not needed. Thus you save money on the electricity bill as well. Also, your sleep will not be disturbed by the cold temperature or the need to get up for switching things ON/OFF. So, your health will be good because of the nights of good sleep.
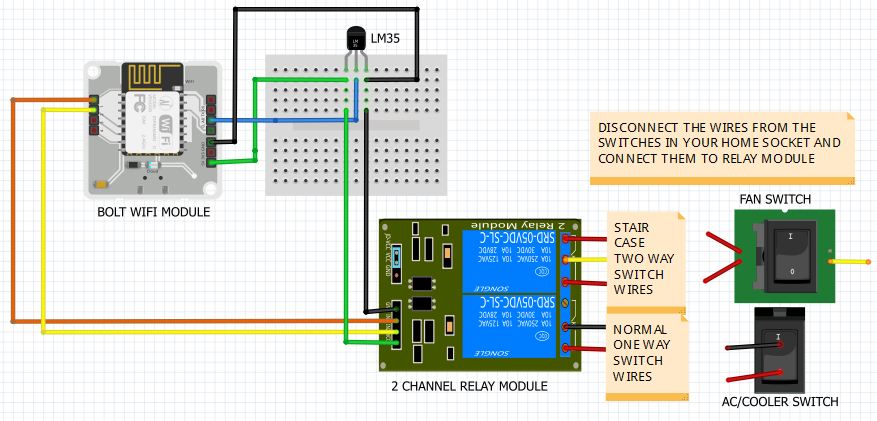
2. WORKING PRINCIPLE & DEMONSTRATIONThe working principle is simple. The temperature sensor LM35 senses the temperature of the room continuously and as the value falls below a certain threshold value it will make a call to the Bolt WiFi module to set selected GPIO pins to HIGH/LOW. Those pins are connected to the Relay module. The Relay is further connected to the fan and the cooler and so, the relay module acts as a switch to the devices. When the temperature drops below the threshold, the cooler terminal pin will become LOW and fan terminal pin will become HIGH. Thus, cooler will be switched OFF and fan will be switched ON and will regulate the temperature.
NOTE: You are dealing with high voltage and current when you are connecting Fan/Cooler wires to the relay. So, make sure you have tripped the CB from the main switchboard of your house.
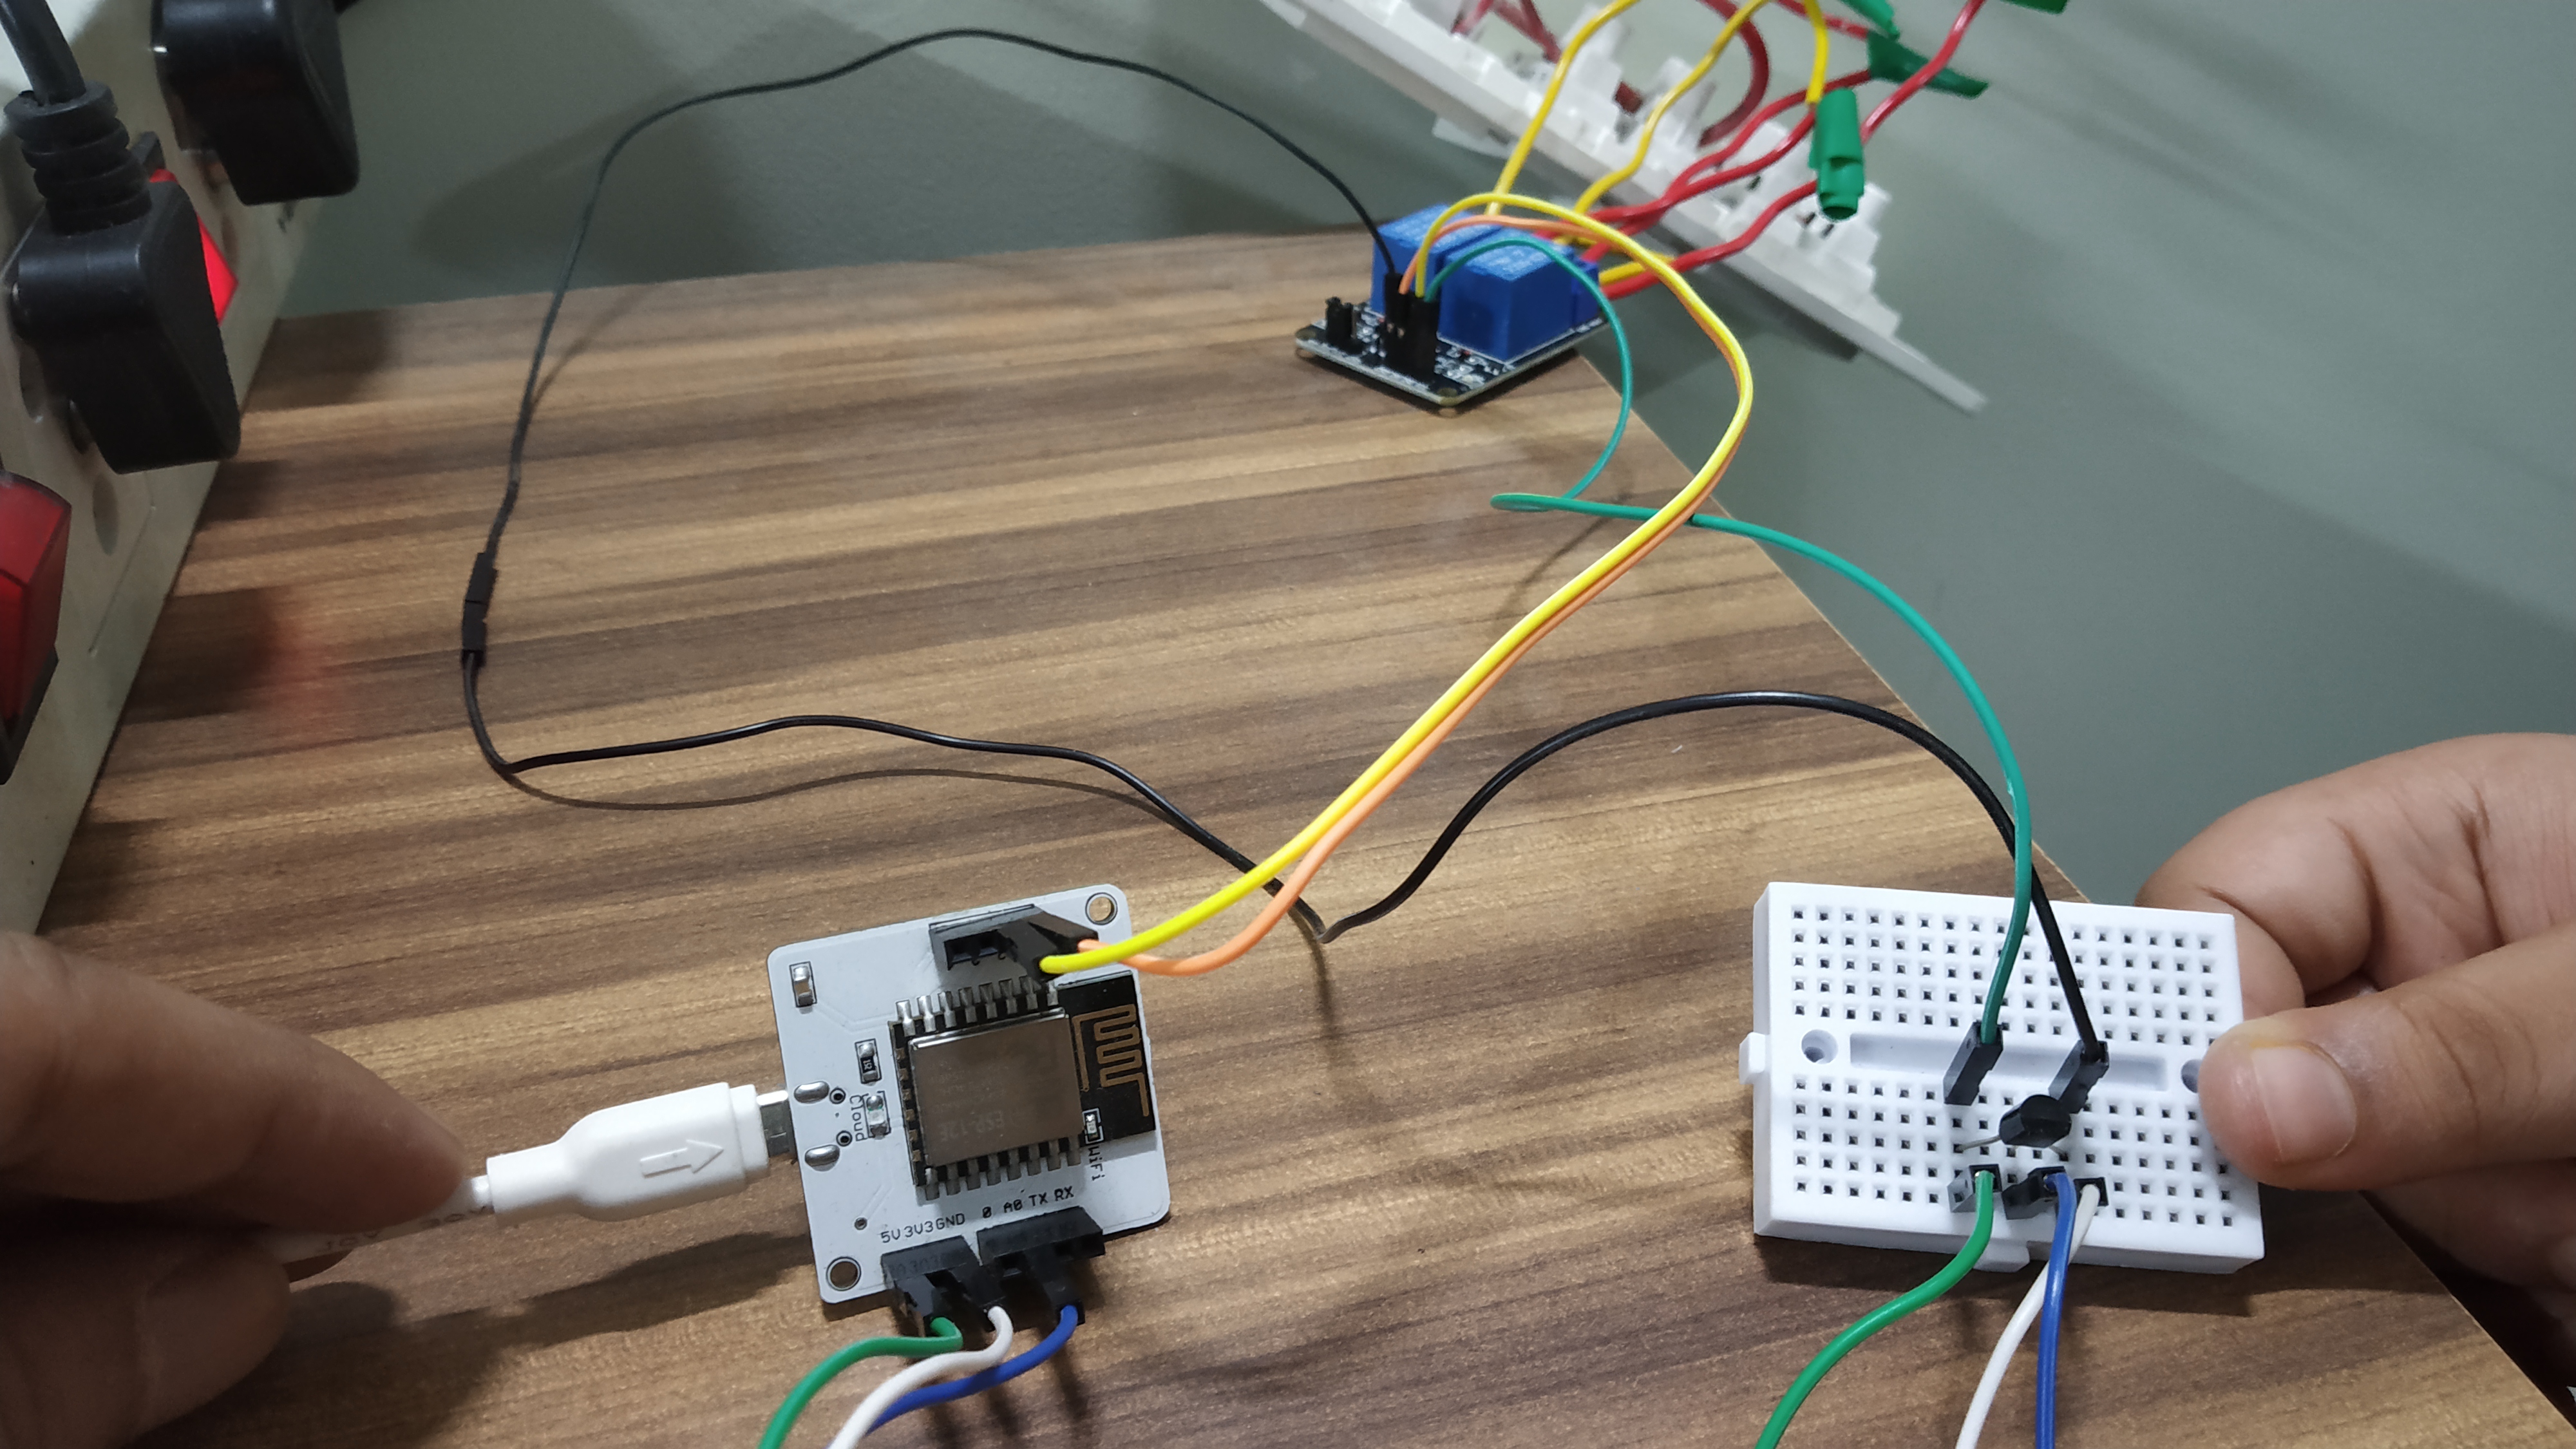
2.1 Notification on Telegram& Via SMSThe digital pins or the GPIO pins 1 & 2 are connected to the relay module pins IN1 & IN2, indicated by orange and yellow colour wires respectively. Connect the 5V (Green wire), GND (white wire) and A0 (blue wire) pins of the module to the breadboard. Give power supply to it either from the charger or the laptop USB pin.
Connect the positive terminal of the sensor in line with green wire, negative terminal in line with white wire and putout (middle) terminal in line with blue wire on the breadboard. Connect another green and black wires in line with the existing green and white wires respectively.
Connect the orange and yellow wires from the Bolt module to this module as shown. It also needs a 5V supply so, connect the green and black wires from the breadboard to the VCC and GND terminal pins respectively.
The other side of the relay module has the connections for the fan, cooler, and lights in our house. I have used 2-channel relay but 4-channel relay is perfect when more devices/appliances are to be connected. Just disconnect the wires from a normal switch (1-way switch) in the socket and connect them to NO and Common terminal of the relay module. In case of a staircase ( 2-way switch), there will be 3 wires, connect the middle wire to the common terminal and the other two wires to the NO and NC terminals.
NO is normally open and NC is normally closed which means if the signal given the switch is HIGH from the Bolt, then the common terminal will disconnect from NC terminal and connect to the NO terminal.
NOTE: SignUp everywhere using the same email ID used to purchase and create an account on cloud.boltiot.com.
4.1 Ubuntu Virtual ServerCreate a Digital Ocean account at cloud.digitalocean.com which will ask for an International Debit card credentials to charge INR 350 which will be reverted after you sign in. Then, create a Droplet of Ubuntu Server for python programming language in it. A username, password and IP address will be received. It will give a 2-months free credit during which one has to complete the project and then have to destroy the droplet and deactivate the account so that they don't charge you further.
This Ubuntu virtual server created above can be accessed from a software called Putty using the credentials received above. When the Python program is run, and the temperature falls below a threshold, the server will communicate to the Bolt module via API ( Application Program Interface) imported from Bolt Python library. The API key is provided in the configuration file on the server and named as conf.py.
The alerts about the temperature are received via messaging using Twilio SMS service. One has to create an account on twilio.com which is free. Go to Programmable SMS tab and get started. One has to give a working phone number to receive the texts. So, this setup will provide you with some credentials like SID, token number and Phone number from which you will receive texts. These are to be provided in the configuration file shown above.
Another way for communication is via Telegram app. For this, one has to install the app from the Playstore and create an account. Then, a channel needs to be created from the New Channel tab. Next, create a Telegram bot using Bot Father. In the end, a BOT token ID and a channel ID are received which are provided in the configuration file shown above. Add this Bot to the channel you had created.
4.3 Bolt App & The API keyAfter signing in on Bolt cloud, API key can be generated from the API tab which is used in the configuration file and also for the Bolt App created for Home Automation.
To create the Bolt App, go to the Products tab and add a product and configure the product for its hardware and software setup. Select the pins in the hardware section and write the HTML code in the code section. Then, save it and link the product to the Bolt device and then deploy the configuration. One can access this product either from the "View this Device" tab on Bolt cloud or from the Bolt App downloaded in our phone from the Playstore. This Bolt app can be used to manually control the devices in our room.
Download the IFTTT app in your Android phone and log in with the same Google ID you are logged in to your phone. Create an applet and link Google Assistant to the Webhooks and complete the trigger fields as shown below. After saving individual applets for each action, one can control the lights and fans in the room with one's voice.


Comments