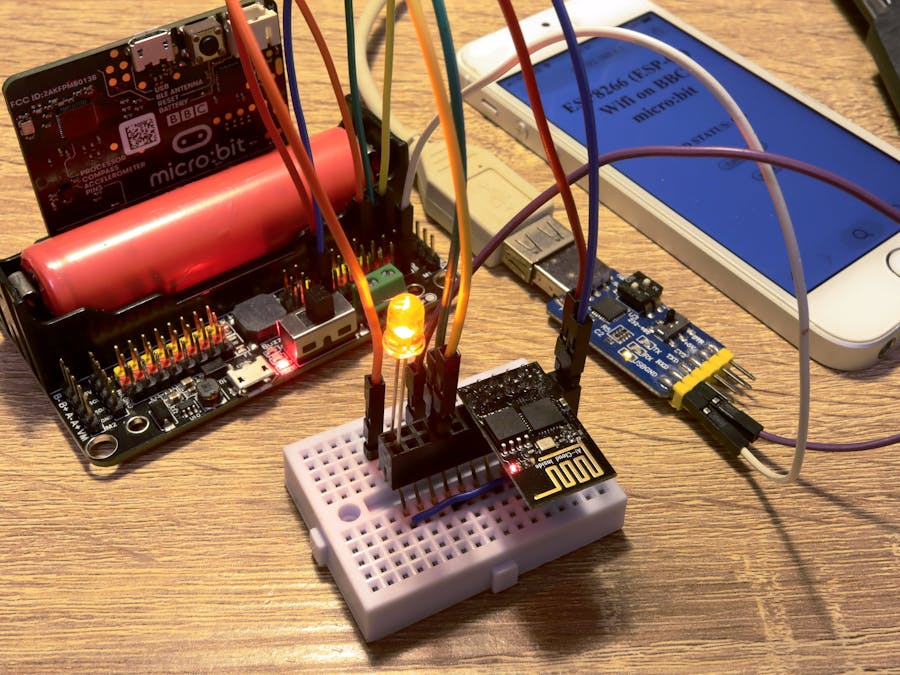
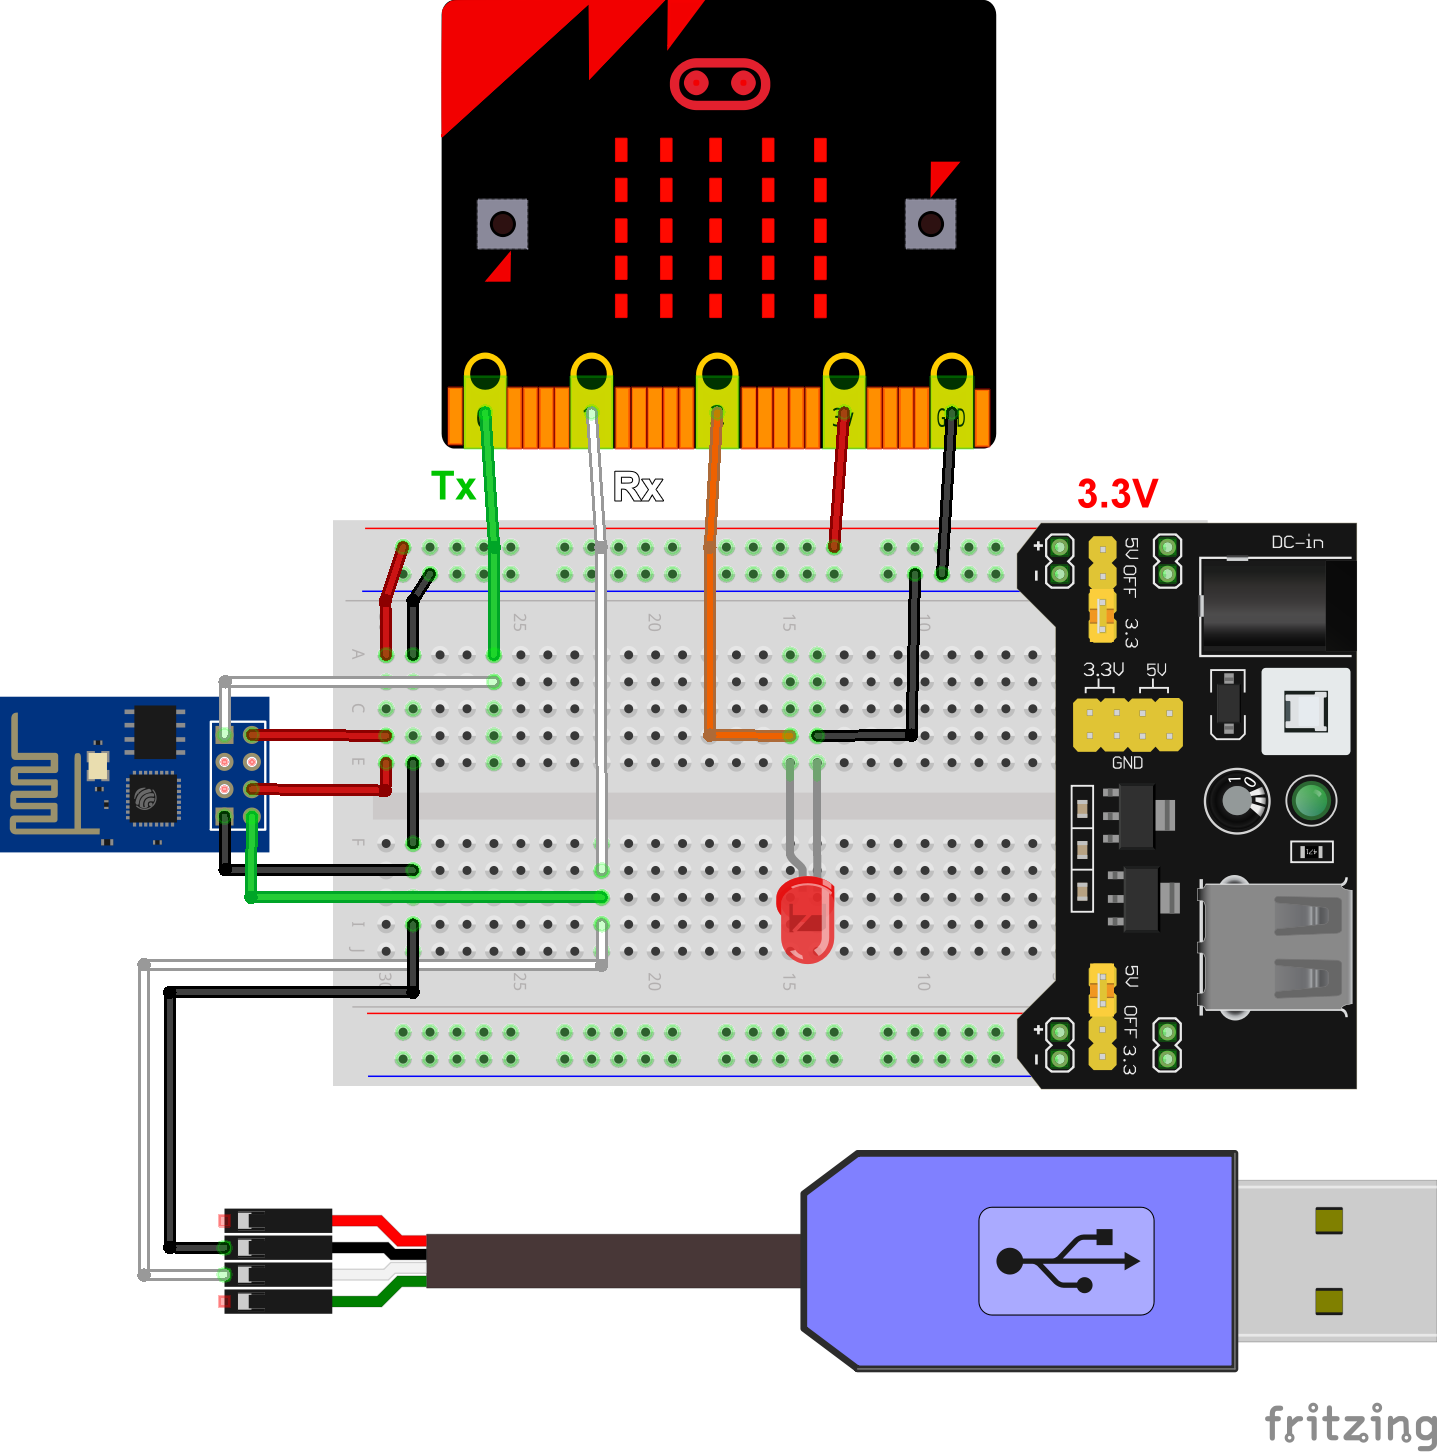
The project allows you to control your BBC micro:bit via WiFi, by using a cheap ESP-01 (ESP8266) module. The micro:bit would generate an HTML web page for the user with control buttons on it. The web page can be accessed from your computer or smartphone without using any apps.
The micro:bit talks to the ESP-01 via AT commands, to set up a web server in either station or AP mode. These commands are in the factory firmware of ESP-01s.
The code is written in TypeScript (JavaScript). You can paste the code into the Microsoft MakeCode editor. You can also modify the HTTP request handle process and HTML generate function for your needs.
You can view the code here or copy the attachment in this article.
A USB-to-TTL cable/module is not necessary but can be used to monitor AT responses from the ESP-01. (In the photos I used a CR2102 6-in-1 module and Tera Term. I'll skip tutorials about their setup and use.) Since the micro:bit's serial port is reassigned, this is the only way for the user to read serial port data.
(Note: I haven't considered to make this into a MakeCode extension, because it's complicated to customize the web page and HTTP responses by using predefined blocks. Not so flexible too.)
(Another node: at the end of June 2019 the MakeCode had a minor upgrade. Users can now set buffer size of both Tx and Rx. However if you did change them this code may not run properly. I can confirm it still runs well without adding any changes other than different pin numbers.)
For the micro:bit pins to be used to connect the ESP-01, try to use P0, P1, P2, P8, P12, P13-15 only. Other pins have functions shared with LEDs or buttons, etc and may not function correctly for this.
In AP mode the default IP is 192.168.4.1. Connect your computer or phone to the new WiFi (named as SSID_2 in the code) and enter the password (as PASSWORD_2). You can rename both if you want. Then open web browser and enter 192.168.4.1 and you'll should see the web page.
Change WIFI_MODE to 1 if you want the micro:bit to connect to your WiFi router: SSID_1 is the name of the router and PASSWORD_1 is the password. You'll need a USB-to-TTL cable/module (baud rate 115200) to look up the IP assigned to the ESP-01 after it boot up, usually 192.168.0.xxx. Your computer or phone have to be on the same WIFI. Remember DO NOT SHARE YOUR CODE WITH YOUR OWN WiFi ROUTER PASSWORD ONLINE.
Some of the older ESP-01's baud rate may be 57600 or 9600. In my test both ESP-01 and ESP-01S (bigger flash size) works.
* * *
All AT commands have to end with CR+LF (\r\n) or \u000D\u000A line ending characters. The Serial.writeLine() function in MakeCode generates different result hence can't be use to send AT commands. This is the primary reason why we don't simply use the blocky interface of MakeCode editor.
The commands in the code by order are as follows:
-----
AT+RESTORE
Restore to factory settings
AT+RST
Reset
AT+CWMODE=2
Set WIFI mode (1=STA or station, 2=AP)
-----
Then, if you are using AP mode:
AT+CWSAP=ssid,pwd,chl,ecn
Setup AP:
ssid/pwd=name and password of the WIFI AP
chl=number of connection channels
ecn=encryption mode (1=OPEN, 2=WPA_PSK, 3=WPA2_PSK, 4=WPA_WPA2_PSK)
-----
If you are using station (STA) mode:
AT+CWJAP=ssid,pwd
Join WIFI router (it might take a while; the code would wait for OK response)
ssid/pwd=name and password of your WIFI router
-----
Then:
AT+CIPMUX=1
Enable multiplex mode (allow multiple connections), which is required for the following command
AT+CIPSERVER=1,80
Start web server and listen to port 80
AT+CIFSR
Display local IP. In AP mode default 192.168.4.1; in STA mode it might be 192.168.0.xxx (assigned by WIFI router)
Hence the server should be on.
If your ESP-01 have trouble starting up, try to disconnect and reconnect power. Also it might shut down and reboot if not enough power is supplied.
-----
When ESP-01 received a HTTP request it would return something like
+IPD,0,467:GET / HTTP/1.1
Host: 192.168.xxx.xxx
Connection: keep-alive
Cache-Control: max-age=0
Upgrade-Insecure-Requests: 1
User-Agent: Mozilla/5.0 (Windows NT 10.0; Win64; x64) AppleWebKit/537.36 (KHTML, like Gecko) Chrome/72.0.3626.119 Safari/537.36
DNT: 1
Accept: text/html,application/xhtml+xml,application/xml;q=0.9,image/webp,image/apng,*/*;q=0.8
Referer: http://192.168.xxx.xxx/
Accept-Encoding: gzip, deflate
Accept-Language: zh-TW,zh;q=0.9,en-US;q=0.8,en;q=0.7
-----
The first number after +IPD is connection ID.
The string between GET / and HTTP/1.1 is the GET URL sent from client (if the client request http://192.168.4.1/LED, you will receive GET /LED. "GET /" means root directory).
Due to the limit of serial port buffer (64 bytes) I use while(true) loop to force the micro:bit to read responses (stored in a 200-length string) as quickly as it can. The built-in "forever loop" has a tiny delay time, so I don't use it. But you might need it in case you want to run multiple forever loops or receive radio messages, etc.
-----
So the micro:bit cycle LED and generate HTTP response/HTML page for the user then send it:
AT+CIPSEND=id,length
Send data to a specific connection
id=connection ID
length=the length of your data (HTTP response + HTML web page, plus 2 for \u000D\u000A)
-----
The data are generated as follows:
HTTP/1.1 200 OK\r\n
Content-Type: text/html\r\n
Connection: close\r\n
\r\n
<!DOCTYPE html>
<html>
<head>
<link rel="icon" href="data:,">
<title>Webpage title</title>
<meta name="viewport" content="width=device-width, initial-scale=1">
</head>
<body>
...
</body>
</html>
The first 3 lines are the HTTP response. Without it (at least you'll need HTTP/1.1 200 OK) your web browser might not be able to read the web page. Also a new line between HTTP response and HTML is required.
The <link rel="icon" href="data:,"> is to prevent favicon.ico requests.
<meta name="viewport" content="width=device-width, initial-scale=1"> is for mobile view mode. Otherwise the text and buttons would be way too small on your phone screen. This does not affect views on computer browsers.
The button in the web page is as follows:
<input type="button" onClick="window.location.href='LED'" value="Text on the button">
By clicking it the button would GET request http://192.168.x.x/LED via JavaScript.
-----
After AT+CIPSEND command you immediately send your data. And you should get the following response from ESP-01 :
AT+CIPSEND=0,541
OK
>
Recv 541 bytes
SEND OK
-----
Then:
AT+CIPCLOSE=id
Close connection; id=connection ID
However this is not required. If a connection didn't close after for a while the ESP-01 would automatically terminate it.


Comments
Please log in or sign up to comment.