


Hardware components | ||||||
 |
| × | 1 | |||
| × | 1 | ||||
| × | 1 | ||||
| × | 1 | ||||
| × | 1 | ||||
| × | 1 | ||||
| × | 1 | ||||
Software apps and online services | ||||||
 |
| |||||
| ||||||
| ||||||
 |
| |||||
Well, this project actually started back when I first heard of the Raspberry Pi in 2014. It has seen 2 previous versions in 2015 and 2016 and many emails to Harry Gee of Agilic, ltd (https://uk.linkedin.com/in/harry-gee-18635b38) its creator. I learned a lot about robotics, manufacturing, funding and outsourcing, not to mention frustration.
What happenedToday is November 3, 2017. Finally my kit was due to be delivered. It was also my day off at work. At 11 am, I heard the porch door open and a thud. This is what I discovered.
A wet, slightly crushed International Parcel was left on my porch. After careful surgery:
Well...
The contents are exposed. Besides the 3rd Gen Pioneer PiBot I purchased many optional items: a basic component kit, laser kit wooden PiBot Box and an extra IO board (to do development and coding work offline of the build).
As you can see the trip across the pond from the UK has caused some additional reconstruction work for me and the wet shipping box has caused the wooden box to bow.
I was never shown the completed 3rd Gen Pioneer PiBot assembled. Harry wanted to surprise me and other backers. How would it compare to the previous iterations?
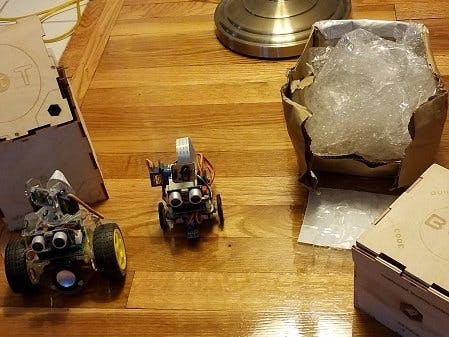
Below is the 1st Gen Pioneer v2 PiBot Raspberry Pi B+ based (left) (http://www.pibot.org/) and the 2nd Gen Tiddlybot Raspberry Pi A+ based (right) (http://www.pibot.org/tiddlybot/)
Let the fun begin together.
An assembly sequence gif. It does not include Pan n Tilt.
This is the Pan N Tilt (dry fit only), I am modifying designed mounting plate.
Neopixel Blink upon initial power UpThis is an open-source project that involves learning by coding, Over the next few weeks, we'll add sound, movement, video streaming, API control ...who knows?
Keep checking back for more pictures of the build.
Update-11/9/17
Pan-n-Tilt assembly and Mod
Below was original design:
This was the Pan portion (using a stepper motor) using 6 plastic standoffs. I knew I could improve appearance quickly using left-over parts included in the "bits-n-bobs" package and a thin piece of plastic.
Crafted by hand, redrawn so creator (Harry Gee) could laser-cut a professional plate...and....oops I am going to need a longer camera "flex-cable" . Time to order an 8"/200mm one from Adafruit. for $1.95
2nd Project update was to get sound working with built-in speaker. Again thanks to creator (Harry Gee) for revised procedure. Only available/known to PiBot Pioneers in a Private Repository still under development. Hint: this is a very basic audio amp with interference:
sh -c "echo 'dtparam=audio=on' >> /boot/config.txt"
sh -c "echo 'dtoverlay=pwm-2chan,pin=18,func=2,pin2=19,func2=2' >> /boot/config.txt"
3rd Project update was to get the usb microphone working and a challenge was to integrate Alexa....this procedure/guide was followed:
[Alexa guide here] (https://lifehacker.com/the-simplest-way-to-build-a-raspberry-pi-powered-amazon-1794218212)


Comments
Please log in or sign up to comment.