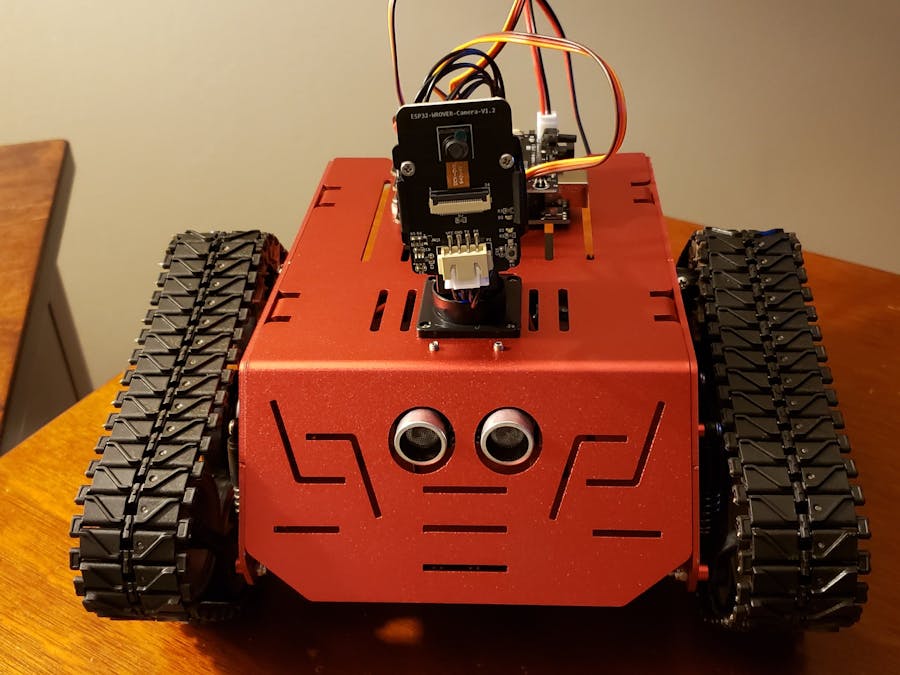
What Do I Build Next? Conqueror FPV Tracked Tank Robot by Elegoo.
While researching info on my last SMART CAR project by Elegoo, " https://www.hackster.io/alien-energy-3/what-do-i-build-next-an-arduino-smart-car-with-video-camera-2a6bce ", I came across advertisements for the tank vehicle that resembled the Devastator Robot by DFR. ( I have three or four of these DFR tanks, one was the original plastic geared version and the others were metal geared).
The DFR version kits, were marketed as a stand-alone chassis' and were not actually paired with their BLUNO ( arduino uno) board that required the DFR bluetooth dongle but did not have software or application. I never could get these BLUNO Devastator kits running. I eventually, used a Raspberry Pi and L298N motor controller the become mobile. A later kit, was marketed with a Kickstarter Camera "HuskeyLens" for Video streaming but also did not have software/application to tie both products together.
But, enough with my ill feelings for the DFR products and I've purchased and was disappointed by many.
Below is the kit I purchased on Amazon. I felt this was a very reasonable price for what was in the kit. (info below from Amazon's website) Most of all, the kit worked right out-of-the-box. The software was pre-loaded on the UNO and ESP Camera unit.
Color: Conqueror Robot Tank
ELEGOO Conqueror Robot Tank is a smart and intelligent robot toy with a high-definition camera and designed for teenagers over 13 years old.The functions are as follow:1. Obstacle-Avoidance mode2.Line-tracking mode3.Auto-follow Mode4.FPV Mode5.Infrared Remote Control ModeController: Arduino UNO R3Programming Software: Arduino IDE, EleRobotInput: Infrared Photoelectric Sensor, Ultrasonic Sensor, ButtonsOutput: Motor, Servo Gimbal, LEDVoltage: 7.2~8.4v (7.4v Lithium Battery Pack)Battery Life: 2 hours (Line-tracking Mode)Distance Measuring Method: Ultrasonic Ranging SensorMotor Driven: Dual-channel DRV8835 Driver ChipTracking Method: Infrared TrackingMotor: DC Servo Motor 1:48Communication: Uart/ WIFICamera: OV2640WIFI Mode: ESP32-WROVERTwo degrees of freedom gimbal: Two SG90 Servo
Package Dimensions : 12.44 x 12.17 x 3.94 inches
Item Weight : 3.54 pounds
Batteries : 1 Lithium Polymer batteries required. (included)
Date First Available November 20, 2018
UNBOXING !!!
I will be the first to say I am impressed with the Elegoo Robot IO board (based upon the Arduino UNO R3 ( https://www.amazon.com/gp/product/B08CZ4MG5P/ ) or NANO IV ( https://www.elegoo.com/products/elegoo-conqueror-robot-tank-kit ) and the software/application that controls this and other robot kits. Its odd that the Amazon and Elegoo stores list different info for the same kit. Pairing with the ESP-WROVER camera gave this vehicle FPV mobility. The Android application was sized and functioned even on my Samsung S9 cell phone.
I would later discover after assembling the Conqueror, that all required software was installed from the factory, so this kit worked right out of the box.
Be sure to begin charging the battery before starting to assemble the robot so you can begin to drive the robot after assembly is complete.
Do I dare attempt the "DEMO or training" modules that were included in the downloaded software? ( https://www.elegoo.com/blogs/arduino-projects/elegoo-conqueror-robot-tank-tutorial ) and ( http://69.195.111.207/tutorial-download/?t=ConquerorRobotTank ).
ASSEMBLY STEPS: Contents of each box
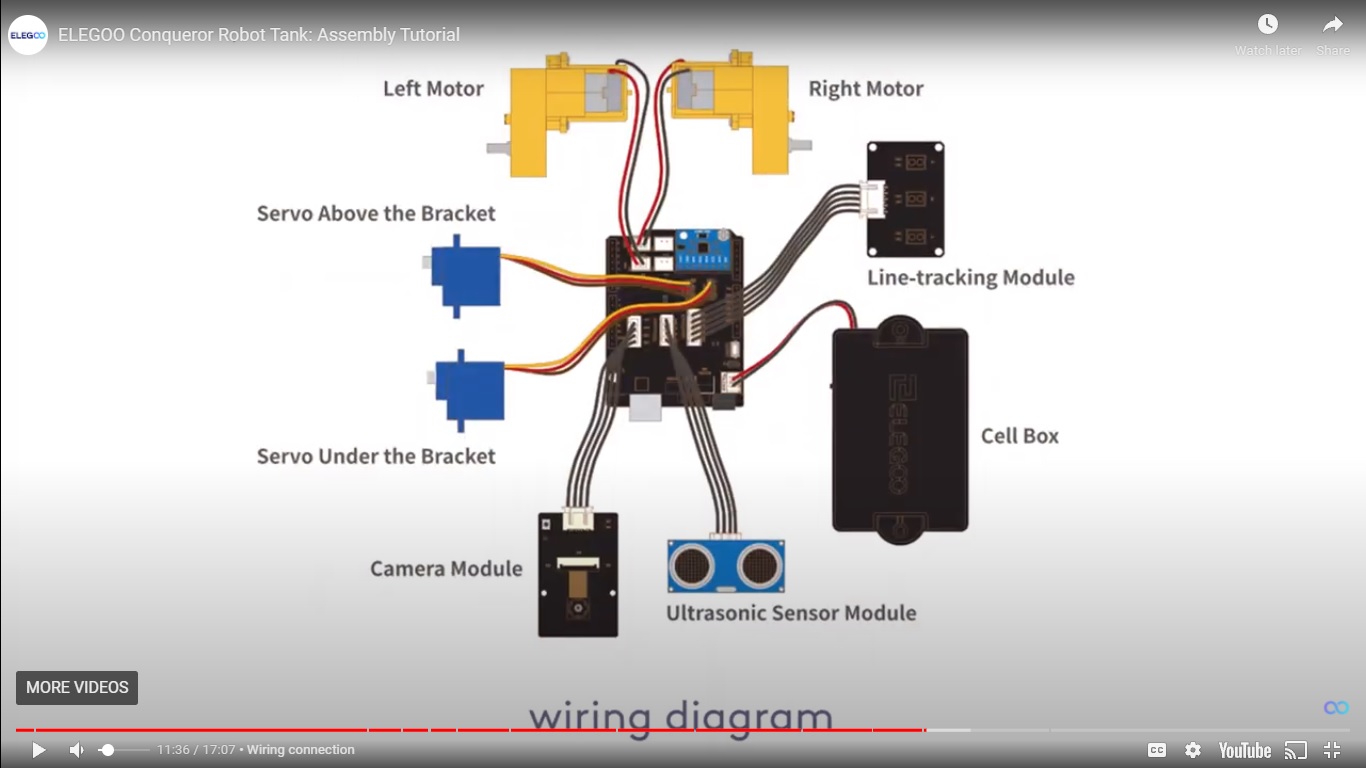
Here is a link to Elegoo's assembly video:
Here's a link to Elegoo's Tank Demo
Elegoo's Assembly layout drawing was an interesting concept. Numbered steps pictured flow in a unusual pattern across layout sheet. Available space on layout sheet determined location of assembly steps.
1. Assemble the rockers/shock absorbers - left and right assemblies are mirrored but not interchangeable.
2. Assembly of side panels - left and right- attach rockers and shock absorbers
3. Attach the motor and drive wheel hub to each side panel
4. Install battery to bottom base plate
5. Attach the UNO board, standard assembly instructions for mounting are used as a guide- bottom next to battery (alternate assembly location allows expansion easier)
6. Attach the expansion board to the installed UNO
7. Attach the battery box- Please note that "C" item in below picture is the USB Charging port on the battery. I originally missed this item during assembly and complained and questioned Elegoo for the lack of a definitive illustration noting this location in its videos. CHARGE Battery using 5V 2Amp cell phone charger using a micro-usb output connector "not included". It will illuminate a GREEN LED on the battery while charging and the LED will turn OFF when charging is complete.
8. Assemble and attach the line tracking module
9. Assemble and attach the bi-axle camera bracket (Pan-n-tilt)
10. Calibrate the servos before attaching Tilt assembly (upper) to Pan assembly (bottom). Connect battery wire/plug to IO Shield in battery port and then each servo cable to IO Shield (observe signal/polarity of connection) in appropriate port and then turn ON battery. You should hear servo motors motor to HOME (midpoint position) and then stop. With POWER still ON, You can attach Tilt assembly to Pan assembly with Tilt assembly facing forward.
11. Assembly and attach ultrasonic module to top plate
12. Assemble and attach camera module to Pan-n-tilt module and install on front of top plate
13. Attach side panels to base plate
14. wiring connections
15. Attach top plate, sides and track to base plate- you may need to loosen side plate mounting screws to position body panels to allow Tank tracks to be flat on floor, then tighten.
16. I used an Alternate assembly- battery bottom rear, uno on top inorder to have access to IO SHIELD and UNO if future upgrades and Modifications are required
17. Cable management- no cable ties were included with kit, but with all my builds... I have plenty.
18. If not loaded from factory-Upload arduino code- ESP32 Camera module and Arduino Uno controller may already have required code "flashed" from factory... a big help. There were two Motor driver chips used on these IO Shields- TB6612 and the DRV8835, be sure to upload correct code to the UNO. My IO Shield has the TB6612 chip installed.
Just a note- before applying power the first time after assembly, ensure that the Conqueror robot is on the floor or flat surface that has ~two foot safe zone" cleared around it. Upon power ON, the robot will initialize its sensors, the robot will drive tracks forward and reverse for a few seconds....
19. playtime- download ELEROBOT App from googleplay store
20. Steps to connect Android device to Conqueror robot.
a. On the Conqueror robot IO Shield, toggle "upload-cam" switching button to "cam" position
b. Turn ON Conqueror robot and allow to initialize
c. On Android device, open WIFI settings and scan for available networks; select "Elegoo-xxx" network. "xxx" corresponds to physical address of the camera module. In my case "ELEGOO-1C2BF31F9C9,,, "
d. Once Android device connects successfully to the ELEGOO WIFI network, open the EleRobot application.
e. Select the Conqueror robot icon on left side of screen to allow app to configure itself for the Conqueror robot and not the SmartCar robot
f. From the EleRobot app control page, select "Control" icon for Remote control, click "ok" when prompt indicates successful connection. The user can select either "Control-remote control", "Program-using xxx graphical application" or "DIY- you can write and control with your custom code".
g. In Control Mode-There are five icons on right of screen, Obstacle-avoidance, line-tracking, auto-follow, standby, and FPV modes. On the left side of screen, there is the Rocker control which using your finger to control motion using a virtual joystick.
Its been along 3 days, I ran into issues with connection via the EleRobot APP because eventually, I discovered that my UnoR3 was defective. Since I had many components available to test with, I naturally choose the most likely to be defective component to be the last item swapped out. Did I say that right?
Yes, I did. I suspected the battery pack and its charging circuit was faulty because I didn't know that it had a charging port and I was charging using a Cell phone charger- 5VDC @ 2Amps. Secondly, the IO Shield only had 5VDC on it and 3.3VDC but the specifications indicated the battery was 7.4VDC. Thirdly, I had another IO Shield from another Elegoo SmartCar V4 project, and after swapping that and its battery to the Conqueror that left only the motors and the UNO.
I next connected the motors to an external battery and they turned so that left "YES" the last item. The UNO R3.
I originally had issues with the code "UPLOADs"... all the tutorial demo's would compile and upload successfully. The issue I ran into, was that the required "Remote Control-Master code" that was uploaded from the Vendor "Elegoo" was not compiling for me because it was 256bytes too big. There was not enough UNO memory available for this code using the Arduino IDE. After a few emails with Tech Support, they shared a link to another APP " XLoader " and that worked; actually not at first because my Uno R3 that came with this kit was defective.
Luckily, I had another New UNO available, and once swapped out, I was back in business.
Mobility Videos:
Initial wake-up/initialization
FPV Remote control-virtual joystick and accelerometer control
FPV view
FPV Camera Servos
Obstacle Avoidance
Final thoughts:
I really like this Conqueror kit, I like that Elegoo had uploaded the required code onto the ESP32 Camera and the UNO R3 boards. I do not like that documentation for the tutorial Demo's indicated that the Arduino IDE is used, but to upload the final release remote control code required the "Xloader" application.
( " XLoader-BurningSoftware.zip - Google Drive " https://drive.google.com/file/d/1CTqRt8yJYk0CmGEBGAAwgR7AXrnbZbYd/view ).
I hope that ELEGOO will release this WIFI IO SHIELD and battery pack for sale without need to purchase the Robot kit, but at ~$100.00 the Conqueror kit has everything... Tutorial Demo's to train and develop subassembly code, Documentation for the Demo's, Assembly and Demo videos, and an Android/IOS application. too bad they don't have a Windows PC app or web-/browser app yet.


Comments
Please log in or sign up to comment.