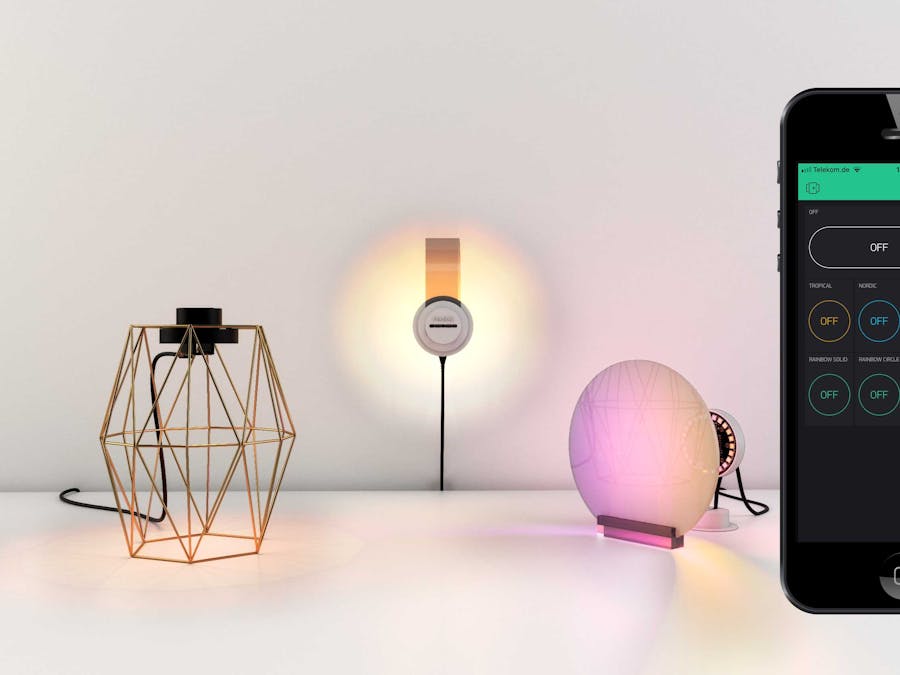
OnLight is a smart light connected to the Wi-Fi. It can be controlled via the Blynk app. Various functions are already preprogrammed, e.g. light settings, color picker and strobe light. The case is 3D printed and can be screwed into E-27 sockets or on self-developed mounts.
Light Settings:- Tropical (ambient light with warm colors, possible to control the color changing speed)
- Nordic (ambient light with cool colors, possible to control the color changing speed)
- Solid Color (choose one color with color picker)
- Rainbow Solid (party light with many colors, possible to control the color changing speed)
- Rainbow Circle (party light with many colors, possible to control the color changing speed)
- Strobe (possible to control the strobe speed)
Find the development agenda here:
https://trello.com/b/PiwIlWRW/onlight-development-agenda-wwwfeaziblycom-studio-andre-nakonz
1. Assembly- The NeoPixel Ring comes with two 12 pin 0.1" socket headers. These two socket headers must be soldered from below on the ring to allow unplugging of the Photon. Or just solder the Photon directly in place for a slimmer look.
- To solder the headers vertically on the ring, a breadboard and two male header strips will help. Alternatively, dough also works to fix the headers.
- And Solder! Be sure to solder all pins for reliable electrical contact. For this, a cheap soldering iron fine.
- Create an account on setup.particle.io and log in.
- Click on Setup a Photon
- After you click Next, the file photonsetup.html should automatically be downloaded.
- Click on the file. If your browser does not open a new tab, your browser does not support this feature. (I've had the best experience with Chrome.)
- Connect the Photon to the PC via a USB cable. In your wireless connections, the photon should now appear after a few seconds. PHOTON- ... and click connect.
- Select your network and enter the Wi-Fi password and click Next. After a while, the Photon is breathing cyan.
- Rename your device. Click Next. You will also see a confirmation if the device was claimed or not.
More Infos:
Connecting:
https://docs.particle.io/guide/getting-started/start/photon/
Device Modes:
https://docs.particle.io/guide/getting-started/modes/photon/
3. Test The Photon- Time for the first code. Your photon should be connected to the power supply or PC and is breathing cyan.
- Go to build.particle.io or login.particle.io and log in.
- Select the Example App 1. Blink an LED.
- Check under Devices that your photon is selected.
- Go back to the code and Flash it to the photon.
- If the LED on the Photon blinks violet, code is being transmitted. After some seconds, the Photon breathes cyan again. In addition, a blue LED should blink every second.
- Your Photon works!
- The Blynk app is free for maker and can be found on the App Store for iOS and in the Google PlayStore for Android.
- Download the app and create an account.
- Create a new project. Give your project a name and choose among the devices the Particle Photon and WiFi as a network.
- Click on Create Project.
- Get the token sent by e-mail. You need this in the next step.
- Follow the steps in the video.
- You are logged in on build.particle.io and in the IDE (Integrated Development Environment).
- Createa new app, give a name and then save (folder icon)
- Add two libraries. Search for "Neopixel" in the search field under Libraries. Click on Include in Project. Search for your recently created project and click Confirm. Repeat the whole thing for the Blynk Library.
- Back to your code. Now copy the code from this homepage and paste it into your code. (Override everything)
- Search the line char auth [] = "YOUR TOKEN"; Under Your Token, add your token from the Blynk app (You got it by e-Mail in step 4.)
- Check the code and the bottom line should say "Great Work!".
- Flash the code to the Photon.
- Run the App.
- You can print the case via Shapeways.
- An optimized 3D-model for FDM printer (Ultimaker etc.) will follow soon.
Hello, I am Andre and I work as a designer and tutor. I think the possibilities that DIY electronics offers today are incredibly diverse and exciting. Especially to develop your own IOT projects.The electronic components and the services (apps and cloud services) are very professional. Are they already an alternative to commercial IOT products? Maybe! Is it possible to build your own wearable as easily as a homepage today? With the project feazibly I would like to pursue exactly these questions. With my feazibly tutorials, I try to create a basis for such product alternatives. The design, the code and the functions can be changed and of course improved. I would be very happy if you participate in this open product development.
http://feazibly.com/ (English version will follow soon.)


Comments
Please log in or sign up to comment.