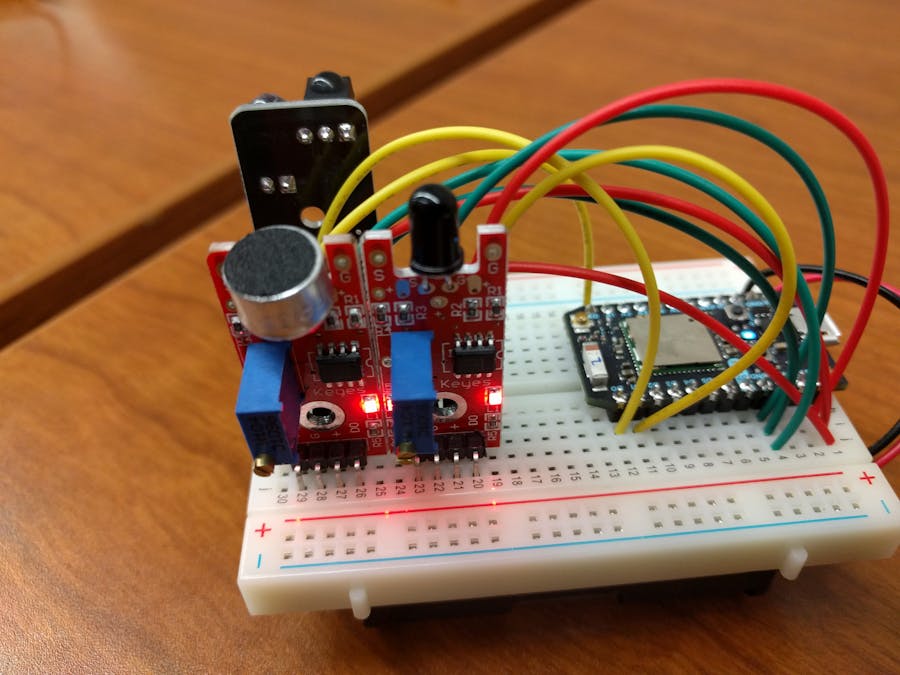
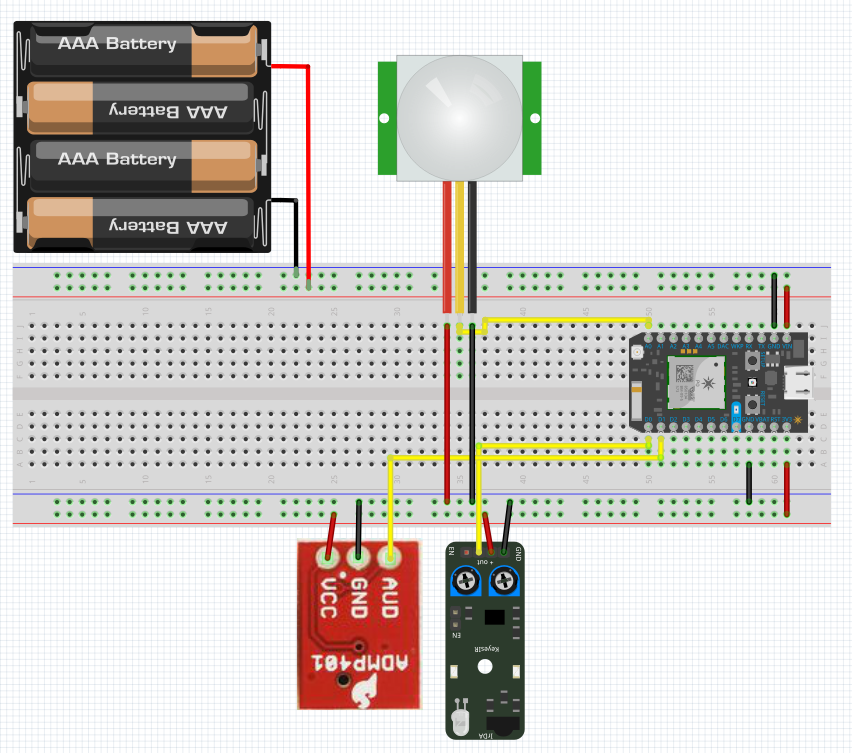
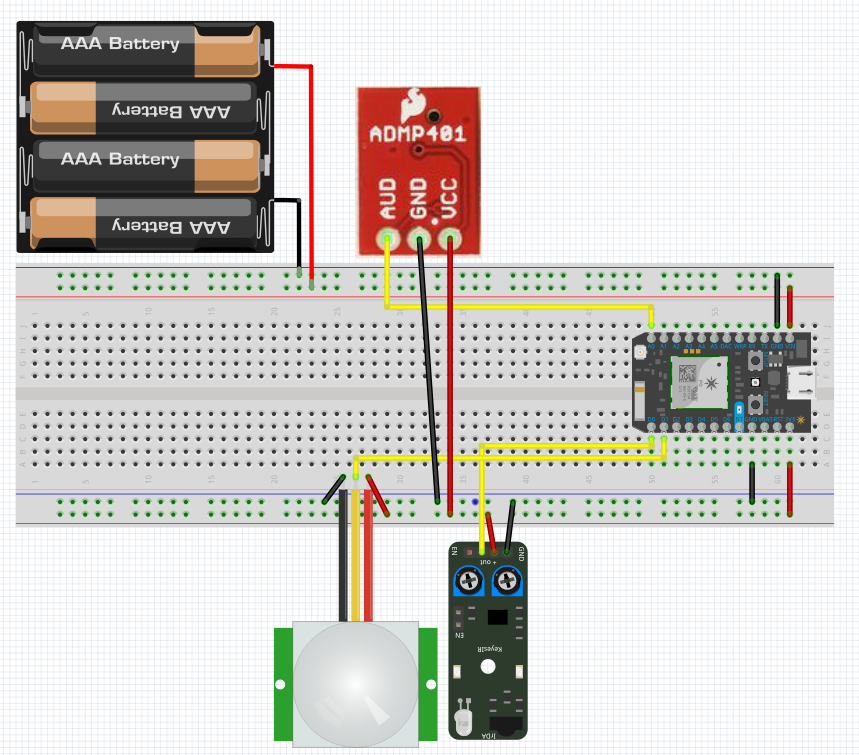
At Hack Arizona 2016, we had to come up with a new project after being 19 hours in to the 36 hour competition. We had a Photon, battery pack, and some sensors, so what we came up with was a WiFi baby monitor. We had a great time and ended up winning "Best Beginner Hack"! Here's how we did it...
OverviewThe first thing we did is connect the Photon to WiFi and burn VoodooSpark firmware to allow a local TCP connection. Then we wrote a NodeJs plugin that takes advantage of the TCP connection to collect sensor data with Johnny-five. We then sent the sensor data up to Parse. The last thing we had to do was create an iOS app that pulls from Parse and displays our data.
Parse SetupCreating a database with Parse is easy!
1. You need to sign up for a free account.
2. Log in and click 'create a new app'
3. Hover over your new app and click 'Quickstart'
4. Click 'Data', 'Web', and then 'Existing Project'
5. Save the line of code from 'Step 2' as you will need it for the Node plugin
6. Go back to 'Quickstart'
7. Click 'Data', 'Mobile', 'iOS', 'Objective-C', and then 'Existing Project'
8. Save the code from 'Step 4' as you will need it for the iOS app
Now that you have a Parse database and the keys you'll need, you'll also need to setup your Photon.
Photon SetupLet's start by connecting your Photon to WiFi. There are two ways to do this, either by usb or by mobile app. After following either of the aforementioned guides, you should have your Photon connected to WiFi and the onboard LED should "breathe cyan." Now you will need to burn the VoodooSpark firmware onto your Photon:
1. Go to build.particle.io
2. Copy the contents of voodoospark.cpp and paste it in the builder
3. Flash the firmware to your board by pressing the lightning bolt icon at the top left
Now that your Photon has the proper firmware, we can take advantage of the TCP connection with NodeJs.
NodeJs Plugin SetupIn order to run a NodeJs plugin, you will first have to install Node.js:
npm install -g node
After you have Node installed, you can download our plugin:
git clone https://github.com/ASteinheiser/IoT-Baby-Monitor.git
Use this as a template, as the sensors you have might be very different. Refer to Johnny-five docs for more help.
Now that you have the plugin, you need to go into it's folder and install dependancies:
cd IoT-Baby-Monitor
npm install
You should be able to see the packages as they install. Once they are done, go ahead and open "app.js" in your favorite IDE. We will need to make a few changes. First, you will need to make sure that the plugin is talking to your Parse:
Parse.initialize("YOUR Application ID", "YOUR JavaScript Key");
Then you will need to make sure that it's talking to your Photon:
var board = new five.Board({
  io: new Particle({
    token: 'YOUR Access Token',
    deviceId: 'YOUR Device ID'
  })
});
Once you have made both changes, save and run it:
node app.js
Now you have the plugin running and you should be able to see it log messages as it sends data to Parse! All we need now is an iOS app to house this data.
iOS App SetupBefore you can do anything for iOS, you will need to download Xcode. After you have Xcode installed, you will also need to install cocoapods:
sudo gem install cocoapods
Once you have Xcode and cocoapods you can download our iOS app:
git clone https://github.com/mtstrong17/iSitter.git
Now that you have the iOS app, you need to go into it's folder and install dependencies:
cd iSitter
pod install
You should be able to watch the pods as they install. Once that is done, start Xcode then open "Monitor.xcworkspace." You will need to make one edit in the file "AppDelegate.m" to make sure the app is looking at your Parse:
- (BOOL)application:(UIApplication *)application didFinishLaunchingWithOptions:(NSDictionary *)launchOptions {
    // Override point for customization after application launch.
    [Parse setApplicationId:@"YOUR applicationId"
                  clientKey:@"YOUR clientId"];
    return YES;
}
Now save your edit and run the app by clicking the play button in the top left.
Make sure you are running both the NodeJs plugin and iOS app at the same time.
Enjoy your WiFi connected baby monitor!


Comments
Please log in or sign up to comment.