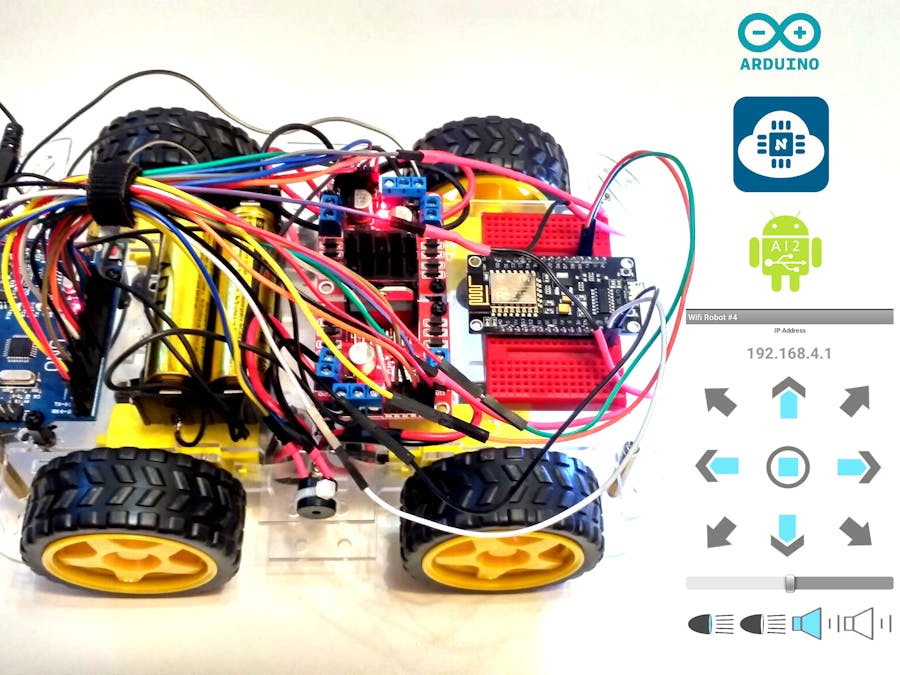
In my project Smartphone Controlled Arduino 4WD Robot Car https://www.hackster.io/andriy-baranov/smartphone-controlled-arduino-4wd-robot-car-14d239 I presented a smartphone-controlled Arduino 4WD robot car or Bluetooth Arduino robot. Then I decided to make a Wi-Fi controlled robot car from a Bluetooth controlled one. For this purpose I simply removed Bluetooth module and added NodeMCU with the same wire connections (appropriate Andriod App was already created).
The NodeMCU ESP8266 works in acsess point mode in order to control robot car in open air, where there is not working Wi-Fi network.
How it works. At first we have to make connection to Wi-Fi Robot network and open Wi-Fi Robot Andriod App. When Forward button is touched down smartphone sends get request http://192.168.4.1/?State=F. Then, as we can see in sketch for the NodeMCU:
if( server.hasArg("State") ) { Serial.println(server.arg("State")); }
NodeMCU sends "F" to serial port. When Arduino Uno board recieves "F" via serial port it starts void goAhead():
  if (Serial.available() > 0) { command = Serial.read();
   switch (command) { case 'F':goAhead();break;
When Forward button is touched up Robot stops. Basic steps for remaking Bluetooth Robot Car into Wi-Fi one:
- Remove Bluetooth module
- Install NodeMCU ESP-12E Development Kit board
- Upload sketches for Arduino Uno board and NodeMCU board in Arduino IDE
- Connect wires Tx, Rx, +5v and GND to NodeMCU
- Install and open Android App
- Connect your smartphone to WiFi Robot network (without password) and enjoy driving Robot Car!
This development board for the ESP8266 SoC inside the ESP-12E module is out-of-the-box ready for you to connect it to your computer, install USB drivers, and start writing programs that connect to your Wi-Fi network!
Step 2. Installing the NodeMCU board at Arduino IDE- In the Arduino IDE open the Preferences window and enter the URL: http://arduino.esp8266.com/stable/package_esp8266com_index.json into the Additional Boards Manager URLs field, and click OK.
- In the MENU select: Tools → Board → Boards Manager and scroll down and to choose esp8266 by ESP8266 Community and click INSTALL. Installing takes about 3 minutes.
- Install the USB Driver (in my case CH340).
- Restart the Arduino IDE and select our board from the menu option: Tools → Board → NodeMCU 1.0 (ESP-12E Module).
- Then, we specify the correct CPU Frequency (Tools → CPU Frequency→ 80MHz) and Upload Speed (Tools → Upload Speed → 115200).
- Select the correct option for the Port (Tools → Port → COM5).
And now we are ready to upload our sketch for NodeMCU!
Step 3. Uploading sketches for Arduino Uno board and NodeMCU boardBefore uploading do not forget to change selection of our board from the menu option:
- Tools → Board → NodeMCU 1.0 (ESP-12E Module) or
- Tools → Board → Arduino/Genuino Uno
After uploading sketches we can connect Tx, Rx wires to NodeMCU board and +5v and GND wires.
Install my App (Wifi Robot #4).
Power up your Wi-Fi Robot Car, go to Wi-Fi settings of your smartphone and select Wi-Fi Robot network (without password). After connection to Wi-Fi Robot network open the App and enjoy driving Wi-Fi Robot Car!
Andrioid App for this project was created in MIT App Inventor. You can change it as you want using .aia file.
I would be grateful for constructive proposals and wishes!


_ztBMuBhMHo.jpg?auto=compress%2Cformat&w=48&h=48&fit=fill&bg=ffffff)


_3u05Tpwasz.png?auto=compress%2Cformat&w=40&h=40&fit=fillmax&bg=fff&dpr=2)


Comments
Please log in or sign up to comment.