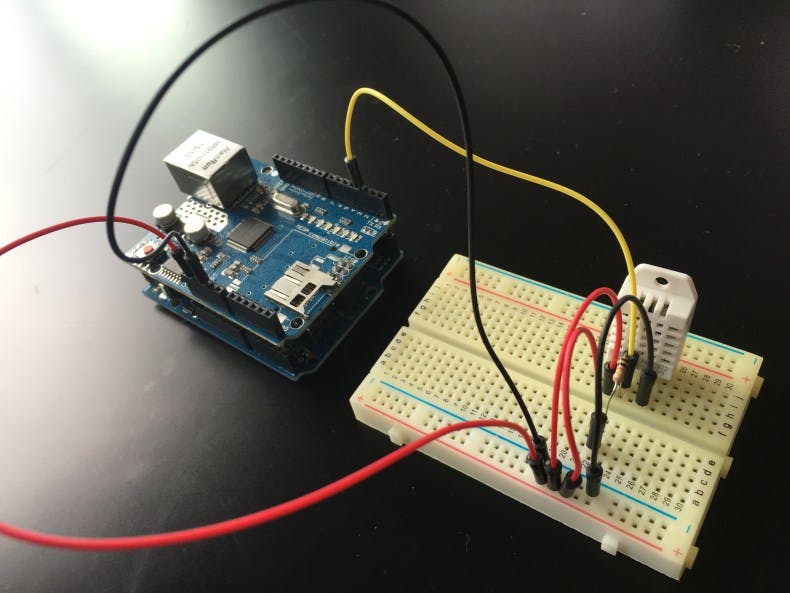
As an easy intro project to get an Ardunio connected up to the web and Autumn we are going to build a temperature and humidity monitor. The monitor will make use of the DHT22 sensor it’s super easy to use and pretty easy to buy online. We will be connecting this to our Ardunio board via a couple of jumper leads and a 10k resistor combined with a Ethernet shield to top it off.
To make it even easier we have all the code ready to go. This can be found here.
Autumn accountFirst up sign yourself up for an account on Autumn https://itisautumn.com, to get started we recommend the Tiny plan you get 15 days free trial to get your teeth in to it. Once you sign in the first few steps you want to do is create a Location this is your physical location (where your sensor is) so that it can be mapped. Once you have a location you will need to create an asset to attach your sensor to. For this lets just name it after your work space the room your in, we are calling it ‘studio’ since we are in the Daiodo studio.
Now we add the sensors to our asset choose a name for your sensor and a description, select your related asset studio in this case, Provider can be left blank and in this case we choose humidity from sensor type. Leave Public off, set Active on and Save data (this will save your data for 24hrs) on.
Under Data Source select Send to Autumn API. Hit Save! On the right hand side of the screen you will see a Element ID, API Key and Organisation Key. You will need these to go in your Arduino code.
CodeYou have now registered a sensor in Autumn all we need to do now is get your Arduino connected to you computer fire up the Arduino IDE. Get the Autumn example code from Github here and make a few changes.
There are comments in the code to help you find the different parts that you need to update. The main parts are to add your API Key, Organisation Key and Element ID.
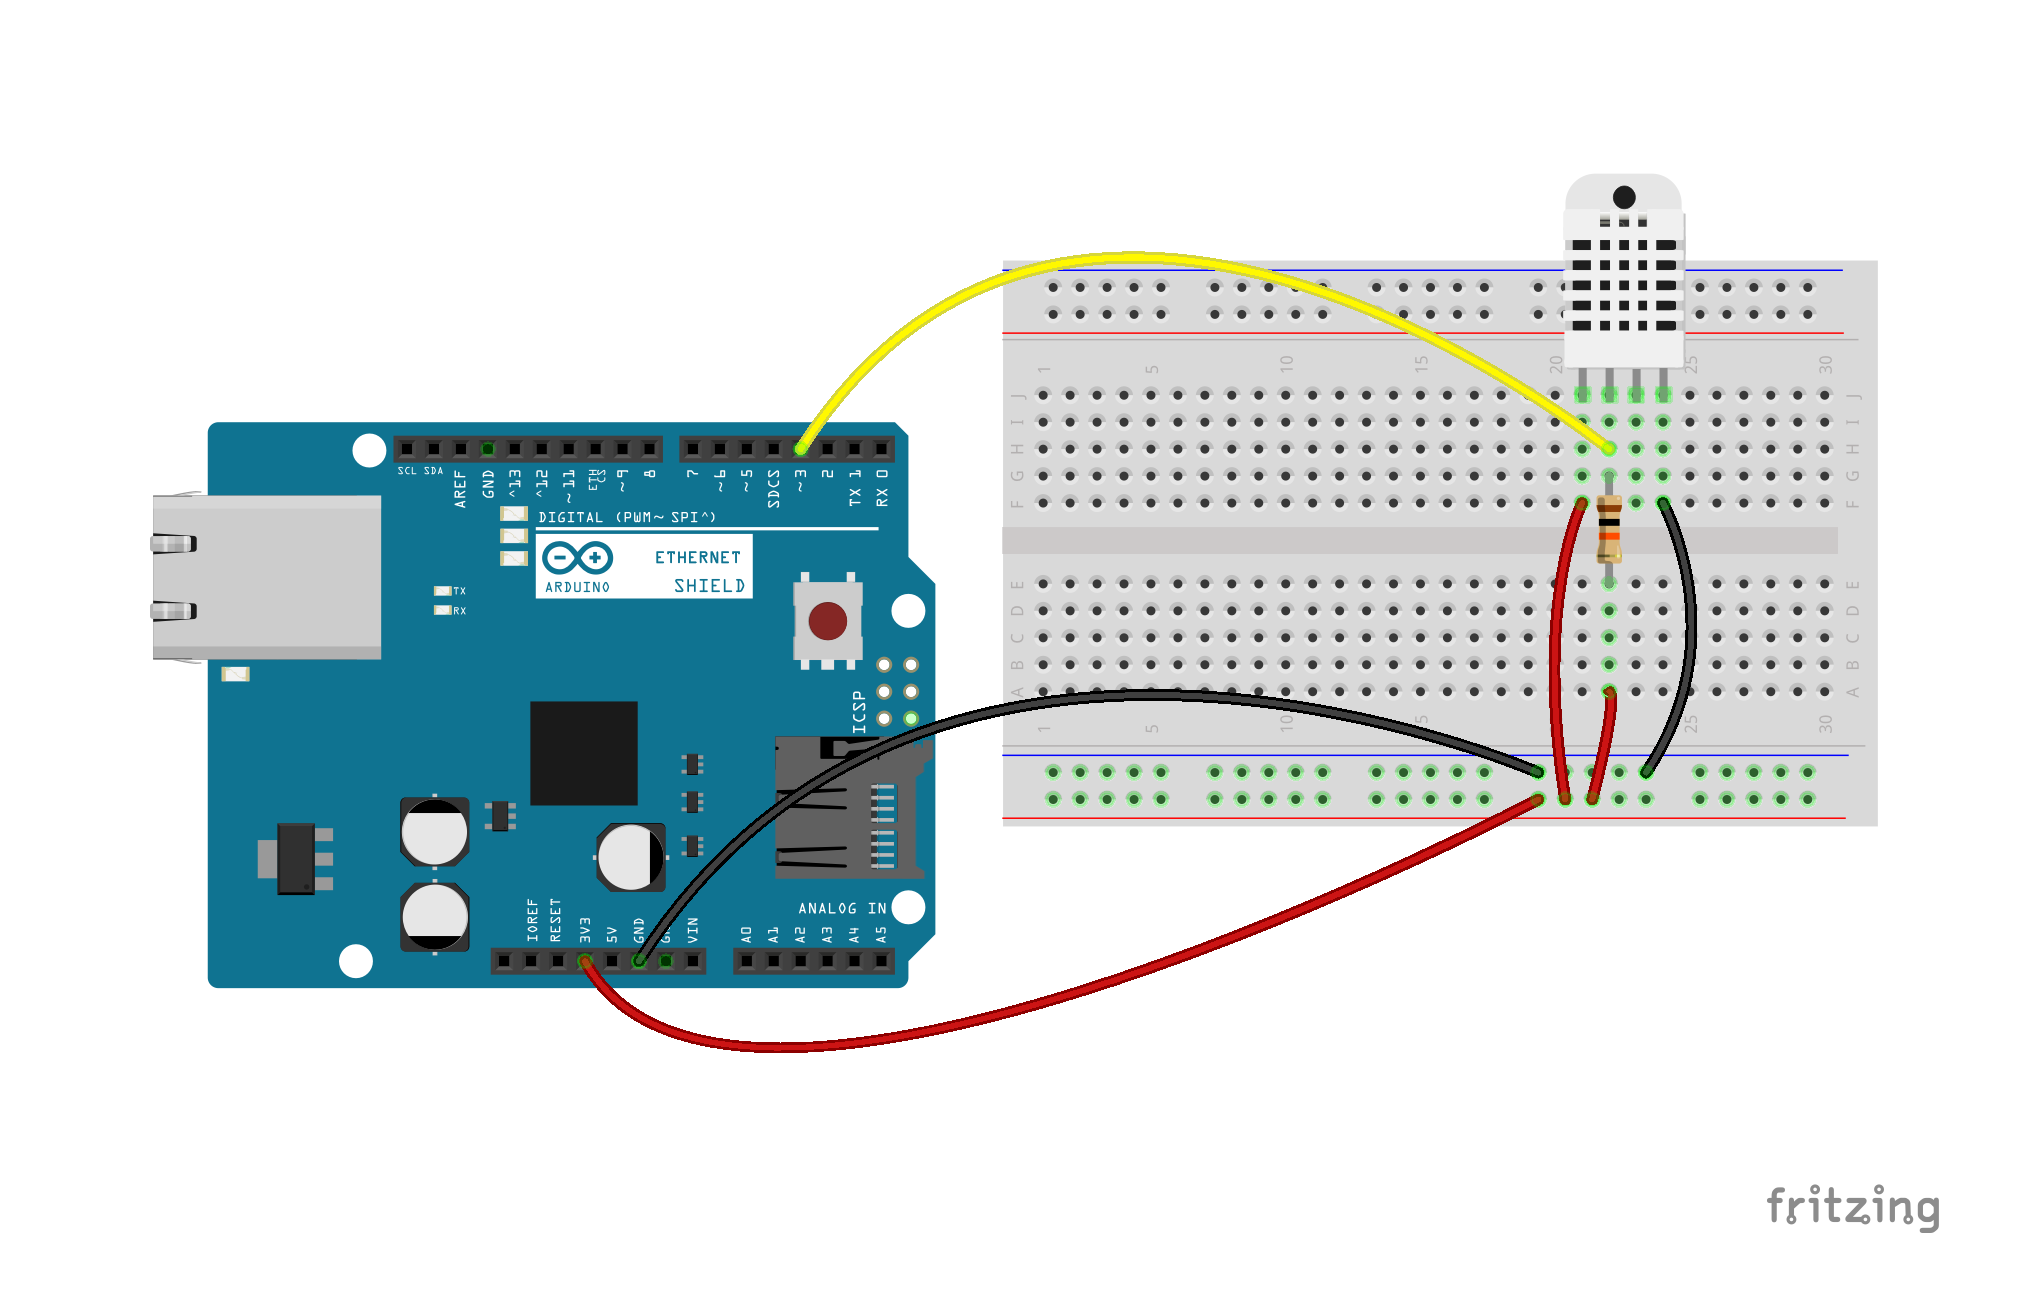
Ardunio UnoTo connect the DHT22 to Arduino we are going to use a 4 jumper leads, either a breadboard, electrical tape or solder. Connect them together in this pattern:
Connecting the 5V power to pin 1 on the DHT22, ground on pin 4, pin 2 to digital input 3. Then the resister between pins 1 and 2.
With a breadboard you can make this layout look nice.
Once you have this all hooked up, connect your Ethernet cable, upload your code to your Arduino and as long as everything goes to plan you will receive data in Autumn.


_ztBMuBhMHo.jpg?auto=compress%2Cformat&w=48&h=48&fit=fill&bg=ffffff)


Comments
Please log in or sign up to comment.