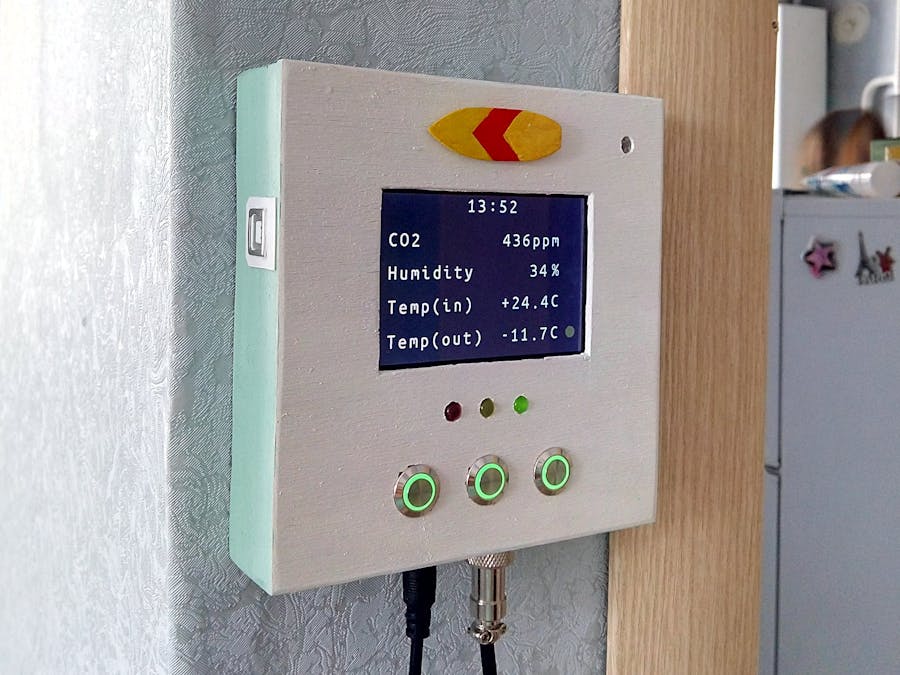
As a civil engineer I'm very well aware of how ventilation systems should work at home. So to measure the quality of the air in my apartment I purchased a CO2 monitor and I really liked it because it not only showed CO2 levels but also room temperature.
However, this wasn't enough for me. I wanted to measure more parameters, so I was looking for an appropriate device. I found some that were ridiculously expensive, so I decided to make my own.
At that time I already had experience programming arduino controllers for a pump station with solenoid valves controlling different pipeline branches.
I made a project on paper and than ordered necessary tools and sensors.
BaseI wanted it to have a huge screen 10inch minimum, but it would empty my pockets very fast. I decided to be realistic and chose Arduino Mega 2560 R3 with tft 3.2 420x380 display. This setup required minimum wiring because the display connects straight to the arduino board.
Unfortunately, display that I ordered from Aliexpress was so cheap that it didn't work very well. There were white small dots appearing with the time and inverted colors. I tried different libraries and different controllers but it didn't help. So I adjusted colors in the code and added screen refreshing at 12.00 pm and 12.00 am.
The most expensive part of the project was mh-z19 CO2 sensor. It is relatively cheap among other CO2 sensors while providing reliable measurements and auto calibration function.
And while other modules were relatively easy to install, this sensor didn't have much info at its datasheet so I looked on forums for a code and combined all the information. As a result, now everything works perfect and even better than the previous sensor.
However, it took 24h for it to calibrate itself, so at first its readings were inconsistent. Auto calibration is simple. When I leave my apartment there is no one who consumes oxygen, so CO2 level drops to the outside level, which is 400ppm. If readings are somewhere below this figures sensor calibrates.
It can communicate via UART and PWM. I chose the first one because I think it is more reliable.
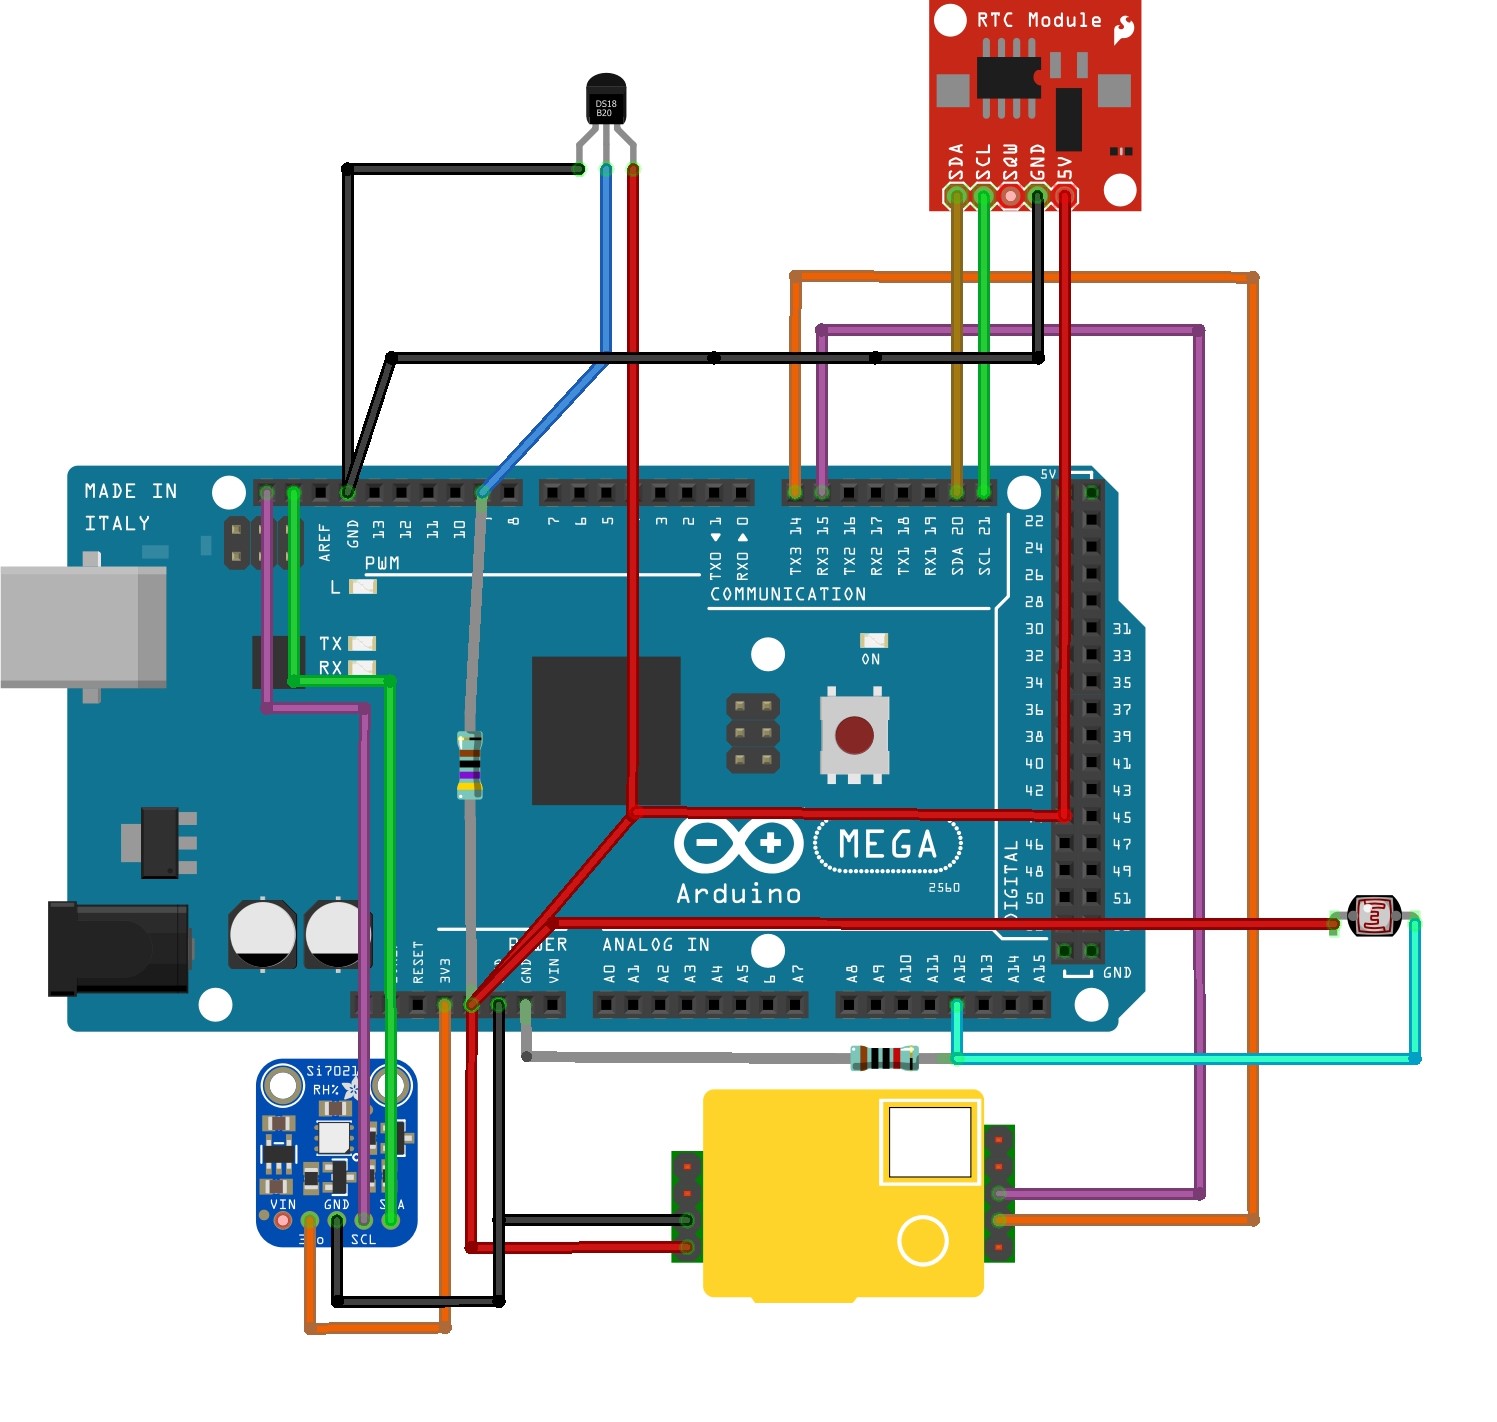
Then I used SI7021 temperature and humidity sensor for indoor monitoring that uses I2C protocol and connects to SDA and SCL pins. Not expensive, industrial high precision. I like it because I didn't have any troubles with it at all.
For outside temperatures I used ds18b20 enclosed in a stainless steel capsule. Cheap and accurate readings. However, it requires 4,7k Ohms resistor, so just don't forget about it. Communication is via 1-wire.
For the time I purchased DS 1307 RTC module that used I2C.
Then 3 LEDs for CO2 levels. For 400-800ppm is the green LED, for 800-1200ppm the orange LED and for 1200ppm - and above is the red one.
Plus, 3 stainless steel buttons with LEDs. The left one is for hours adjusting. The middle one is for minutes and the right one is for text color changing.
Additionally, I wired up a photoresistor to adjust LEDs brightness. I didn't want them to shine too bright at nights.
For power supply I drilled a hole in the bottom and placed there a DC connector:
The problem was that I didn't have any suitable power supply sources. I had only 19v and 15v supply adapters while recommended voltage for Arduino is 7-12v. However, I had a bunch of LM2696 DC-DC adjustable voltage regulators.
I put it inside of the box and adjusted it for 7 volts. I found out that my Arduino is heating up very quickly under 12 volts, so I chose the recommended minimum. As a result, now it can be supplied from various power sources.
For outside temperature sensor I used aviator connectors and telephone wires.
This was the major issue for me because I didn't have a 3D printer. I tried to make it from polymer clay at first but it didn't hold its shape well. Plus, I burned it ones in an oven.
The second attempt was with 6mm plywood. it was mostly fine but it was difficult to cut. I had to use an electrical saw and a dremel tool.
The final and the most successful one was from 3mm plywood (which was difficult to find) that I was able to cut without electrical equipment and used only box cutter knife and some sandpaper. Covered it with acrylic paint, and as a result, it looks much better.
- Arduino Mega 2560 R3 - 8,27$ (480Rub)
- Display TFT 3.2 480x320 - 8$ (400Rub)
- RTC DS1307 module - 0,55$ (32Rub)
- CO2 mh-z19 sensor - 20$ (1160Rub)
- Temperature&humidity sensor Si7021 - 2$(118Rub)
- Temperature sensor DS18b20 in capsule - 1,14$ (66Rub)
- Photoresistor - 1$/50pieces (65Rub)
- LEDs - 0,67$/100pieces (39Rub)
- Stainless steel push buttons - 5,07$/3pcs (294Rub)
- GX12-3 pin aviation plug (set) - 1,17$ (68Rub)
- DC connector 1,25$/10pcs (73Rub)
- LM2596 DC-DC adjustable Voltage regulator - 0,69$ (40Rub)
- Power adapter 12v - 2,14$ (120Rub)
- Wires - 1,78$ (100Rub)
- Plywood 3mm - 1,78$ (100Rub)
Total 55,51$ (3155 Rub)


_wzec989qrF.jpg?auto=compress%2Cformat&w=48&h=48&fit=fill&bg=ffffff)


Comments