Introduction
In this DIY guide I will show you how to make your own wireless weather station. In this project I decided to make my own PCB that is based on Arduino UNO microcontroller - Atmega328p.
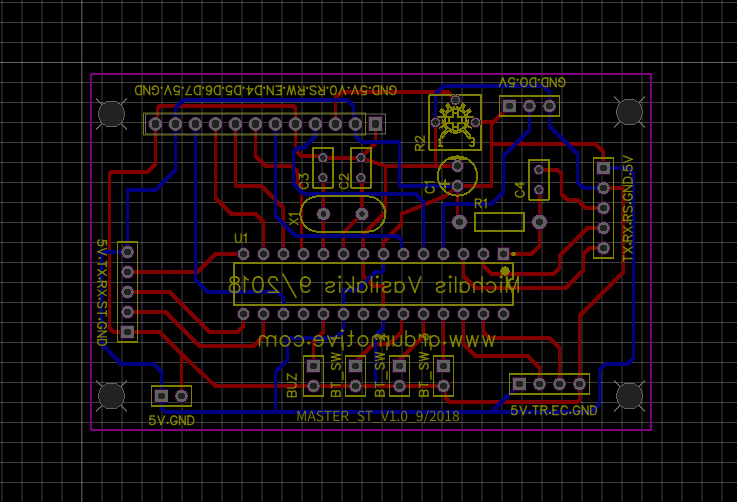
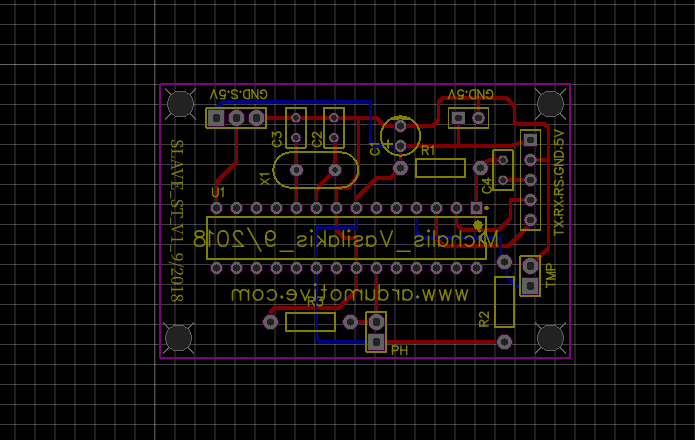
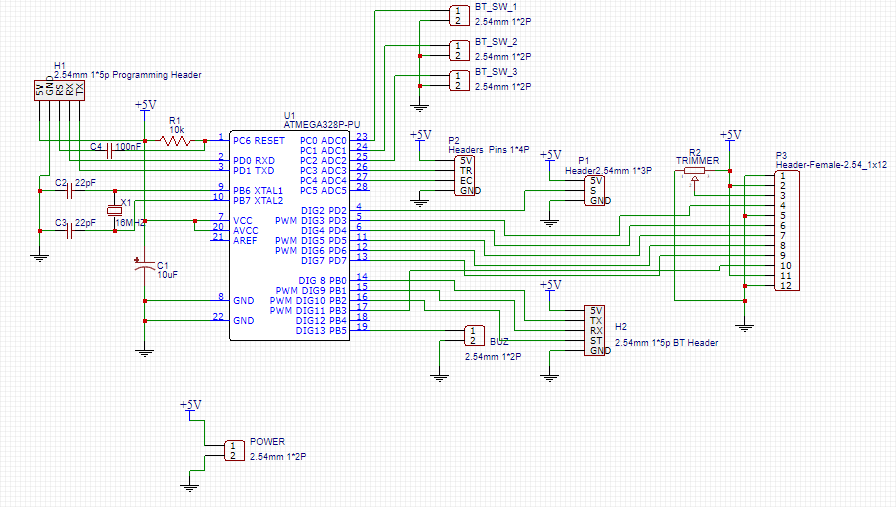
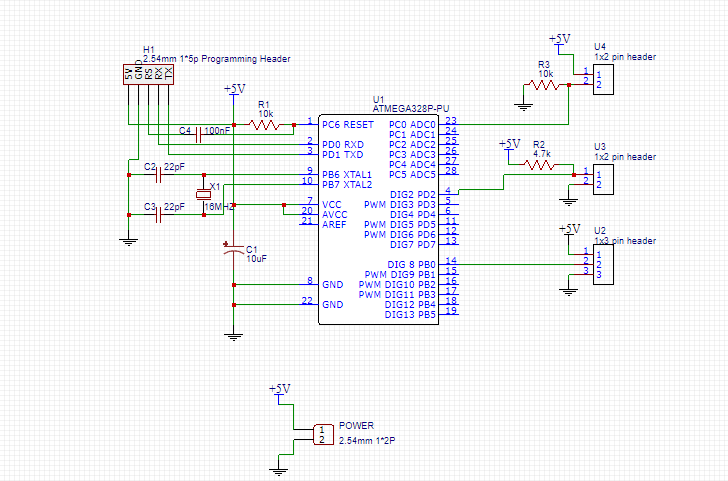
Bellow you will find the electronic schematic with PCB layout so you can easily produce it.
~Project updates can be found here:
https://www.ardumotive.com/arduino-wireless-weathe...
Let's get started
The circuit at EasyEDA, the free online circuit design platformEasyEDA is a free, zero- install, cloud-based EDA tool, designed to give electrical engineers, educators, engineering students and electronics hobbyists an Easier EDA Experience. It is easy to use circuit design, circuit simulator and PCB design that runs in your web browser.
Arduino Connection Pins--> For Master StationLCD
RS pin to Arduino Pin 3 EN pin to Arduino Pin 4 D4 pin to Arduino Pin 5D5 pin to Arduino Pin 6D6 pin to Arduino Pin 7 D7 pin to Arduino Pin 11
DHT Sensor
Data pin to Arduino Pin 2
HC-12
TX pin to Arduino Pin 8RX pin to Arduino Pin 9
--> For Slave/Sensor StationDHT Sensor
- Data pin to Arduino Pin 8
DS18B20 Sensor
- Data pin to Arduino Pin 2
Photocell
The codeConnect your circuit with TTL to USB module with 5 cables to the programming header. The pins RX and TX must be cross-connected.
NOTE: If you are using the Arduino UNO board make sure to remove the ATmega328 IC from it first and connect the headers RX to RX and TX to TX pins of the board. The RS pin must be connected to Arduino UNO reset pin.
Download File
JLCPCB - Make your own circuit boad from 2$!Enter here to produce your PCB board!
Use JLCPCB for $2 PCB Fabrication & 2-day Build Time, the quality is really good, check the below photo of our pcb board.
Download File
Download File
3D Parts
Download File
Well Done!I hope you liked this, let me know in the comments!!!


Comments
Please log in or sign up to comment.