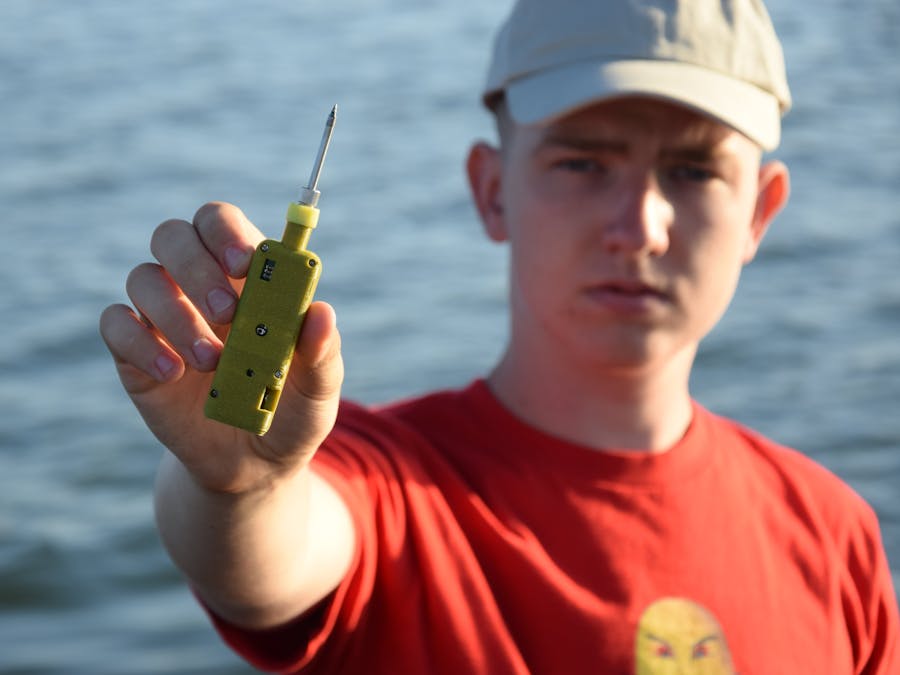
Wireless soldering iron - that sounds weird. Sometimes I feel like soldering outdoors, but I can't take my soldering station outside. I bought a USB soldering iron, which worked quite well, but needed a little modification, because what if I want to solder outdoors? In the middle of the lake? So I decided to make a wireless soldering iron. Will it work? It will!
Step 1: DesingingThe first step was to design the schematic and PCB, which I ordered, of course, from PCBWay - check Step 2. You are probably curious how long it took me - thinking about the whole project, designing, soldering - ehmm, actually one minute - check out the video. It went really smoothly. Unfortunately, soldering with something like this will be difficult, so I still have to design the housing, and in fact, I have already designed it. I will use a PLA filament from 3DJake to print the case, which is perfect for this type of project. The only thing left to do is assemble the whole thing. I must admit, it looks better than I expected, but will it work? I'll turn it on!
Step 2: PCB OrderingI went to PCBWay and clicked "Quote Now" and then "Quick Order PCB" and "Online Gerber Viewer", where I uploaded files for my board, so I could see what it would look like. I went back to the previous tab and clicked "Upload Gerber File", I chose my file and all parameters were loading themselves, I changed only the soldermask colour to blue and black. Then I clicked "Save To Card", provided shipping details and paid for the order. After two days the tile was sent, and after another two days, it was already on my desk.
Step 3: PerfectingWow, the soldering iron tip heats up very quickly, it reached very high temperature immediately, but is it able to melt the tin? Yes, the tin is melting! Let's try to solder something. As you could see, my wireless soldering iron works really well, which I'm really happy with, and now let me tell you some more details. On the board I put a chip that measures the temperature of the tip and three LEDs on the pcb, which was supposed to indicate the temperature, which could be set to one of three levels, but during the programming I found it pointless in a 5V soldering iron. A second version of this soldering iron, with smaller dimensions, will definitely be created. Currently, it works in such a way that to turn it on, press the button that activates the counter that will turn off the heating of the tip after one minute. One LED turns off every twenty seconds, so I know how long it will turn on. The battery enough for about an hour of soldering, so I recommend getting a power bank if you want to solder outside for longer.
Step 4: Thanks for Your Attention!Ok, that's it for today, tell me what do you think about this device in the comment and check out my previous post!
My Youtube: YouTube
My Facebook: Facebook
My Instagram: Instagram
Get 10 PCBs for only $5: PCBWay
Shop with accessories for 3d printing: 3DJAKE


_3u05Tpwasz.png?auto=compress%2Cformat&w=40&h=40&fit=fillmax&bg=fff&dpr=2)
Comments
Please log in or sign up to comment.