(This project is being managed here: Project Repository )
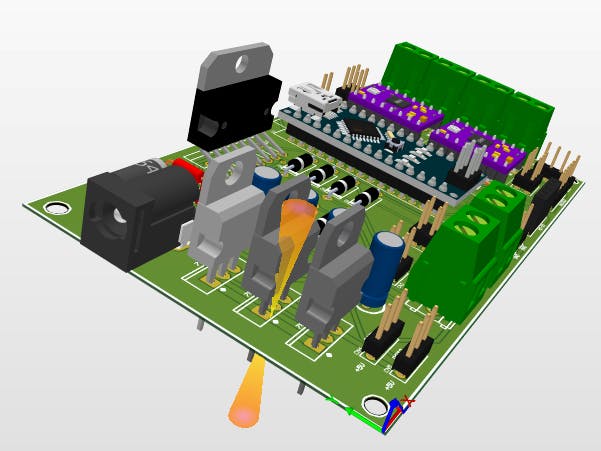
The All in one Arduino board is designed to provide the facility to the users of doing multiple projects at a time with efficiency. Those who are doing projects on Arduino can understand the need for this board. If u try to connect multiple components to the Arduino it will not work efficiently with all components at a time with either 5V or 9V regulator, you have to do it turn by turn otherwise you will not get accurate results. While with this Arduino board a user can easily connect more than 2 or 3 loads or components at a time, for instance, multiple stepper motors, multiple fans or bulbs, etc.
It provides a wide range of voltages from 5V to 24V for different purposes. It has a header and connection terminal to connect the wires in order to avoid the mess. It can work with Arduino Nano. The benefit of using this board is that a user can connect:
- 1x2 DC motors from 9V to 24V
- 1x2 Servo motors from 5V to 9V
- 1x2 Stepper motors
- 1x2 Potentiometer
- 1x1 Serial device that could be any Bluetooth or Communication module, RX and TX device
- 1x1 I2C device that could be SCL, SDA Device, the display module
- L298 IC
It is an IC that drives high-power motors. The high voltage and high current is responsible to drive loads like relays, solenoids, and different types of motors. It has an operating voltage range between +5V to +46V but its maximum supply voltage limit is 50V. The power dissipation of this IC is 25W.
- A4988 Stepper Motor Driver
It is a micro-stepping motor driver that has a built-in translator. It usually operates those bipolar stepper motors that have an operation mode of full, half, eighth, sixteenth, and quarter. The output voltage limit of this driver is 35V.
- LM7805 and LM7809 Voltage Regulator
These are both voltage regulator IC that is commonly used to regulate voltages. In the case of LM7805; for variable input voltages, it provides a constant 5V. While in the case of LM7809 provide voltages of 9V.
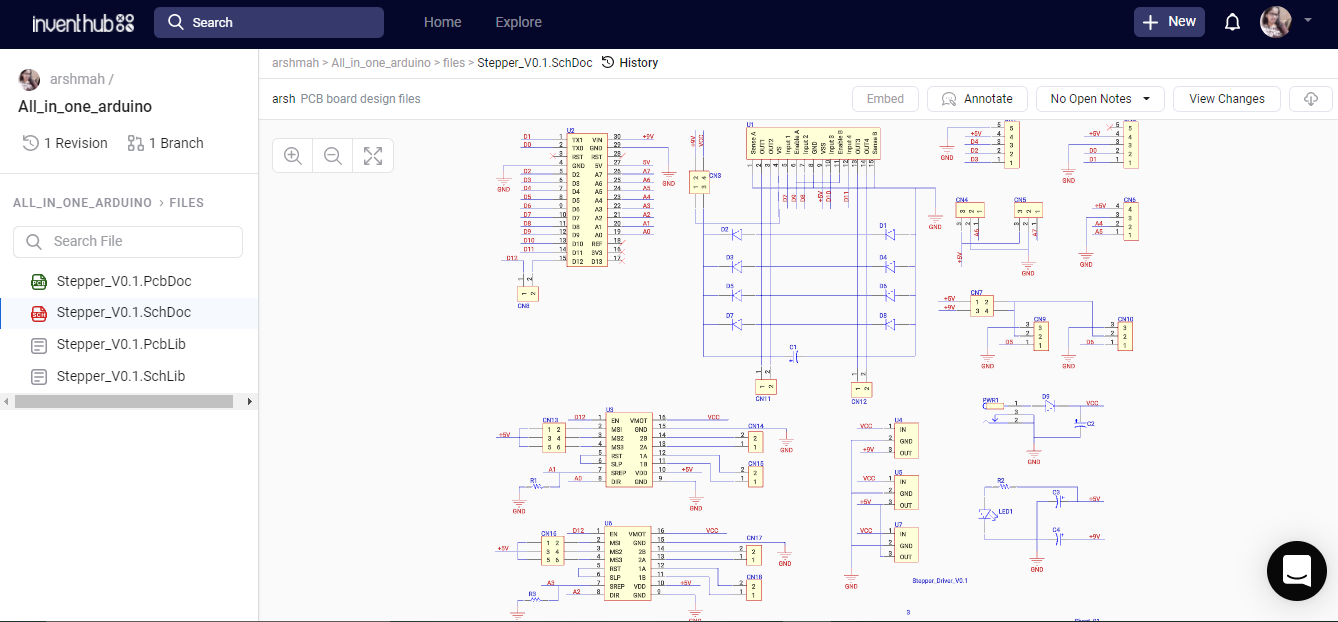
In the schematic diagram, there is an Arduino Nano at the leftmost side connected to the terminal. In the center, there is a motor driver IC that is L298. Then there are connectors, diodes, and capacitors attached to the circuitry. On the bottom left side, there are two A4988 Stepper motor drivers.
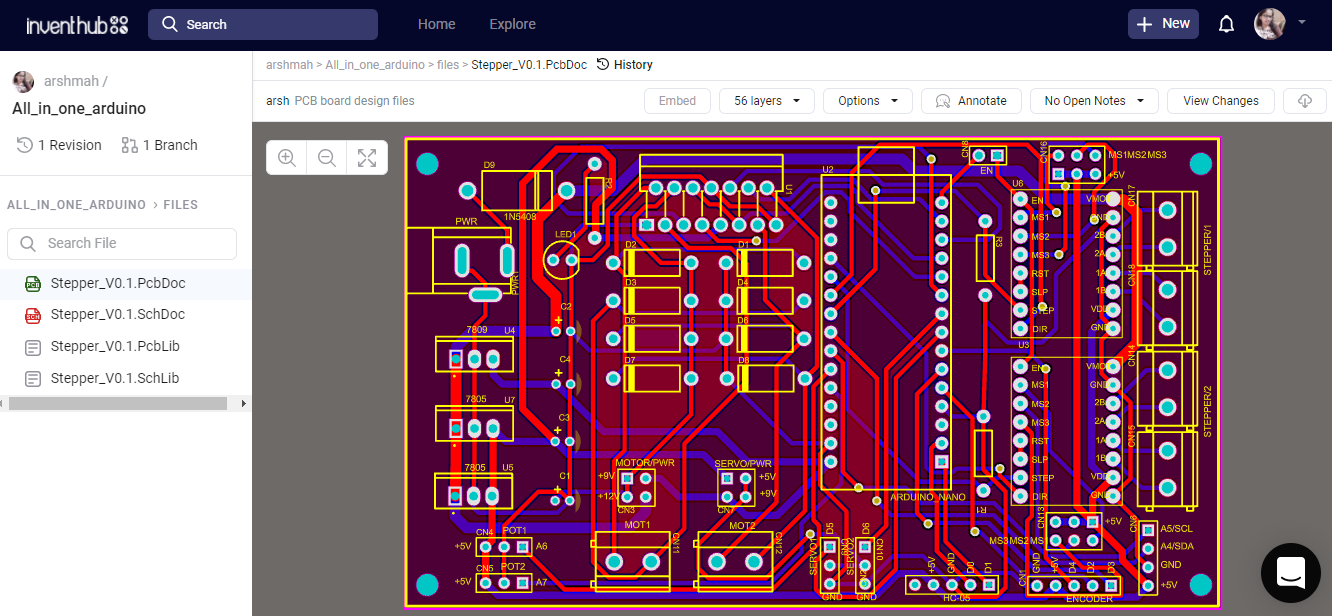
I have designed this PCB board on Altium, then I have uploaded the schematic files online on Inventhub where users and manufacturers can get my file and can implement my design.
This is the link where files are available Inventhub.
On Inventhub, there is an option of annotating where my collaborators can comment and suggest improvements in my design. This is how I have improved my design.
For the process of fabrication that is essential in creating a 3D board, it is important to send all the design files to the manufacturer. Instead of visiting my manufacturer, I will send all my design files to the manufacturer in the form of a Release File that will contain all files in a zip folder to avoid any errors. Through this release file, my manufacturer can design and fabricate my board easily without any errors.
In Inventhub, there is an option that I can switch between layers of PCB, I can select a specific layer at a time or multiple layers as well to observe a better version of my design.
This is the link to my release file of the project Inventhub.
Bill of Material (BOM)File:
My Bill of material contains the detail of each component including footprint, library reference, and quantity. After the process of fabrication when I will get the board, then I will contact my component provider who will get my BOM file in the form of an excel sheet, he only downloads that file and delivers my components with exact parameters. Here you can find my BOM list on Inventhub.


_U3tyKHqvmg.png)


_3u05Tpwasz.png?auto=compress%2Cformat&w=40&h=40&fit=fillmax&bg=fff&dpr=2)
Comments
Please log in or sign up to comment.