(This project is being managed here: Project Repository )
Types of Converter:There are three main types of converters depending upon the conversions they do:
- Buck Converter (Step-down)
- Boost Converter (Step-up)
- Fly buck Converter (Isolated)
Fly-Buck Converter:The fly buck converter can provide an isolated voltage output which is why it is also named an isolated buck converter. A simple buck converter with the addition of another winding inductor to form a coupled inductor, a Schottky diode, and a capacitor forms a fly buck converter. One side of the inductor is primary and the other side is secondary. This converter is useful where multiple outputs are required from a single output supply like +/- 5V, +/-9V can be created from a single fly buck converter. It is a low-power, low EMI buck converter.
Why there is a need for isolation?The major thing that differs fly buck converters from other converters is isolation. The electrical isolation between the input and output sources. Isolation helps in reducing power noise, and for safety in electrical operations, we need isolation. This converter protects the devices from damages at the input and output sides.
LM5160 Regulator:The LM5160 step-down synchronous switching regulator is a low-cost, efficient buck converter capable of supplying 2A to the load. This high voltage regulator contains 65V N-channel buck and synchronous rectifier switches. The LM5160 can be applied in numerous end equipment systems requiring efficient step-down regulation from higher input voltages.
The LM5160 integrates an under-voltage lockout circuit to prevent:
1- Faulty operation of the device at low input voltages
2- Features intelligent current limit and thermal shutdown to protect the device during an overload or short circuit
Features:The fly buck converter provides:
- Isolation from the primary side to the output side
- Multiple isolated output voltages
- Control multiple output voltages with a single control
- Wide range of input voltages
- Low power and low EMI
- Efficiency is high
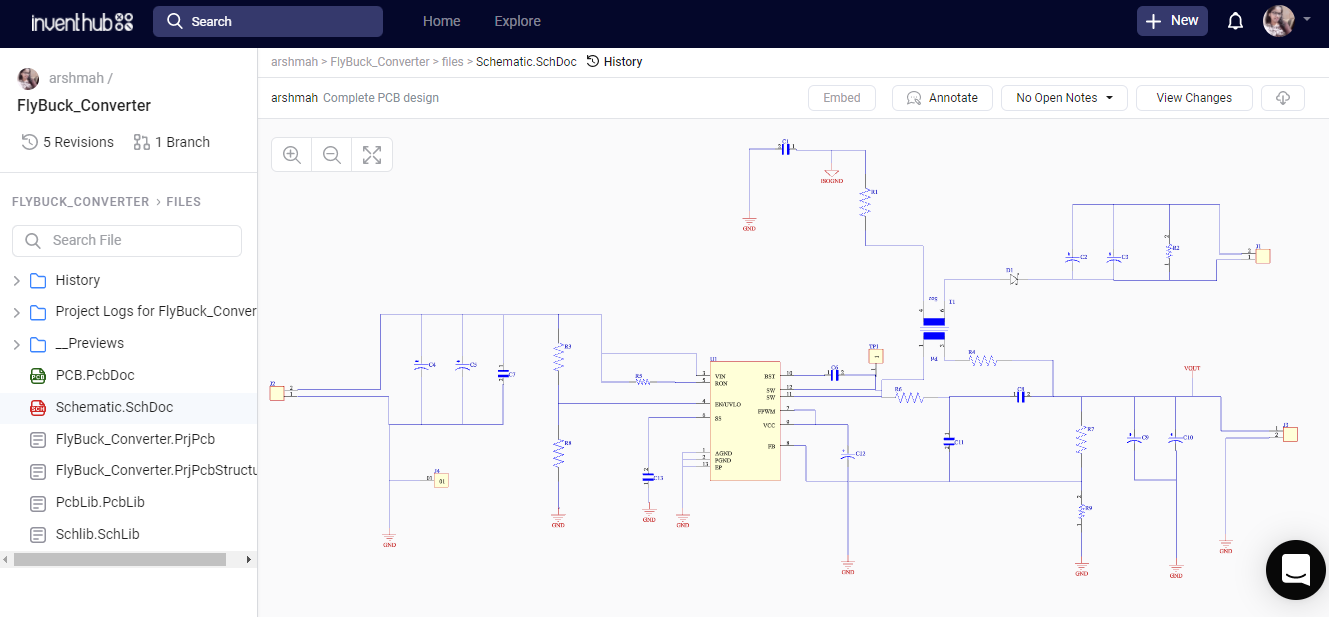
Schematic:For the schematic diagram, I have used Altium software. First, I have designed symbols and footprints of each component because it’s a good practice to start with designing symbols and footprints. Then I have uploaded my symbols and footprints libraries online on Inventhub where users can view them, download them, or use them in their design implementation. Users do not need to design the components for their design. Thus, it can save time.
After completing the designing of components. I have used them in my schematic to complete my design. I have uploaded my schematic file for the users and viewers on Inventhub.
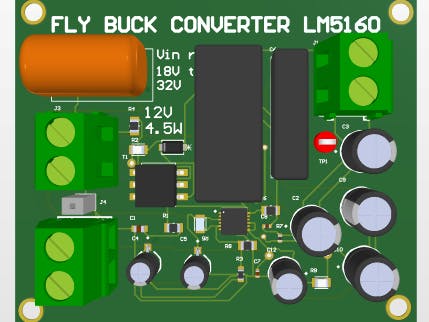
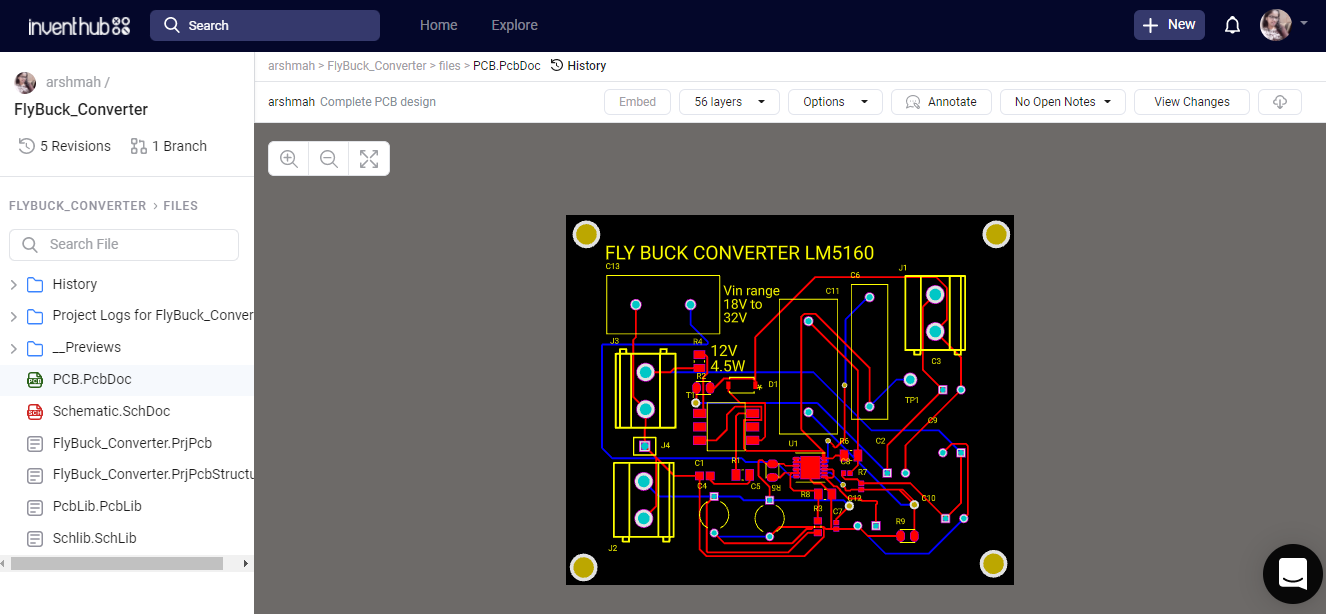
PCB:To fabricate my PCB, I have converted my schematic file to the PCB file so that I can design a board, connect my components, and can visually view my board in 3D. Along with it, I have uploaded my PCB file on Inventhub where the manufacturer can view or download my PCB file for fabrication of my board.
For the manufacturer, I have created a release of my project which contains all design files including schematic, PCB, and their component libraries. Instead of visiting my manufacturer, I can send him the release of my design files. He can view or download files in ZIP format and can fabricate my PCB without any errors.
Project History files:Sometimes it becomes messy and difficult to keep the multiple versions of the design in one folder. On Inventhub, I have created the backup of my design files. I have uploaded different edits of my design files online from where I can view or download the specific file. If I want to use my previous design as my current design I can easily download that file without any error.
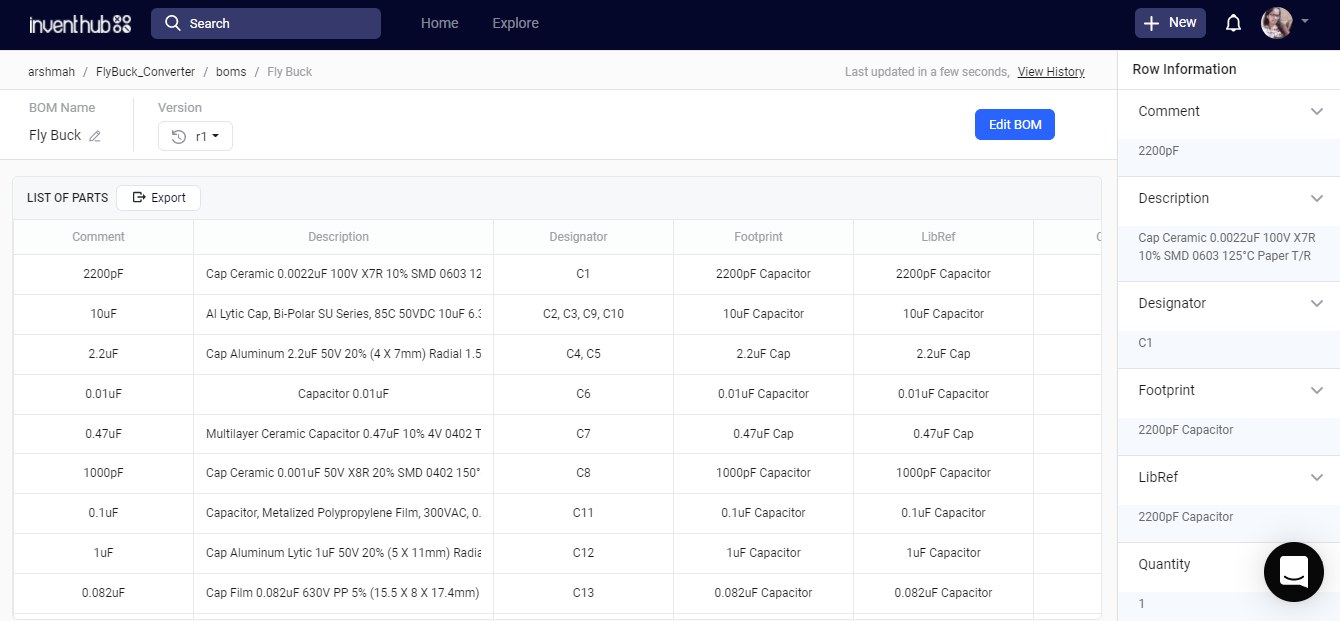
BOM file:After getting my fabricated board, I need to embed components on it. Components should be of the same dimensions as I have used in my design. I have created a BOM file on Inventhub which contains a description, library reference, footprint, and quantity of each component. My component provider can simply download the file in CSV format and can send me my components.


Comments