Home automation is building automation for homes using devices connected to the internet(such as esp8266, arduino), also known as smart home or smart house. The automated home system will monitor and / or control home features such as lighting, weather, entertainment systems, and electrical appliances. It may also include home security such a alarm systems & many other things.
3 PIN RELAY MODULE:A relay is an electromagnetic switch operated by a relatively small electric current that can turn on or off a much larger electric current. The heart of a relay is an electromagnet (a coil of wire that becomes a temporary magnet when electricity flows through it).Here we are providing the small current/signal from the esp8266(pin7) to the Signal pin.
The N/O and N/C is part of the relay, NO is "normally open", which means that switch contact is open, or disconnected, when the relay coil is not energized. NC is "normally closed", which means that switch contact is closed, i.e. connected, when the relay coil is not energized.
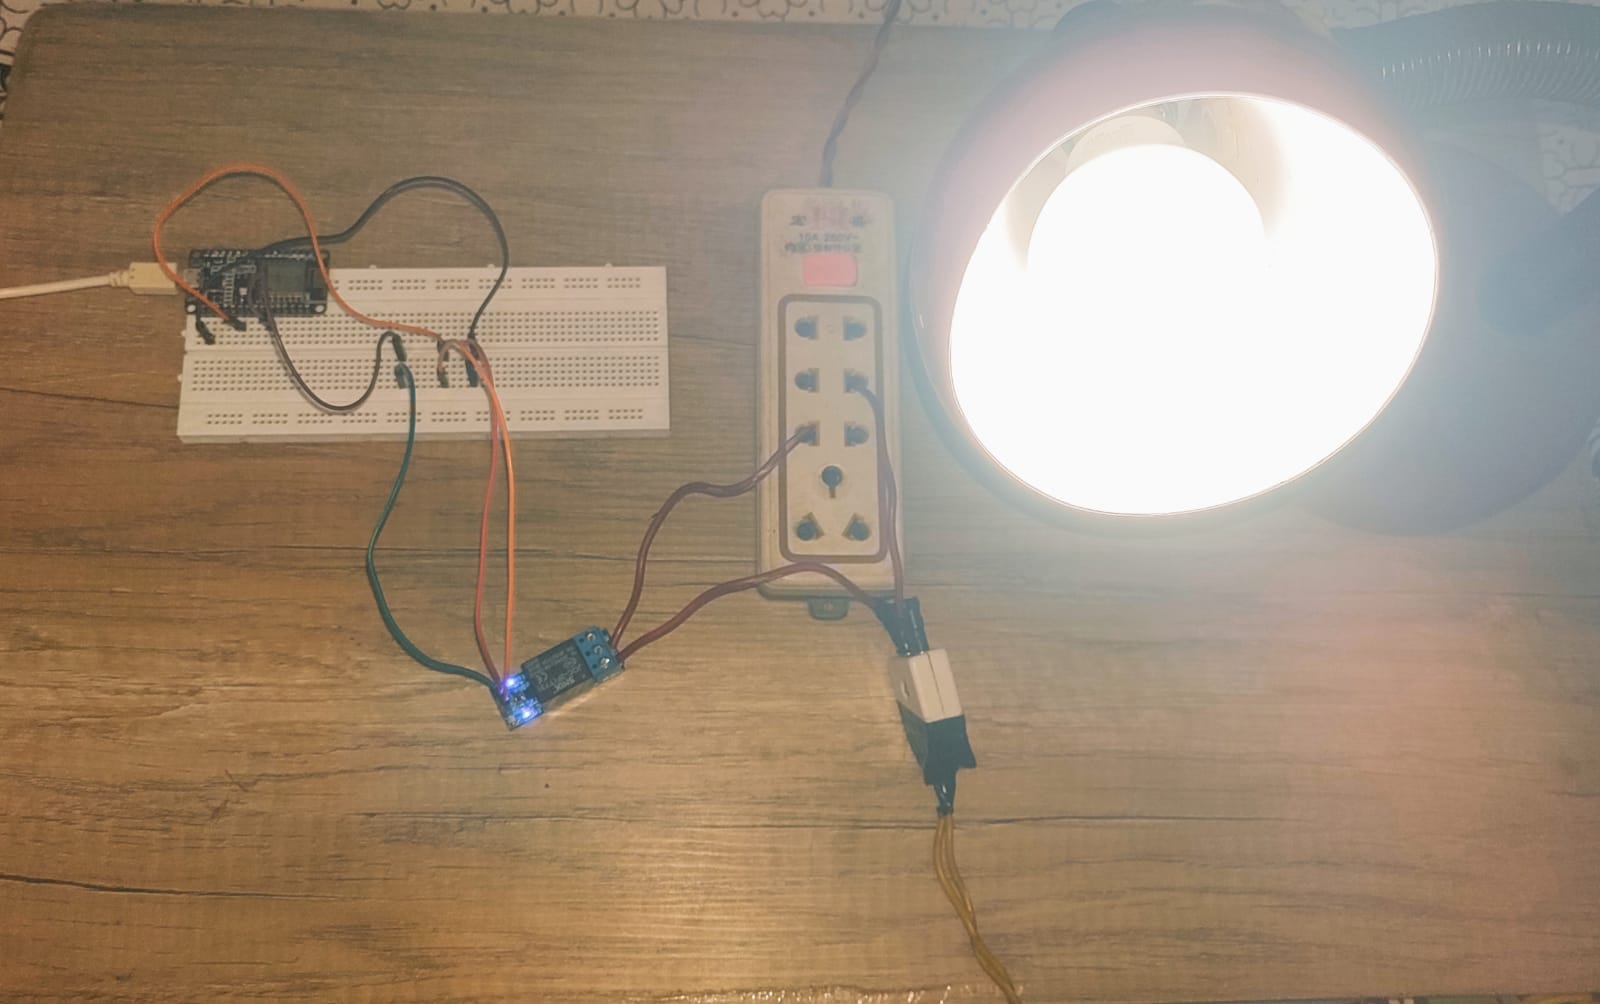
As you can see the circuit diagram of my project, I have given electricity supply to 'C' and 'NO' ie when the signal is given from esp8266 then 'C' and 'NC' gets connected and it allows the current to flow thus turning on/off the lamp.
SETTING UP THE SERVER AND THE MOBILE APP:First go the ThingSpeak website and login with your email id.
Then click on channels and create a new channel & name it as well.
After creating the new channel go the API key section and generate the new key.
Note:Copy the Channel Id and API key(both) in the code given below.
Then copy the link (the one selected in the image above) under 'Write a Channel feed'.
Now your server is set!!! It's time to work on your mobile app.
Go to the MIT a2 website and login with your email id.
Then click on 'Create Apps!', and create a new project. Also give it a suitable name.
From the palette insert two buttons and then search for 'web', a globe will appear under the palette and place it anywhere on the mobile screen.
Under the properties section you can modify the shape bg color and many other things of your app.
On the top right corner click on 'Blocks'.
On the left side click on 'Button1' and add the first block,
Then under the 'Web' scroll down to the bottom and add the block as shown in the image.
Under the same section add the block at positiion 7 from top.
Under the 'text' add the text block (first block from the top).
Then paste the link from ThingSpeak website under 'Write a Channel feed' and set the value as '1' at the end for 'Lamp on' and '0' 'for Lamp off'(refer he above image where the link has been selected).
Similarly Add the blocks for button 2.
Your App is ready!!!! Now it's time to download the apk.
On the top right corner click on designer and under the build click on 'Android app'( it takes time to create it so please be patient).
This is how your app should look like in your device:
In the above image you can see I have connceted 'vcc 'to 3v3 (green wire),
'ground' to the ground pin (red wire) &
'input' to the d7 pin (orange wire) of the esp8266
The 'C' of my relay and one of lamp plug (w1) and one of lamp plug is directly connected to the Ac supply.m
The 'NO' of relay is connected to the other lamp plug (w2 )thus completing the circuit.


Comments
Please log in or sign up to comment.