SMART WEARABLE
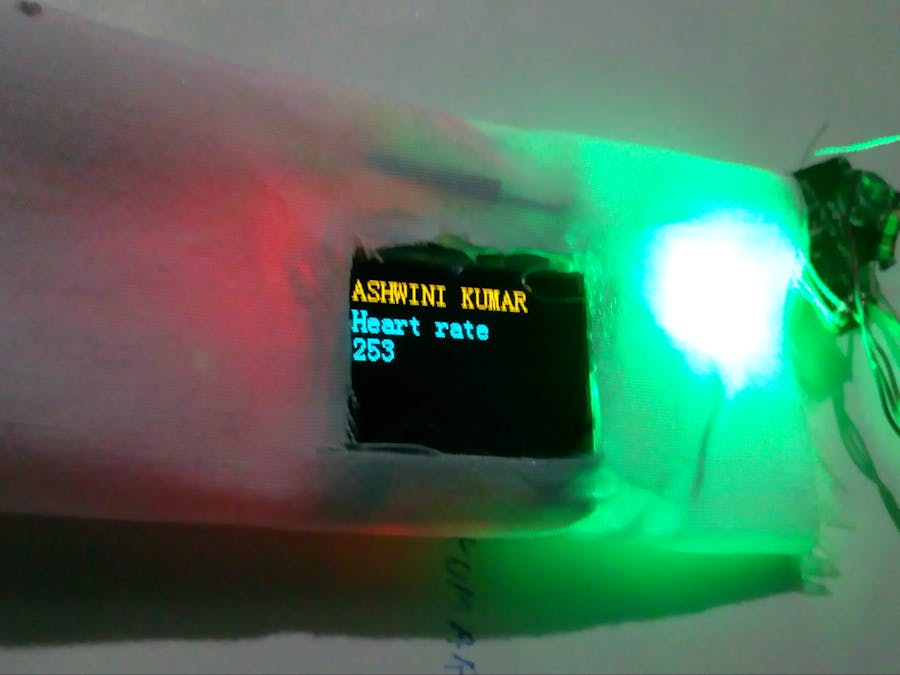
It is smart O.LED based wearable equipped with sensors that shows your heartbeat live and a led that glows according to your heartbeat it gives a new exiting experience to you you can actually moniter your heartbeat and see its working live on display and feel it by watching the led bulb.
You can also attach many other sensors like temperature sensor and sugar sensor and other sensor to it that helps you to track your body live in every moments of life.It might be helpful to people with heart problem.
SMART IDENTITY CARD
This is a smart O.LED based identity card that gives you a very new look and experience to you.IT shows the the identity and details like identity card but in very new way the O.LED in it actually display and animate the the texts in it and gives a unique look to you.You can also some sensors to it like heartbeat sensor that makes it more exciting and cool.
We are going to use hot glue and some sticking and sewing skills in it that makes it more exciting in making it.
Step 1: MATERIALS WE NEED TO COLLECTHEART rate sensor (some thing like this as in link
- DIGISPARK ATTiny85
- Small rechargable battery
- O.Led display(ssd1306)
- A plastic Identity card sample (NOTE- we are going to cut it and change it so Don"t use original one that you use that might create a problem, get a duplicate or old plastic Identity card sample )
EXTRA MATERIALS WE NEED
- Hot glue
- Duct tape or other simple tape
- Needle
- Thread
- Spare cloth
Remove the sticker of identity card and make a cut as illustrated in pic above for battery, Attiny85 and O.LED display
you can also change it and make cut according to your own design and concept.
Now solder the wires as described below:-
DIGISPARK ATTINY85 ---------------------SSD1306 O.LED Display
Pin0----------------------------------------------->SDA Pin
pin2----------------------------------------------->SCL Pin
5V------------------------------------------------->VCC
GND---------------------------------------------->GND
solder the wires according to above connections and as illustrated in pic above
Now open the Arduino IDE and upload the code below to DIGISPARK or you can Downlode the code from Link below
To Know more about how to upload the code to Digispark you can take the help of google.
Now after uploading the code fix all the things with hot glue and duct tape and battery as illustrated in pics above..
Congratulations you have done Have fun with it amaze your friends wit such a unique Identity card
Step 3: Congratulations You Have Made the Smart Identity Card Have Fun and Surperise Your Friends With Such a Uniquie I CardMake the connections between OLED and DIGISPARK ATTINY85 as below
DIGISPARK ATTINY85 ---------------------SSD1306 O.LED DisplayPin0----------------------------------------------->SDA Pin
pin2----------------------------------------------->SCL Pin
5V------------------------------------------------->VCC
GND---------------------------------------------->GND
Connect LED and HEARTBEAT Sensor as below
LED---------------------------------------------------DIGISPARK PIN 4
HEART SENSOR OUT ------------------------>DIGISPARK PIN 1
HEART SENSOR VCC------------------------->DIGISPARK 5v PIN
HEART SENSOR GND------------------------->DIGISPARK GND
NOTE :-must use original HEARTBEAT sensor available online for accurate reading and making things work, as I don't have that sensor so I have make my own from a photo diode that do not show correct reading, So must use HEART SENSOR available online store like on amazon, ebay etc
Now uplode the below code from Arduino IDE.
#include #include
int senval=0;
void setup()
{
oled.begin();
}
void loop() {
senval=analogRead(1);
analogWrite(4, senval-600);//change it according to your sensor type
oled.clear();
oled.setCursor(0, 0);
oled.setFont(FONT8X16);
oled.print("your text"); //your text here
oled.setCursor(0, 2);
oled.println("Heart rate");
oled.setFont(FONT8X16);
oled.print(senval-600);//change it according to sensor
delay(2000);
oled.clear();
oled.setCursor(0, 0); //top left
oled.setFont(FONT8X16);
oled.print("ASHWINI KUMAR");
oled.setCursor(0, 2);
oled.setFont(FONT8X16);
oled.print("pulse rate");
oled.setCursor(0, 4);
oled.setFont(FONT8X16);
oled.print(senval);
oled.setCursor(0, 6);
oled.setFont(FONT8X16);
oled.print("yourtext@gmail.com");//your text here
delay(2000); }
After uploading the code fix all the things together with Hot Glue as illustrated in pics above then sew it to your shit as illustrated in pic above.
Step 5: Congrats You Have Done Now Enjoy It Amaze Your Friends by This Unique Project.


Comments
Please log in or sign up to comment.