The chess playing robot is a robot able to play against a real player in real time. The pieces are moved automatically from underneath the board using an electromagnet, which is moved around the board with an XY table.
It is a automated chessboard which recognizes player movement through image processing and finds a tackle move with a chess engine and makes a move with the help of Arduino and Raspberry pi which controls stepper, servo motors to make the correct movement.
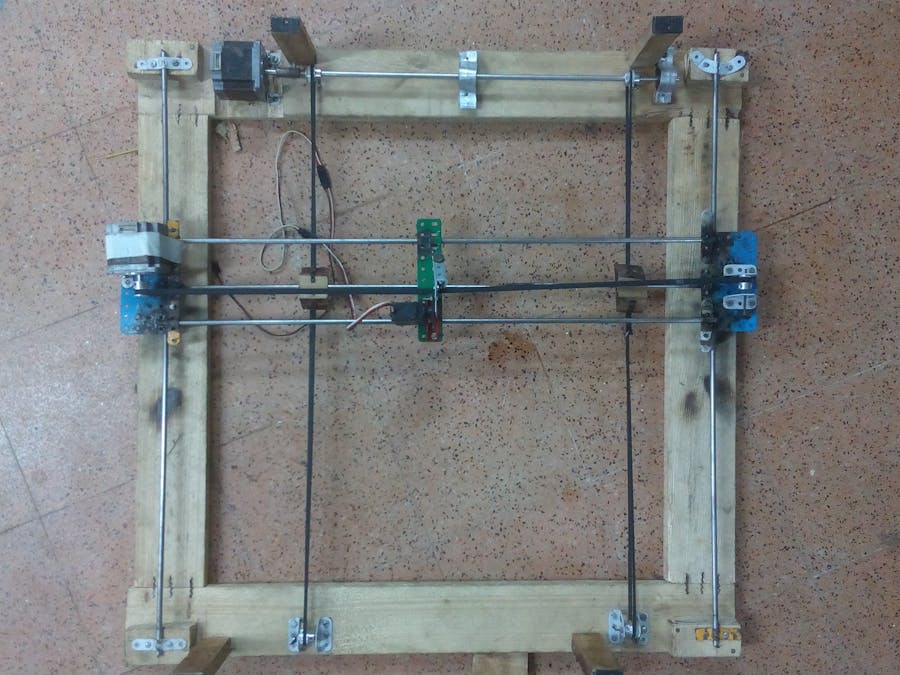
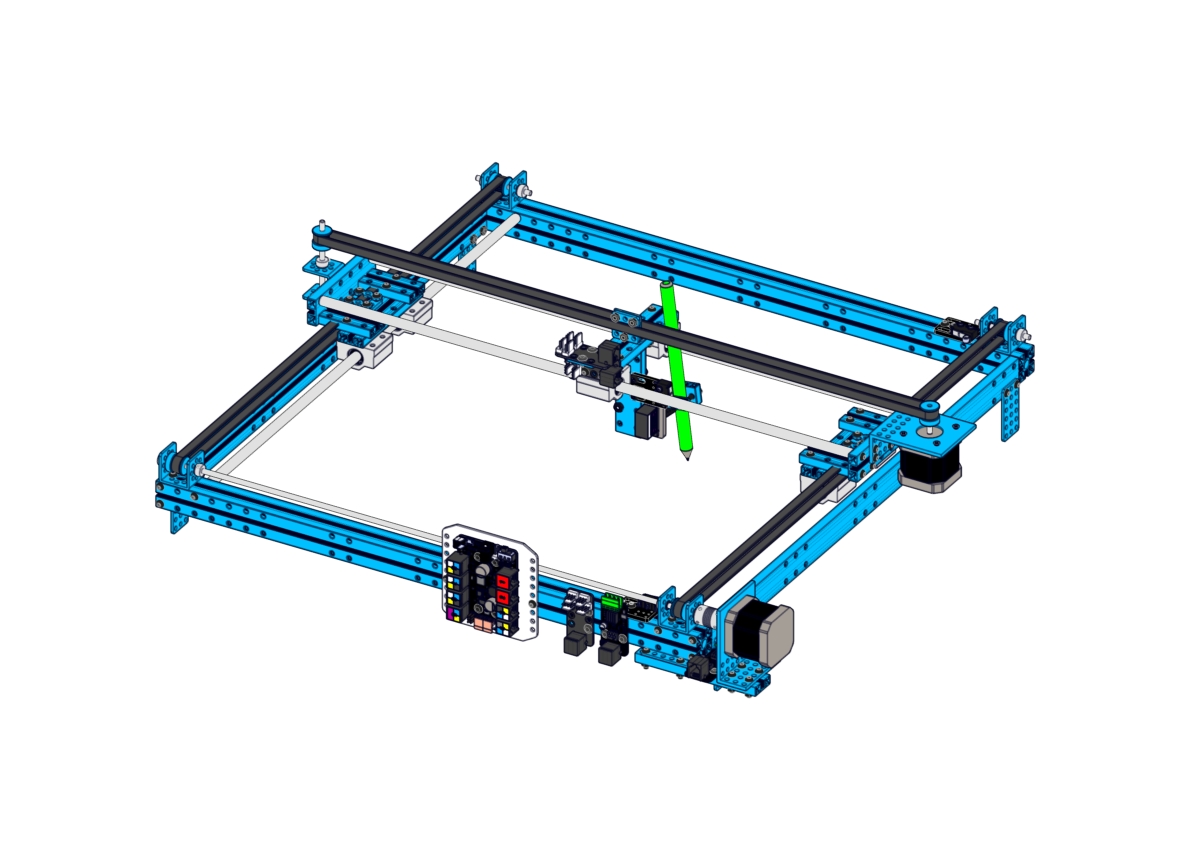
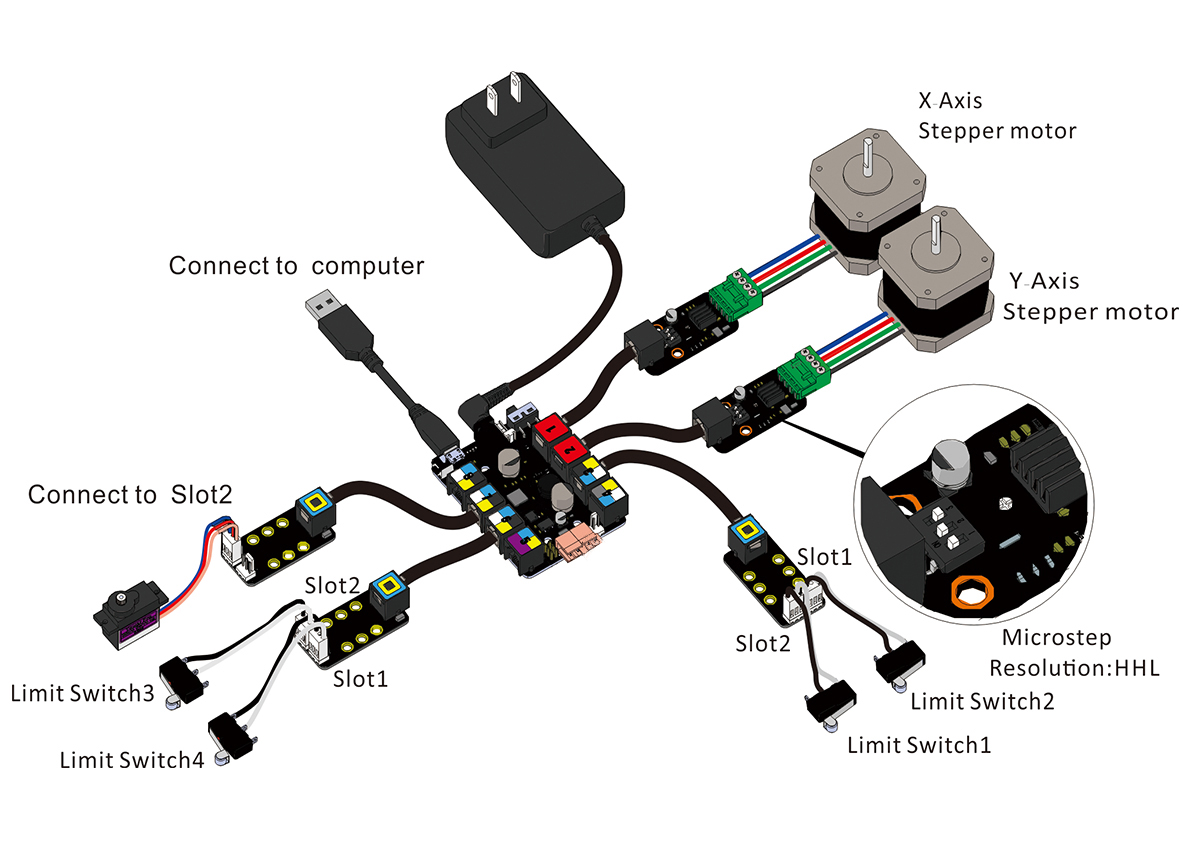
Important components:The x-y plotter has a two axis control and a special mechanism to raise and lower the magnet stand. The plotter has a hole in its base where the magnet stand goes through. Each axis is powered using a single stepper motor and belt. Magnet stand control is achieved using a servo. All electronics are controlled by an Arduino and a raspberry Pi and powered by a 12 volt wall adapter
When assembled, the base look like a square with the center cut out. Attach the four sides using the 4 screw holes on each piece. Bolts should slide easily though the base pieces and tension is achieved by tightening bolts on the nuts which should be loosely wedged into each strut as shown in following the picture.
Stepper motors
For our application the needed motors had to answer to a certain amount of requirements:
- Motor should be able to turn crazy (no limit in °)
- Motor should be precise (and possibility to control)
- Motor should be powerful enough
Stepper-motors are the motors that answer all the requirements listed above. This is thus the type of motor that has been chosen for this project.
For this project recycled stepper motors where used. Unfortunately no datasheets on those motors where given with those motors and they couldn't be found on the internet. The only information that was given is the maximum current they allow.
In order to know how to wire the motor tests first needed to be done. The two motors are 6 wire motors. Those motors can either be half or full wired in a circuit.
The type of pulleys used would depend on the type of timing-belt used. The main requirement for the timing belts is a sufficient length. Two of the main timing belt types, for small scale mechanical constructions, available on the market are MXL timing belts and GL2 timing belts. The ones available on the site had the inconvenience to be closed small timing belts. This is why we decided to use GL2 timing belts that can be bought on the internet on sites like E BAY for a much better price and on the wanted length.
The belts and pulleys doing exactly their work of easy movement under the surface of the chess board.
The rod which helps the movement of the servo clamped to the magnet move to the desired position and stick to the coin and move the coin to the respective place.
This is the stand to hold the Aluminium sheet in place and the coins over it.
For now we have completed the Image processing Part completely and it works awesome. We are trying this now for voice controlled Chess automation by means of using Alexa Services.
Hoping that this project will be a wonderful skillset for Alexa!
Every code that we used:The code for image processing and Alexa can be found in the dropbox link.


_ztBMuBhMHo.jpg?auto=compress%2Cformat&w=48&h=48&fit=fill&bg=ffffff)


Comments
Please log in or sign up to comment.