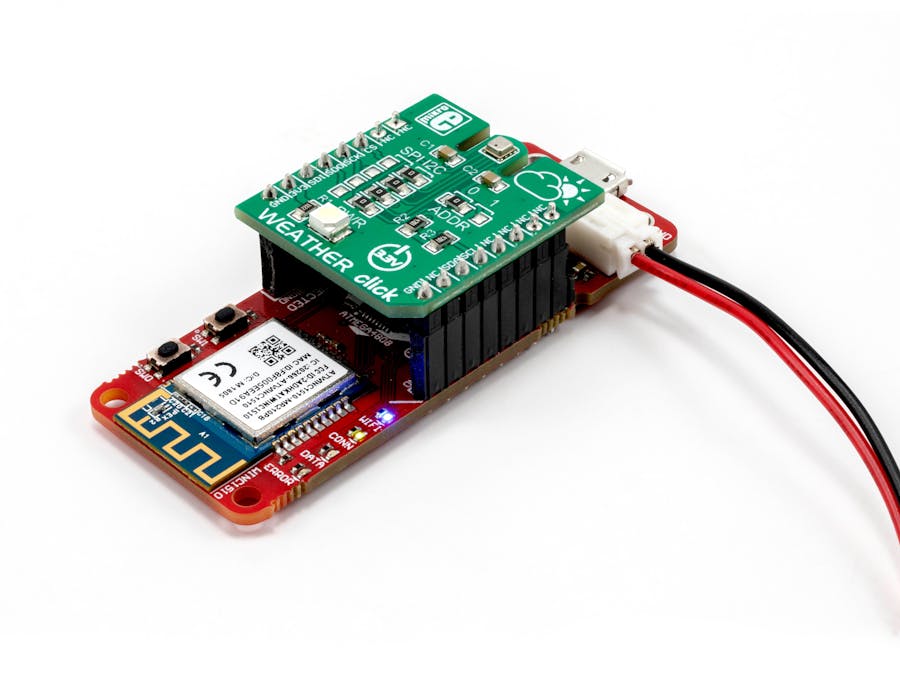
Out of the box, the AVR-IoT WG and PIC-IoT WG development boards already enable you to view temperature and light data from the cloud. Plug a MikroElektronika Weather Click into the MikroBUS socket to easily complete your weather sensor with humidity and pressure sensing.
By the end of the tutorial, you will have a complete cloud-connected weather sensor and you will be able to view temperature, light, humidity, and pressure data from the Microchip Sandbox within the Google Cloud Platform IoT Core.
Follow the Quick Start Guide to configure your Wi-Fi connection and start streaming temperature and light data.
Setup your development environment and get started on building a sensor node foundation. We will build off of this pre-configuration to customize the design.
Connect the Mikroe Weather ClickSimply plug the Mikroe Weather Click into the MikroBUS socket. You may need to solder headers onto the socket.
Program the MCU1. If you haven't already, follow the Quick Start Guide to run the startup demo to configure your Wi-Fi connection and familiarize yourself with the Google Cloud Platform Sandbox.
2. Setup your MPLAB X development environment, create a new project, and open your MCC config file if you have closed it.
Check that your MCC library versions match the following:
- MPLAB Code Configurator v3.85.1
- 8-bit AVR MCUs v2.02
- AVR-IoT WG Sensor Node v1.2.0
- Foundation Services v0.1.34
3. Add the AVR-IoT base firmware to your project by following the Basic Sensor Node Foundation tutorial
4. In Device Resources (bottom left) and scroll to the list to expand the MikroE-Clicks folder
5. Under Sensors, select and add the Weather click
6. When you add the Weather module to your project, an EasySetup dialog window will appear. Explore the dialog window to see useful information about the Mikroe Weather Click.
7. Under the Configuration tab within the EasySetup dialog box, ensure that GenerateExample is selected.
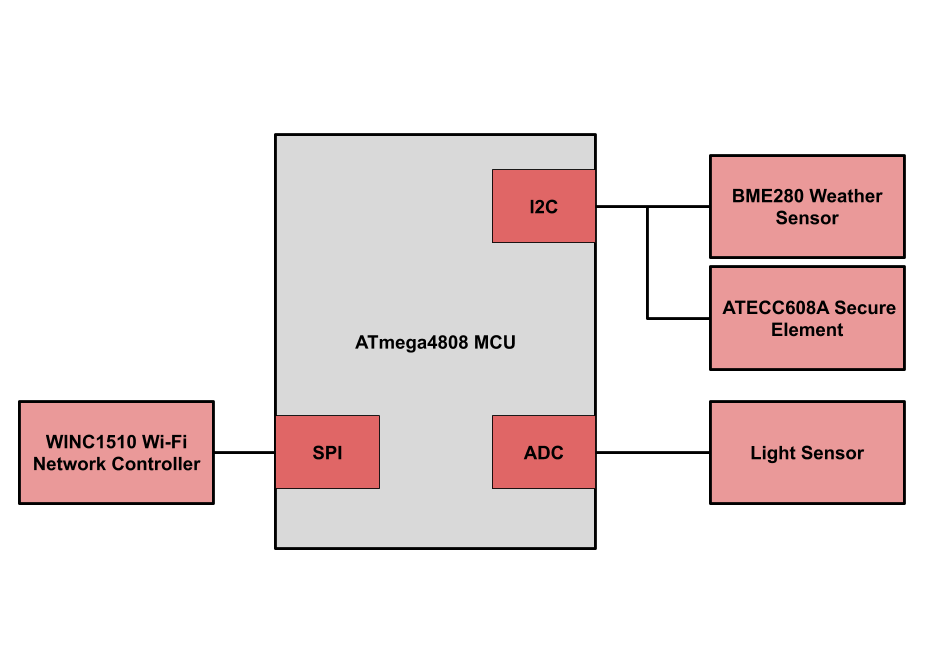
8. The Weather Click uses I2C to communicate with the MCU. The I2C pinshave already been configured because the bus is also used for the temperature sensor and ATECC608a secure element.
9. Before generating the files, check the Notifications tab. Depending on which library and MCC versions you're using, you may get the following warning:
If you have that warning:
- Navigate to the Pin Module (listed under System in Project Resources)
- Locate PD5, and change the ISC to DigitalInput Buffer Disabled
- Navigate back to the Notifications tab and make sure the Pin Module warning went away
10. Press the Generate button to add the files to your project
11. Verify the files have been added by checking the mcc_generated_files folder
12. Navigate the Main.c file, and add weather.h to your directives
#include "mcc_generated_files/weather.h"
13. Find the sendToCloud() function, and modify it as follows:
void sendToCloud(void)
{
    static char json[100];

    // This part runs every CFG_SEND_INTERVAL seconds
    // collect data from embedded light sensor
    int light = SENSORS_getLightValue();

    //collect data from weather click sensors
    Weather_readSensors();
    uint8_t temperature = (uint8_t) Weather_getTemperatureDegC();
    uint8_t humidity = (uint8_t) Weather_getHumidityRH();
    uint8_t pressure = (uint8_t) Weather_getPressureKPa();

    //send data to cloud
    int len = sprintf(json, "{\"Light\":%d,\"Temp\":%d,\"Pressure\":%u,\"Humidity\":%u}", light, temperature, pressure, humidity);

    if (len >0) {
        CLOUD_publishData((uint8_t*)json, len);
        LED_flashYellow();
    }
}
Take a look at how this code works:
The sendToCloud() function is invoked automatically every pre-defined interval period (typically 1 second).
The light sensor measurement is performed during the sendToCloud() function through calling SENSORS_getLightValue() in the sensor_handling.c file. The temperature, humidity, and pressure measurements are called from their respective functions in the weather.c file. Note that there is also an embedded temperature sensor on the AVR-IoT WG board.
Then, the sprintf() function is called to create a JSON formatted string (json), which is used to display the data in the cloud sandbox. The JSON formatted string is modified in this code snippet to accommodate the humidity and pressure readings.Compile Code
We recommend that you modify the compiler settings to optimize efficiency. For this tutorial, we used the AVR 8-bit Toolchain 3.6.2.
To modify compiler settings, click on the gear icon in the dashboard (bottom left corner):
Select the AVR compiler, navigate to avr-gcc, and select the Optimization menu
- Select s as the optimization level
- Uncheck "Pack Structure members together"
- Select OK and navigate back to the IDE
Click on the Hammer and Brush Icon to Clean and Build your code
Program the device by clicking on the green arrow Make and Program Device icon
If you have not already, follow the Quick Start Guide to configure a Wi-Fi connection.
On your PC, navigate to the Curiosity Drive, and click on the CLICK-ME.HTM file to view your unique URL.
Until you migrate to a private google cloud account, this URL will always link to your device, so be sure to write it down so that you can access your weather data from anywhere.
That's it! We plugged a LiPo battery into the connector on the AVR-IoT board so we can take our weather sensor anywhere with a Wi-Fi connection.
Comment below to ask questions, give feedback on this tutorial, and share screenshots of the weather in your area!
TroubleshootingIf you are having trouble connecting to Wi-Fi:
- Make sure you are using a 2.4GHz connection.
- While the WINC1500 Wi-Fi Network Controller can support enterprise level security (what you'll usually see at your office or university), this is not part of the demo. I usually configure a hot spot on my phone.
- We've had the most seamless experience using a Wi-Fi SSID that has no special characters. For example, we use "MCHP.IOT" instead of "MCHP's IOT"
- Make sure you're dragging "WIFI.CFG" and not accidentally dragging "WIFI (1).CFG" if you've downloaded multiple while troubleshooting
If you are having trouble with MCC:
- Make sure you have the correct versions installed by following the development requirements tutorial and also referencing the image labeled MCCLibrary Versions located at the top of this tutorial


Comments
Please log in or sign up to comment.