The basics:
This device will water your plants for you. It was designed for outdoor use (balcony, terrace or any other place where the plants are not watered by rain) but will work indoors just as well.
The details:
- The brains of the irrigation system is an Arduino Uno with sensors (see parts list)
- At first it will measure the air temperature. If that is at least 5°C, the program will continue, otherwise it will stop, because it's too cold for watering.
- Then it will check if there's enough water in the reservoir (e.g. a simple bucket) using an ultrasonic sensor. If there isn't, the pump won't switch on, because dry-running would damage it. If there is:
- Next it will check if watering is even necessary using a soil moisture sensor. If watering isn't required, nothing will happen obviously and the measuring cycle will repeat after a few minutes. If the soil is too dry:
- The RF transmitter will switch on the remote control power socket for 10 seconds which will supply power to the pump, thus watering your plants.
- The measuring cycle will repeat after a minute until soil moisture exceeds the given threshold value. This intermittent watering (10 seconds every minute) has proven to be better than continuous watering, because the water needs some time to sink down to the bottom of the planter, where the soil moisture sensor is positioned. With continuous watering, there would be already too much water in the planter before the sensor can detect it.
- A timer switch between mains power and the device is recommended. A setting that provides power twice a day (mornings and evenings) will prevent watering around noon, which may cause damage to your plants and is a waste of water anyway.
- Arduino Uno
- Soil moisture sensor (e.g. from Sparkfun)
- Ultrasonic sensor (e.g. HC-SR04)
- DHT11 temperature-humidity sensor
- 434MHz RF-transmitter
- remote control power socket
- timer (optional)
- small indoor fountain pump (submersible) + hose
RF codes:
For the transmitter to be able to switch the remote control socket on and off, you first need to figure out the codes sent by the remote to the socket. For this see library https://github.com/sui77/rc-switch for tutorials and example code
Planter
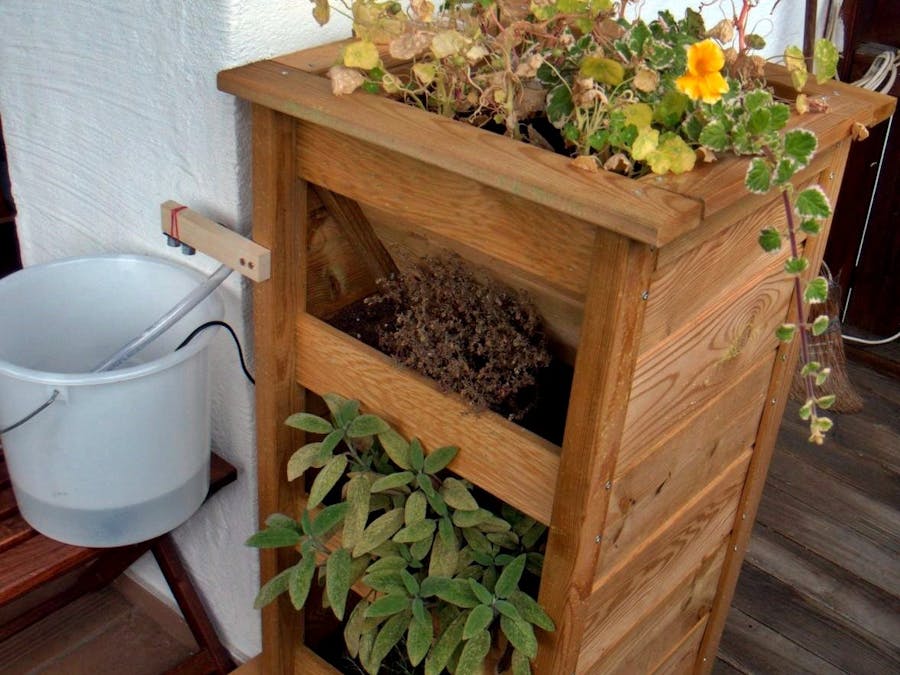
Currently the system uses a column planter that looks like this:
Mine was available at my local DIY-store as a kit, but you can use any other planter/vertical garden system or even build your own from scratch.
AssemblyArduino and sensors
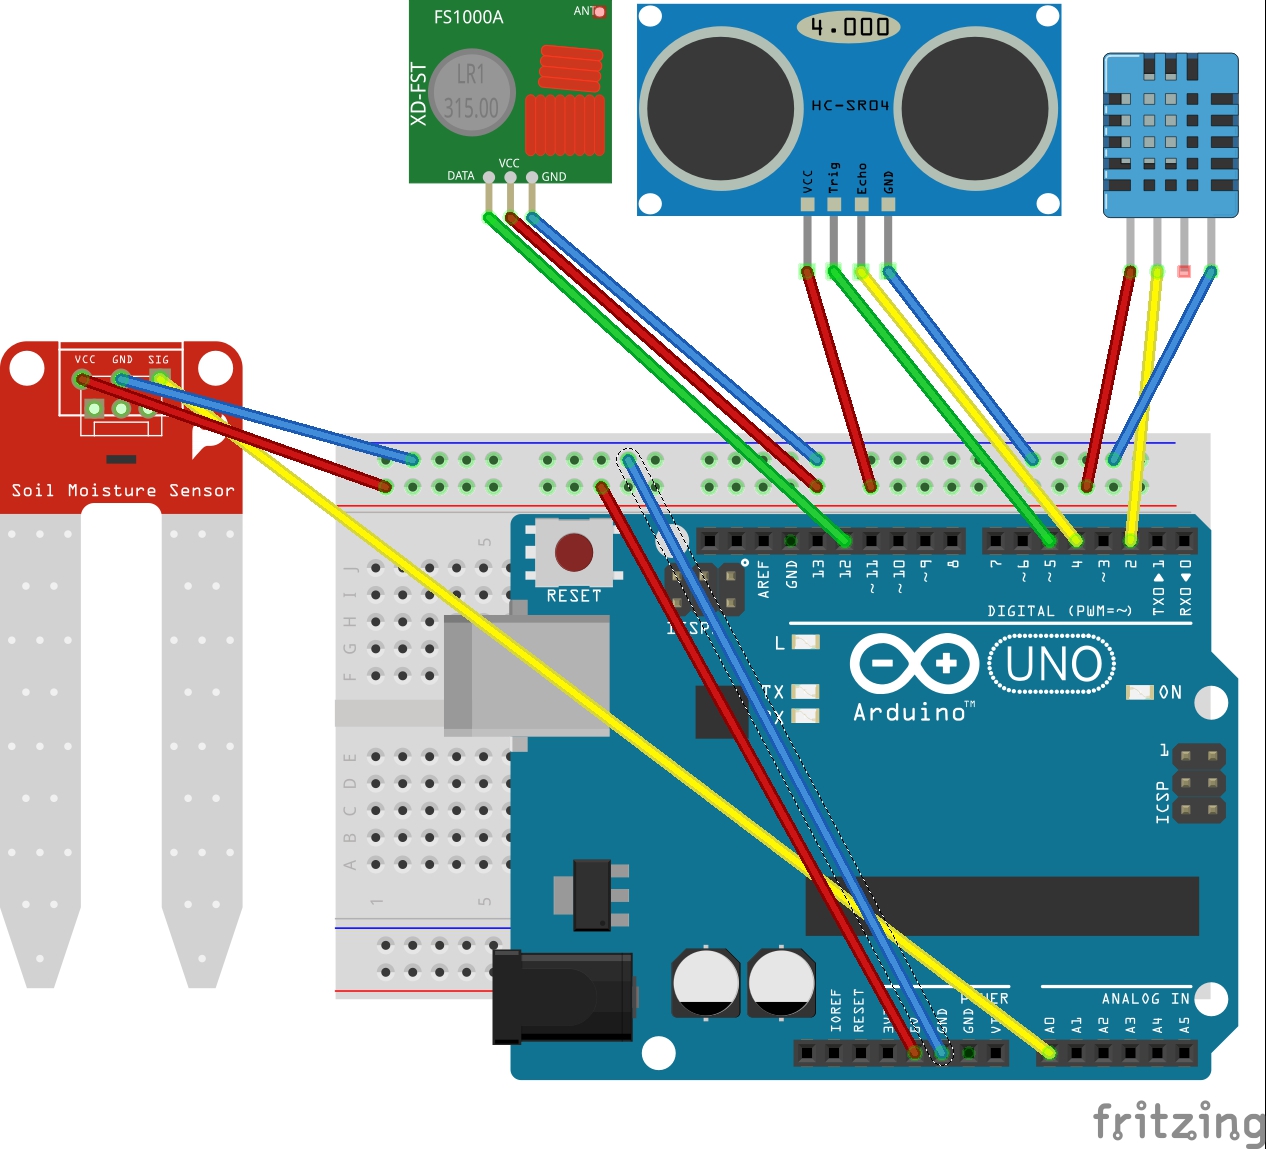
see Fritzing diagram and Arduino sketch in attachments
Power supply
The timer is plugged into the mains socked and set to e.g. 7.00-8.00 am and 7.00-8.00 pm. The remote control socket and the Arduino are plugged into the timer, the pump gets plugged into the remote control socket.
Planter
The planter is filled with soil all the way down from top to bottom with the plants sticking out from the sides. The hose from the pump goes into the top, the soil moisture sensor should be placed close to the center at the bottom. Because the soil is one continuous body, the water gets distributed more or less evenly throughout the planter.
The pump is submerged in the water bucket, which is placed beside the planter.
I tried using an Adafruit Feather HUZZAH ESP8266 instead of the Arduino, but as of yet without much success because of the differences in operating voltage: 3.3v for the Feather, but the ultrasonic sensor needs 5v. Also, with the Feather it is extremely difficult to get consistent readings from the soil moisture sensor (analog signal).
I will continue experimenting with Wi-Fi capabilities for the device because it would be useful to be able to view the sensor readings remotely. I did manage to display temperature and humidity readings from the DHT11 on Adafruit IO using the Feather but that didn't work in combination with the ultrasonic sensor.
Suggestions on solving this would be gladly accepted.


_ztBMuBhMHo.jpg?auto=compress%2Cformat&w=48&h=48&fit=fill&bg=ffffff)


_3u05Tpwasz.png?auto=compress%2Cformat&w=40&h=40&fit=fillmax&bg=fff&dpr=2)
Comments
Please log in or sign up to comment.