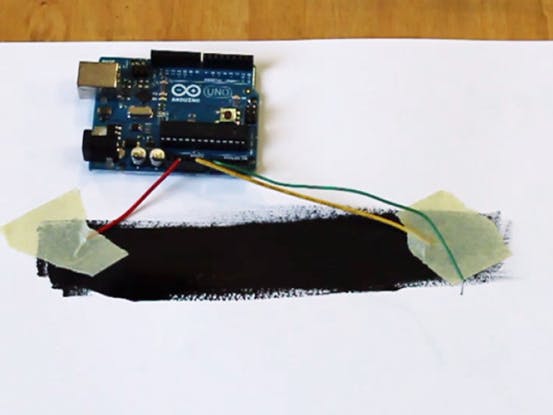
In this tutorial we are going to make a simple potentiometer using a strip of Electric Paint. This is one of the fundamental ways to use the material as it makes a great variable resistor. The principle of the interaction is to vary the voltage received by the wiper based on its position on the pad of paint. For this tutorial you’ll need some Electric Paint, a piece of paper, an Arduino and some jumper wires (or any wire that can connect the Arduino). The potentiometer is one of the fundamental ways to use the material and in the future we’ll be doing more tutorials which show you how to use this simple interaction as a cool and flexible interface.
Materials: To begin you will need:
1 x Electric Paint 50ml
-
Paintbrush
Paper
Arduino
Jump Wires
USB Cable
Step 1: Video tutorial
To begin, watch the video and then copy the code below
Links
Step 2: Code
Copy and paste this code into a new Arduino sketch, making sure to select the correct board and serial port.
/*
Making a potentiometer with Bare Paint
Attach one wire from +5V to one side of a pad of Bare paint
Attach second wire from Ground to other side of same pad of paint
Wire connected to Analog Pin 0 acts as wiper
*/
int sensorValue = A0; // This is the wiper which moves along the pad of Bare Paint it is connected to Analog Pin 0
int ledPin = 9;// This is the LED which we will be dimming. It is connected to pin 9 and ground.
void setup()
{
Serial.begin(9600);
}
void loop()
{
sensorValue = analogRead(A0); // Read the value from the wiper
ledPin= map(sensorValue, 0, 1023, 0, 255); // map the value from the wiper (0-1023) to the range of the LED (0-255)
analogWrite(9, ledPin); // Change the brightness of the LED based on the remapped values received from the wiper
Serial.println(sensorValue); // print the values to the serial port
}
Links


Comments
Please log in or sign up to comment.