


This project started as a piggy back off of a previous project that I completed. That project was my first introduction with computer vision, and namely the OpenCV library. This newer version of the project, I decided to step up the difficulty by adding in an Arduino board, paired with servo motors.
This was the first time that I had ever dealt with servos in any capacity. I used my previous knowledge and experience with computer vision to create a program to control a servo. Originally, I wasn't sure quite what type of project I wanted to do. I thought maybe a robot that mimicked arm movements, or maybe even a robotic car that could be controlled by location of the hand in the webcam feed. Eventually I found inspiration when a friend showed me a project where two servos were being moved via hand tracking. I thought "YES! This is what I want to do!". and from then on, I went with this idea.
While browsing for parts, I found the Pan-tilt servo kit from Adafruit that gave me an idea. What if I used this kit and controlled it in a standard X/Y direction, similar to a gimbal. I immediately purchased the kit, and waited patiently. When it all arrived, I felt overwhelmed and excited, knowing that I was about to try something I had never done before. With the excitement full in my body, I got to work!
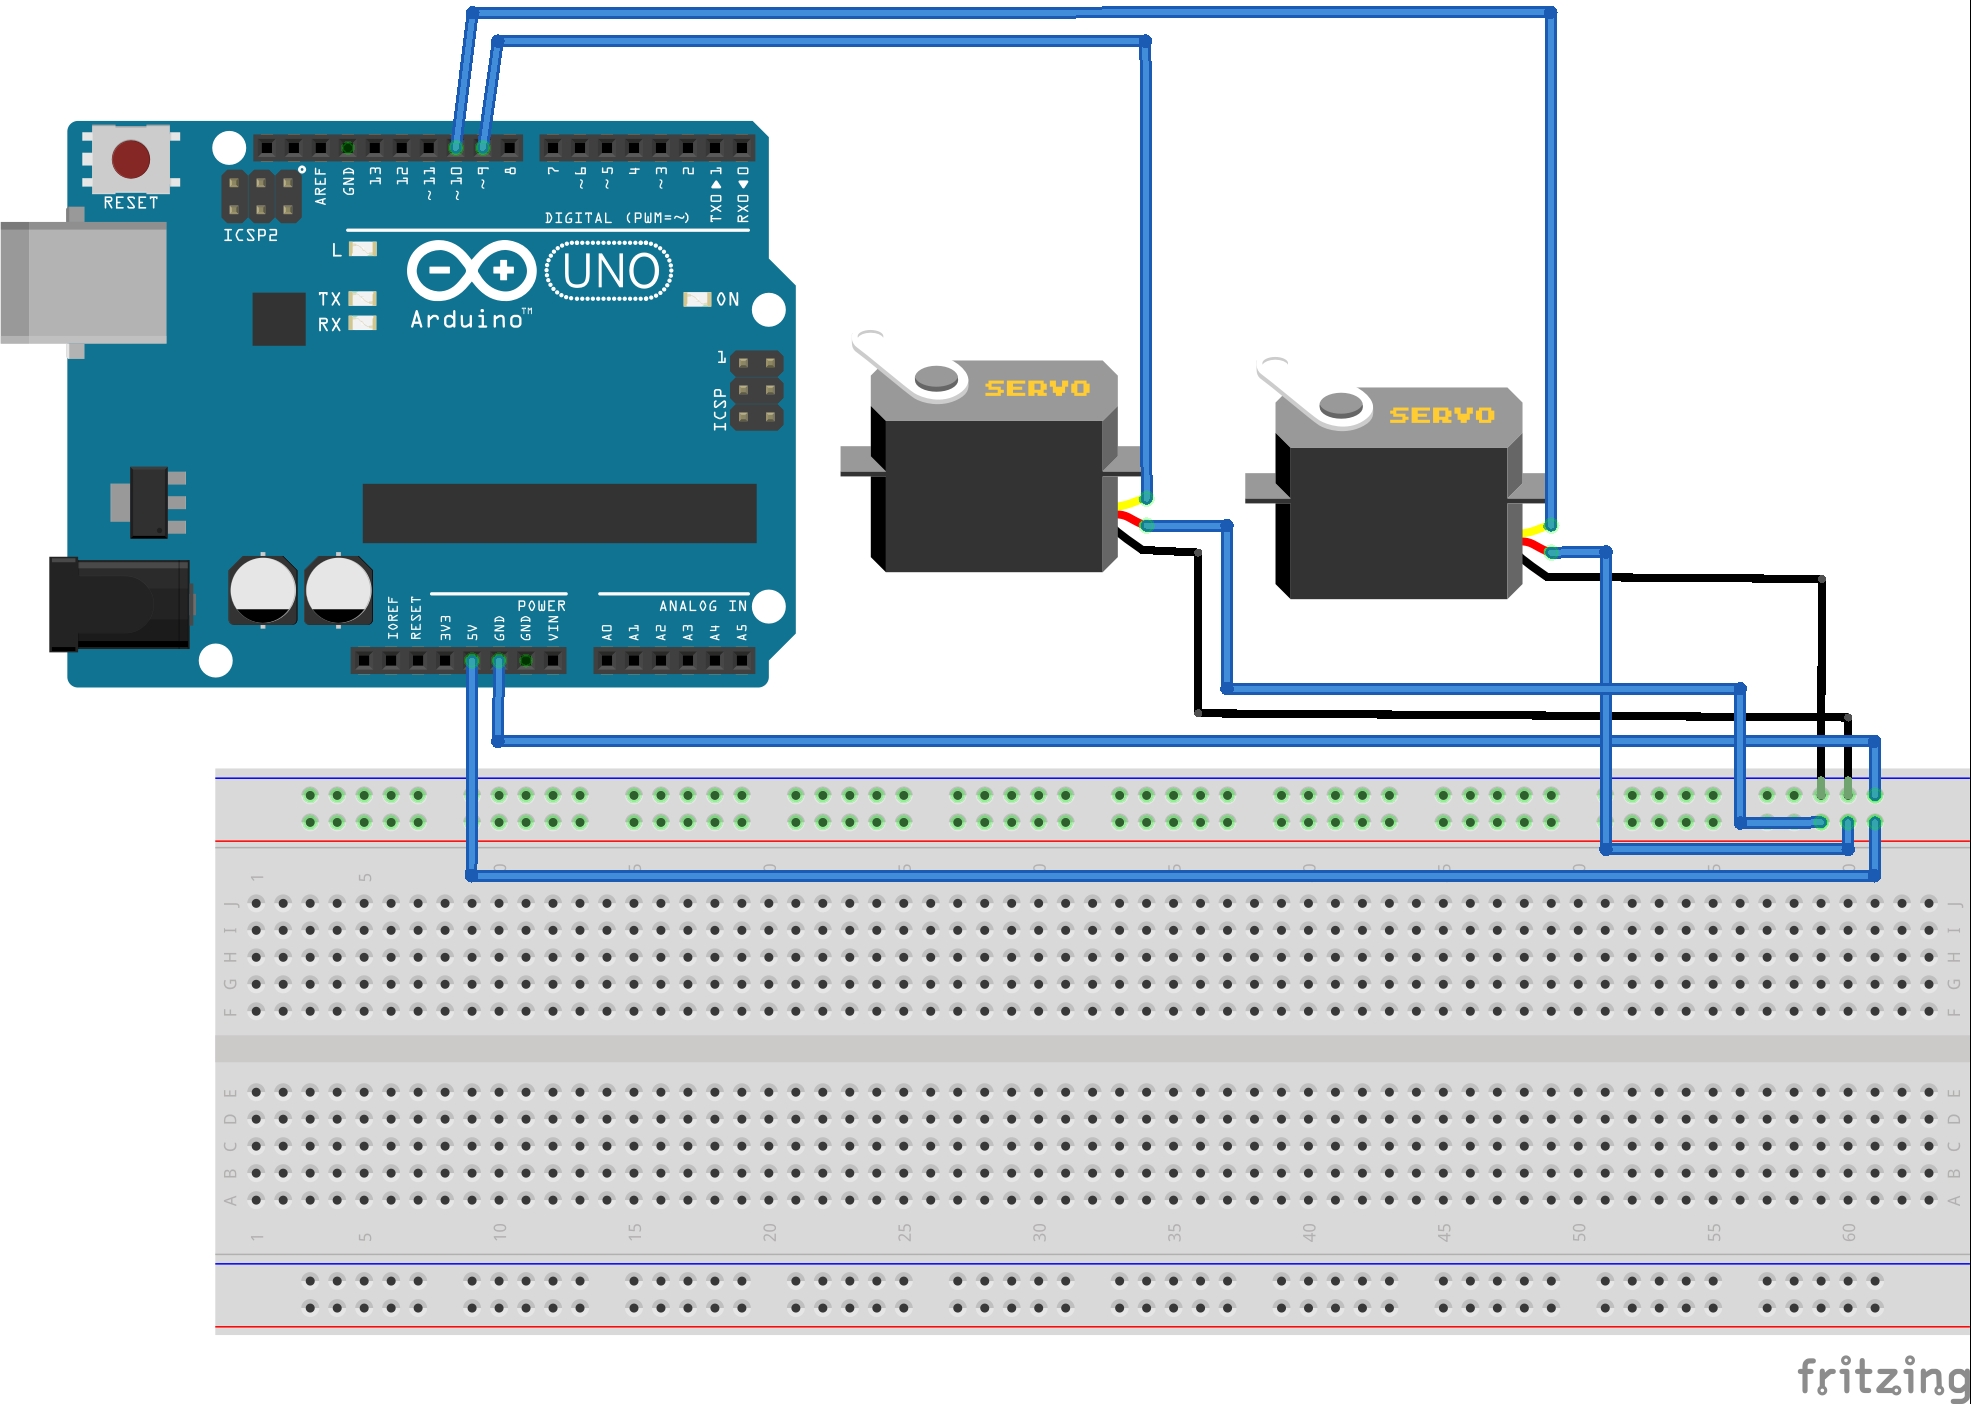
SetupAttaching the USB cable that comes with the Arduino to the host computer, the first step is determining the port that is being used for communication. There are a number of ways to do this but the easiest I found was using Arduino IDE. When the USB is connected to the Arduino board, in the bottom right of Arduino IDE, it says the COM port that is being used for the Arduino. The wires need to be ran from the Arduino pinouts to the data and power connections on the servos. The schematics for this can be seen in the SCHEMATIC section. Once all connections are made, it is time to start thinking about the code.
I personally started on the Arduino code first, as it has a physical, tangible output that is easily identifiable if it is correct or not. I played around with the limits of the given servos, careful not to overload them so as to not break the internal gearing. Once I was able to get the servos to move to a certain degree angle with simple input, I moved on to the Python code.
The Python code was definitely the most daunting task, despite my previous experience with it. I knew from my last project that I had to create a simple webcam feed via OpenCV, so that was the first thing that I completed. Once that was done, I moved onto the hand/finger tracking. I originally was planning on using the OpenCV libraries to do this, but it did not have the extensibility that I wanted, so I researched for an alternative and stumbled across CvZone's library which had finger tracking. Once I saw this in action, I knew it was going to be what I utilized. I imported this library and followed a simple tutorial on getting a very basic finger tracker to work.
After this, I worked on sending the information to the Arduino. Communication between the Arduino and Python code originally was not cooperating. I constantly had errors, and when I didn't, the data being sent wasn't readable. I had to think of a way to parse the data from the USB so that is was readable by the Arduino. That is when I came up with the idea of read until the new line character. This allowed me to easily determine which data is being sent, and is easily modifiable for the future purposes. After successful connection and data transmission, the Python code was finally able to move the servo! Once I had the first success, it was just a matter of time for me to build out the functionality the way I wanted it.
How It WorksThe easiest way to see it in action is watching the Youtube video below. It is a quick 2-minute video to show the overall demonstration of the project. If you would prefer to read how it all works, look below the video.
When the project is ready to be executed, the Arduino code must be flashed to the Arduino board, allowing it to run independently. After flashing, the Python code is ready to be executed from the host computer.
The program starts out in the Python section, first by initializing a USB serial connection to the Arduino, then by opening up a webcam feed for analyzing. NOTE: I utilized the onboard webcam via my computer. If using an external webcam, it will have to be connected and the code must be changed accordingly. After creating a webcam image feed, the program then calls the CvZone library's function: HandDetector. This allows for the program to identify when, and how many, hands are detected in the image. Once a hand is found, the program then determines if there is just one hand or two. There are separate functions for either case, although they are very similar in execution with a few changes. If one hand is found, the program determines the "type" of hand- either left or right. Then the number of fingers that are up on that hand are calculated. The fingers up are output by the system in the format of the thumb being the left-most digit, and the pinky being the right-most, regardless of the hand. Example: [1, 0, 0, 0, 0] is the thumb is up. This data is then sent to a helper function which tries to systematically go through and compare the number of fingers that are up to a predefined comparison. NOTE: All possible finger combinations are not included. If a comparison match is made, then the data is sent to the Arduino via another helper function. This data is formatted in such a way that the hand type, either left or right, as well as a predefined movement angle based on the number of fingers that are up. *The two hands up is the same as the one hand, with the difference being that both hand types are sent, with one movement angle.*
After the Python code makes the comparison and sends the data off the the Arduino, the Arduino parses the data, and then calls it's own internal helper function. This function compares the data sent to possible choices of hand combinations and movement angles. When a match is made, the servos are then told to move the predefined angle, up to the limit. If the limit is reached, the servos stay at the limit, without moving over it. If a match is not found, the servos are instructed to stay where they currently are without any movement. This prevents any strange movements from occurring.
This cycle continues until the Python code is ended.
Issues encounteredWhen first familiarizing with the Arduino and Python communication, the Python code would always crash, saying that the communication port was locked and could not be used. This was due to using Serial Monitor from within Arduino IDE. When making two code bases communicate, it is vital to not use Serial Monitor as it locks down the COM port and prevents data from being sent both ways.


Comments
Please log in or sign up to comment.