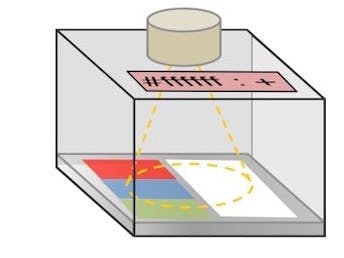
This project will aim to develop a low-cost colorimeter to detect colour changes in medical diagnostic assays, such as those for infectious diseases. The system will be intended for use in resource poor settings with the aim of improving diagnostic accuracy and sensitivity by removing user subjectivity from the interpretation of the test result. The system will be open-source and take a range of sample types to allow it to be easily adaptable to a large variety of colorimetric diagnostic assays.
TeamAndrew Stretton and Cassi Henderson
Explain functionality of software components (if any) as concisely as possible, developers should be able to figure out how your project solves their problem by looking at the code example. Ideally, this should be pseudo code or an abstract graphical representation of your code e.g entity relationship diagram. Consider adding a screenshot of your User Interface.
HardwareThis device makes use of a Raspberry Pi 3 and a Pi Camera to take and process the images. A 3D printed box with sample loading drawer and several LEDs control the illumination of the sample.
Assembly instructions:
- Laser cut top.dxf from 3mm black PMMA.
- Print box.stl and drawer.stl. We used PLA with 15% fill but adapt settings as needed for your printer.
- Attach drawer handle through screw hole in center of drawer.
- Fix 10 white LEDs in the 2 lines of holes in the top using Araldite Rapid. Allow to cure 24hr.
- Attach Pi camera to center square hole in top. Attache camera to RaspPi as specified by manufacturer. Attach RaspPi to screen as specified by manufacturer.
- Attach top to box using screws at each corner so Pi camera top is closest to the drawer opening.
- Connect LEDs in parallel each with a ~200 Ohm resistor to a 9V battery. Insert a potentiometer into the circuit (see diagram).
8. Adjust light with potentiometer to appropriate intensity.
Assembled hardware (minus battery and Raspberry Pi/touchscreen connections)
This system can be adapted for a variety of test formats. The case study presented here is for multi-color pH strips. Summarized process flow diagram:
Instructions for use:
- Power Raspberry Pi and camera through power bank and LEDs via the battery.
- Standards creation: Dip strip in solution of known pH. Load into drawer in sample slot. Run biomaker_camera.py to take image and process it to return LABspace color values for each color section. Save as part of analysis code as calibration value.
- Sample testing: Dip strip in solution of known pH. Load into drawer in sample slot. Run biomaker_camera.py to take image and process it to return pH value.
Biomaker Challenge 2017: Team 5
 Jim Haseloff


Comments
Please log in or sign up to comment.