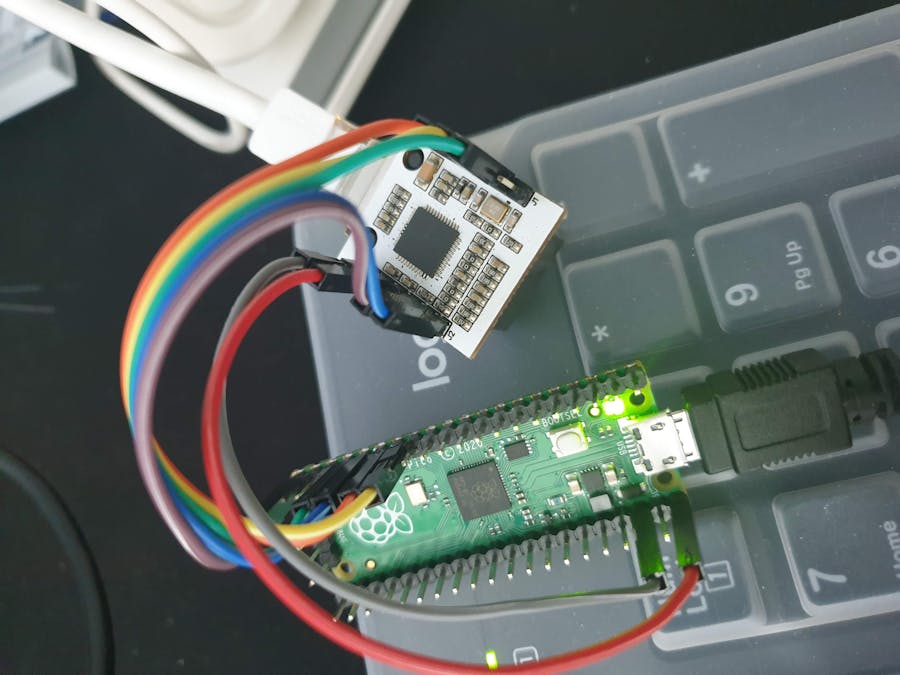
This project uses new WIZnet W5100S chipset + RaspberryPi Pico. For W5500 user, please see https://www.hackster.io/bjnhur/how-to-add-w5500-ethernet-to-raspberry-pi-pico-python-1-c7340c
1. new TCP/IP W5100S chip & WIZ810Sio module- S/W(F/W) compatible with W5100 (not H/W compatible, pin map is different from W5100)
- Product page : https://docs.wiznet.io/Product/iEthernet/W5100S/overview
- Support 4 Independent Hardware SOCKETs simultaneously
- Support SOCKET-less new Command: ARP-Request, PING-Request
- Support Auto-MDIX only when Auto-Negotiation mode
For beginner, use WIZ810Sio module - https://www.wiznet.io/product-item/wiz810sio/, It's H/W compatible with WIZ850io/WIZ820io.
2. Install CircuitPython on your Raspberry Pi Pico boardIt's very simple. Download & Copy uf2 file.
- Download the below uf2 file link on your computer
CircuitPython 6.2.0 - adafruit-circuitpython-raspberry_pi_pico-en_US-6.2.0.uf2
CircuitPython 6.3.0 - adafruit-circuitpython-raspberry_pi_pico-en_US-6.3.0.uf2
- Follow up the steps from below Adafruit page.
https://learn.adafruit.com/getting-started-with-raspberry-pi-pico-circuitpython/circuitpython
Push and hold the BOOTSEL button and plug your Pico into the USB port of your Raspberry Pi or other computer. Release the BOOTSEL button after your Pico is connected. It will mount as a Mass Storage Device called RPI-RP2.
Drag and drop the CircuitPython 6.2.0 or 6.3.0 UF2 file onto the RPI-RP2 volume. Your Pico will reboot.
The RPI-RP2 drive will disappear and a new disk drive called CIRCUITPY will appear. You are now running CircuitPython.3. Pin connect to WIZ810Sio (W5100S)
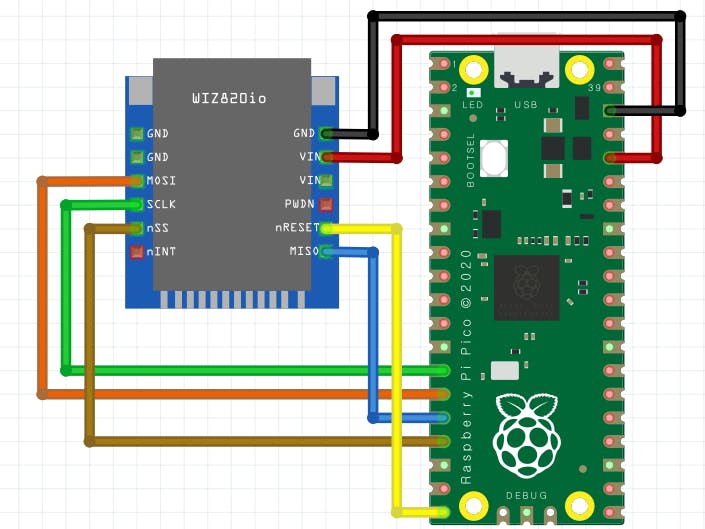
It's same as previous project, https://www.hackster.io/bjnhur/how-to-add-w5500-ethernet-to-raspberry-pi-pico-python-1-c7340c#toc-2--pin-connect-to-w5500--wiz850io-1
- Download new adafruit_wiznet5k library from https://github.com/bjnhur/pico-W5500/tree/main/lib - this lib supports WIZnet W5100S TCP/IP chipset.
For W5100S, you should use this adafruit_wiznet5k in the lib folder not original Adafruit one. The APIs are almost same. If you see the changes for W5100S, please see the code https://github.com/bjnhur/pico-W5500/blob/main/lib/adafruit_wiznet5k/adafruit_wiznet5k.py
- Copy whole lib folder into your Raspberry Pi Pico board via USB.
If you see the detail code for adafruit_bus_device and adafruit_requests.py, download from below link.
- https://github.com/adafruit/Adafruit_CircuitPython_BusDevice\
- https://github.com/adafruit/Adafruit_CircuitPython_Requests/blob/main/adafruit_requests.py
- Download https://github.com/bjnhur/pico-W5500/blob/main/Pico_W5500_Ping_Test.py
- Copy all code from download Pico_W5500_Ping_Test.py file or below code section.
- Paste code into code.py on your RaspberryPi Pico and Save it.
- Open putty for serial debug message. Before this, you should find the RaspberryPi Pico COM port number from "Device Manager" on your PC.
- Press "Ctrl+D" on the terminal window. you can see the messages as follows.
- Try to ping to your Raspberry Pi Pico + W5100S board. (Sorry Korean message, but, I'm sure you can understand ping result)
It's very simple.
- Please download https://github.com/bjnhur/pico-W5500/blob/main/Pico_W5500_WebClient_Demo.py or refer to below code section.
- Copy code and paste it to code.py on your RaspberryPi Pico.
- Save it, Done~
The code use DHCP, so set is_dhcp option.
line 51:
# Initialize ethernet interface with DHCP
eth = WIZNET5K(spi_bus, cs, is_dhcp=True, mac=MY_MAC, debug=False)
The code try to connect 2 URLs:
- "http://wifitest.adafruit.com/testwifi/index.html"
- "http://api.coindesk.com/v1/bpi/currentprice/USD.json"
If you have DHCP server in in your network, you can see No.1 "My IP address" message as belows. It's important! If you don't have DHCP server, please try to do this example with Manual IP setting (refer to previous Ping example).
If succeeded, You can see the message from adafruit.com, and JSON data from api.coindesk.com like this result.
Enjoy IoT!


_xcg7vos8ax_LjVH1Q6mKB.png?auto=compress%2Cformat&w=48&h=48&fit=fill&bg=ffffff)


Comments
Please log in or sign up to comment.