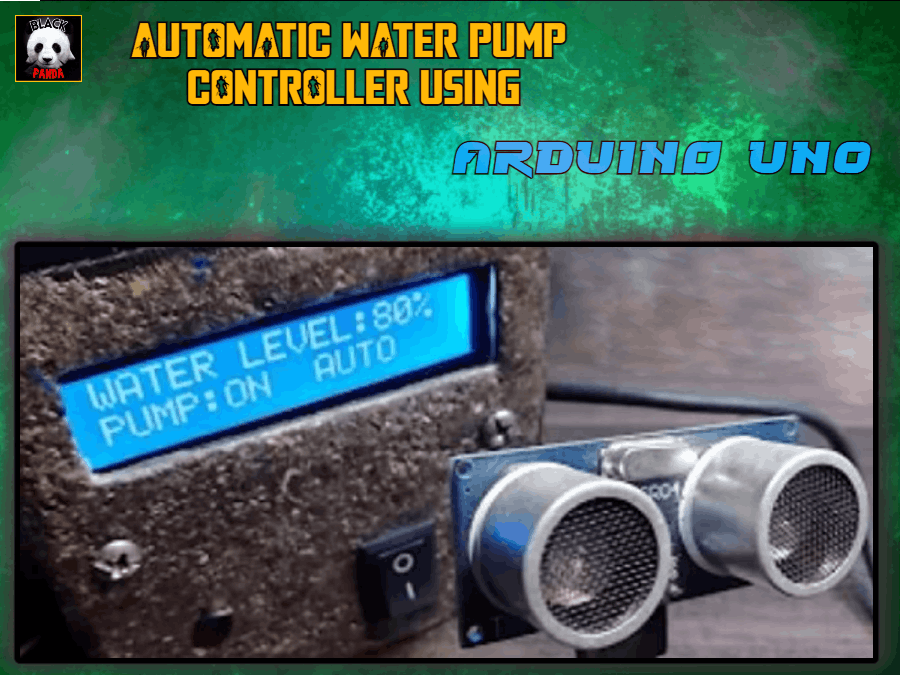
This is a little bit hard project. But I will explain it in a simple manner.
How It Works ?The Arduino turns the water pump ON/OFF by calculating the data received from the Ultrasonic Distance Sensor. If the data is a particular distance (In Code - Inches) less from the sensor, then the Arduino turns the water pump ON. After turning it ON, it checks if the data is a particular distance (In Code - Inches) high from the sensor, the the Arduino turns the water pump OFF.
How I made this projectI was worried about the overflow of the water from my water tank. I loses a huge amount of water from it. So, I started thinking of a way to get rid of it. I came with an idea of making a system which controls the water pump.
I started to think practically and wrote the code logically. But, I came with a bad news - "NOT WORKING PROPERLY".
Then I took my phone and started searching for one like this. After a while of searching, I got the article. It was from You Tube. This is not my project. It is owned by : Kiyani's Lab
Channel link : https://www.youtube.com/Kiyani'sLab
His video gave me the code for this project.
Components Required :-- Arduino Uno
- 16 x 2 LCD Display
- Ultrasonic Sensor (HCSR-04)
- Breadboard
- Potentiometer (10k)
- Jumper Wires (Female - Male)
- 1k Resistor
- Relay Module
- Push Button
- SPST Switch
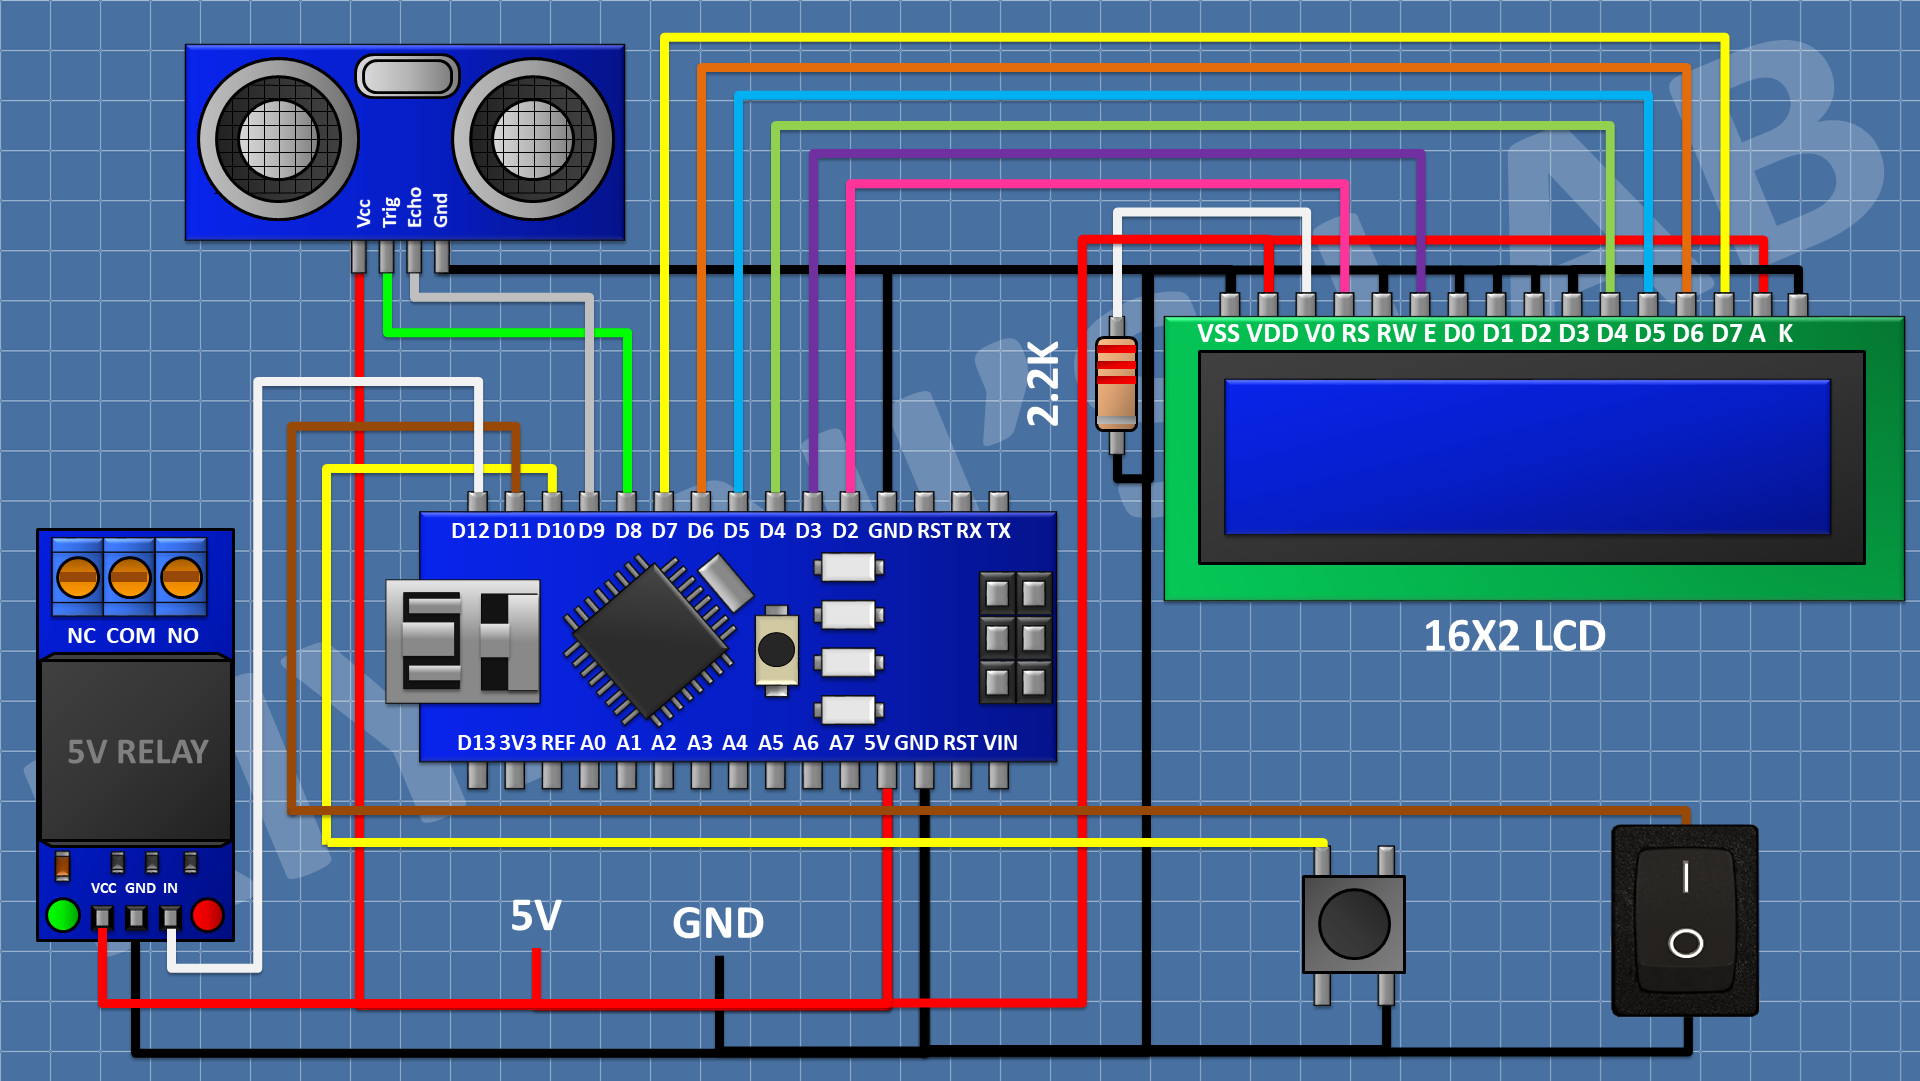
Do the wiring as shown in the Circuit Diagram
Here it is Arduino Nano.
You can use any of the Arduino Boards.
Ultrasonic Sensor To Arduino Uno :-Ultrasonic Sensor gnd(Ground/Cathode) to Arduino Uno's gnd pin. Its Vcc pin (5v/Anode) to Arduino Uno's 5v pin.
Its Trig(Input) pin to Arduino Uno's D8 pin and Echo(Output) pin to Arduino Uno's D9 pin.
LCD Screen To Arduino Uno :-VSS - GND
VCC - 5v
VEE/VO - Potentiometer Wiper Pin (Centre Pin). Potentiometer other two end pins to - One to Arduino Uno's 5v and and other to its Gnd
RS - D2
RW - Gnd
E - D3
D0 - Gnd/No Connection
D1 - Gnd/No Connection
D2 - Gnd/No Connection
D3 - Gnd/No Connection
We are not connecting LCD Screen's (D0, D1, D2, D3) pins because we are using 4 bit mode to display the text.
D4 - D4 (Arduino Uno/Nano/Mega/Any Other Board)
D5 - D5 (Arduino Uno/Nano/Mega/Any Other Board)
D6 - D6 (Arduino Uno/Nano/Mega/Any Other Board)
D7 - D7 (Arduino Uno/Nano/Mega/Any Other Board)
Led Anode [ Short Form - A] / (LED +) - 5v (Arduino Uno)
NOTE: Use a resistor while connecting (I used 1k). Otherwise the led may burn due to high voltage ⚠.
Led Cathode [Short Form - K] / (LED -) - Gnd (Arduino Uno)
RelayToArduinoUno:-
Connect Relay modules IN (Signal/INPUT) to Arduino Uno's D12 pin.
Relay's Gnd to Arduino Gnd. Its 5v pin to Arduino's 5v
MODE(AUTO/MANUAL)SwitchToArduino:-
Connect the switch's one end to Gnd of Arduino and the other end to D11 of Arduino Uno.
PUMP(ON/OFF|DISTANCESET)SwitchToArduino:-
Connect the push button switch's one end to Gnd of Arduino and the other to its D10 pin.
Working Video:-
Please subscribe to my You Tube channel
Channel Name :J4 JEVINS
Link :-https://youtube.com/J4Jevins
Please help me to reach 1k Subscribes :D


_ztBMuBhMHo.jpg?auto=compress%2Cformat&w=48&h=48&fit=fill&bg=ffffff)


Comments
Please log in or sign up to comment.