

Hardware components | ||||||
 |
| × | 1 | |||
| × | 1 | ||||
| × | 1 | ||||
| × | 1 | ||||
My project started as something I was going to 3D print just for fun. I started playing around with AutoDesk Fusion 360 and came up with a design for my basketball hoop.
I had never 3D printed anything before, so when I finished the design in the picture above I thought that it would turn out exactly like the picture, but no…
After I realized that the 3D printer wasn’t able to print everything that I designed on the computer I decided to try another way to design my basketball hoop.
I noticed that on my first printing attempt the arcs that were connected to the backboard and to the base did not print very well, so I started by taking those out.
Right after I took the arcs out it stroke me that the best way to approach this was by designing it in different pieces.
I started with the pole. I had the idea of making it like a screw that would just screw into the base.
Once I printed this I realized that it didn’t work, so I had to start over. I decided to go with the solid post and in order for it to fit in the base hole, I would just have to use Sand Paper to make it a little thinner; same thing for the backboard hole.
On the design above I still had the backboard and the rim together, which looking back at the first printed version didn’t turn out very well. For this reason I decided to make my Basketball Hoop into 4 different pieces.
And this was how the first prototype using separate pieces turned out.
After knowing that this design worked I decided to play a little with the filament colors and created a new hoop.
After finishing the hoop I decided to print a little basketball so that I could turn this cool thing that I had just designed and printed, into a cool small game, a table top game.
After having created this little game, that everyone that passed by the lab would play with, my teacher, Dave Holzwarth, asked me why not turning this into a bigger but still a table top game and make that my final project for the class.
I started brainstorming and designing my new game.
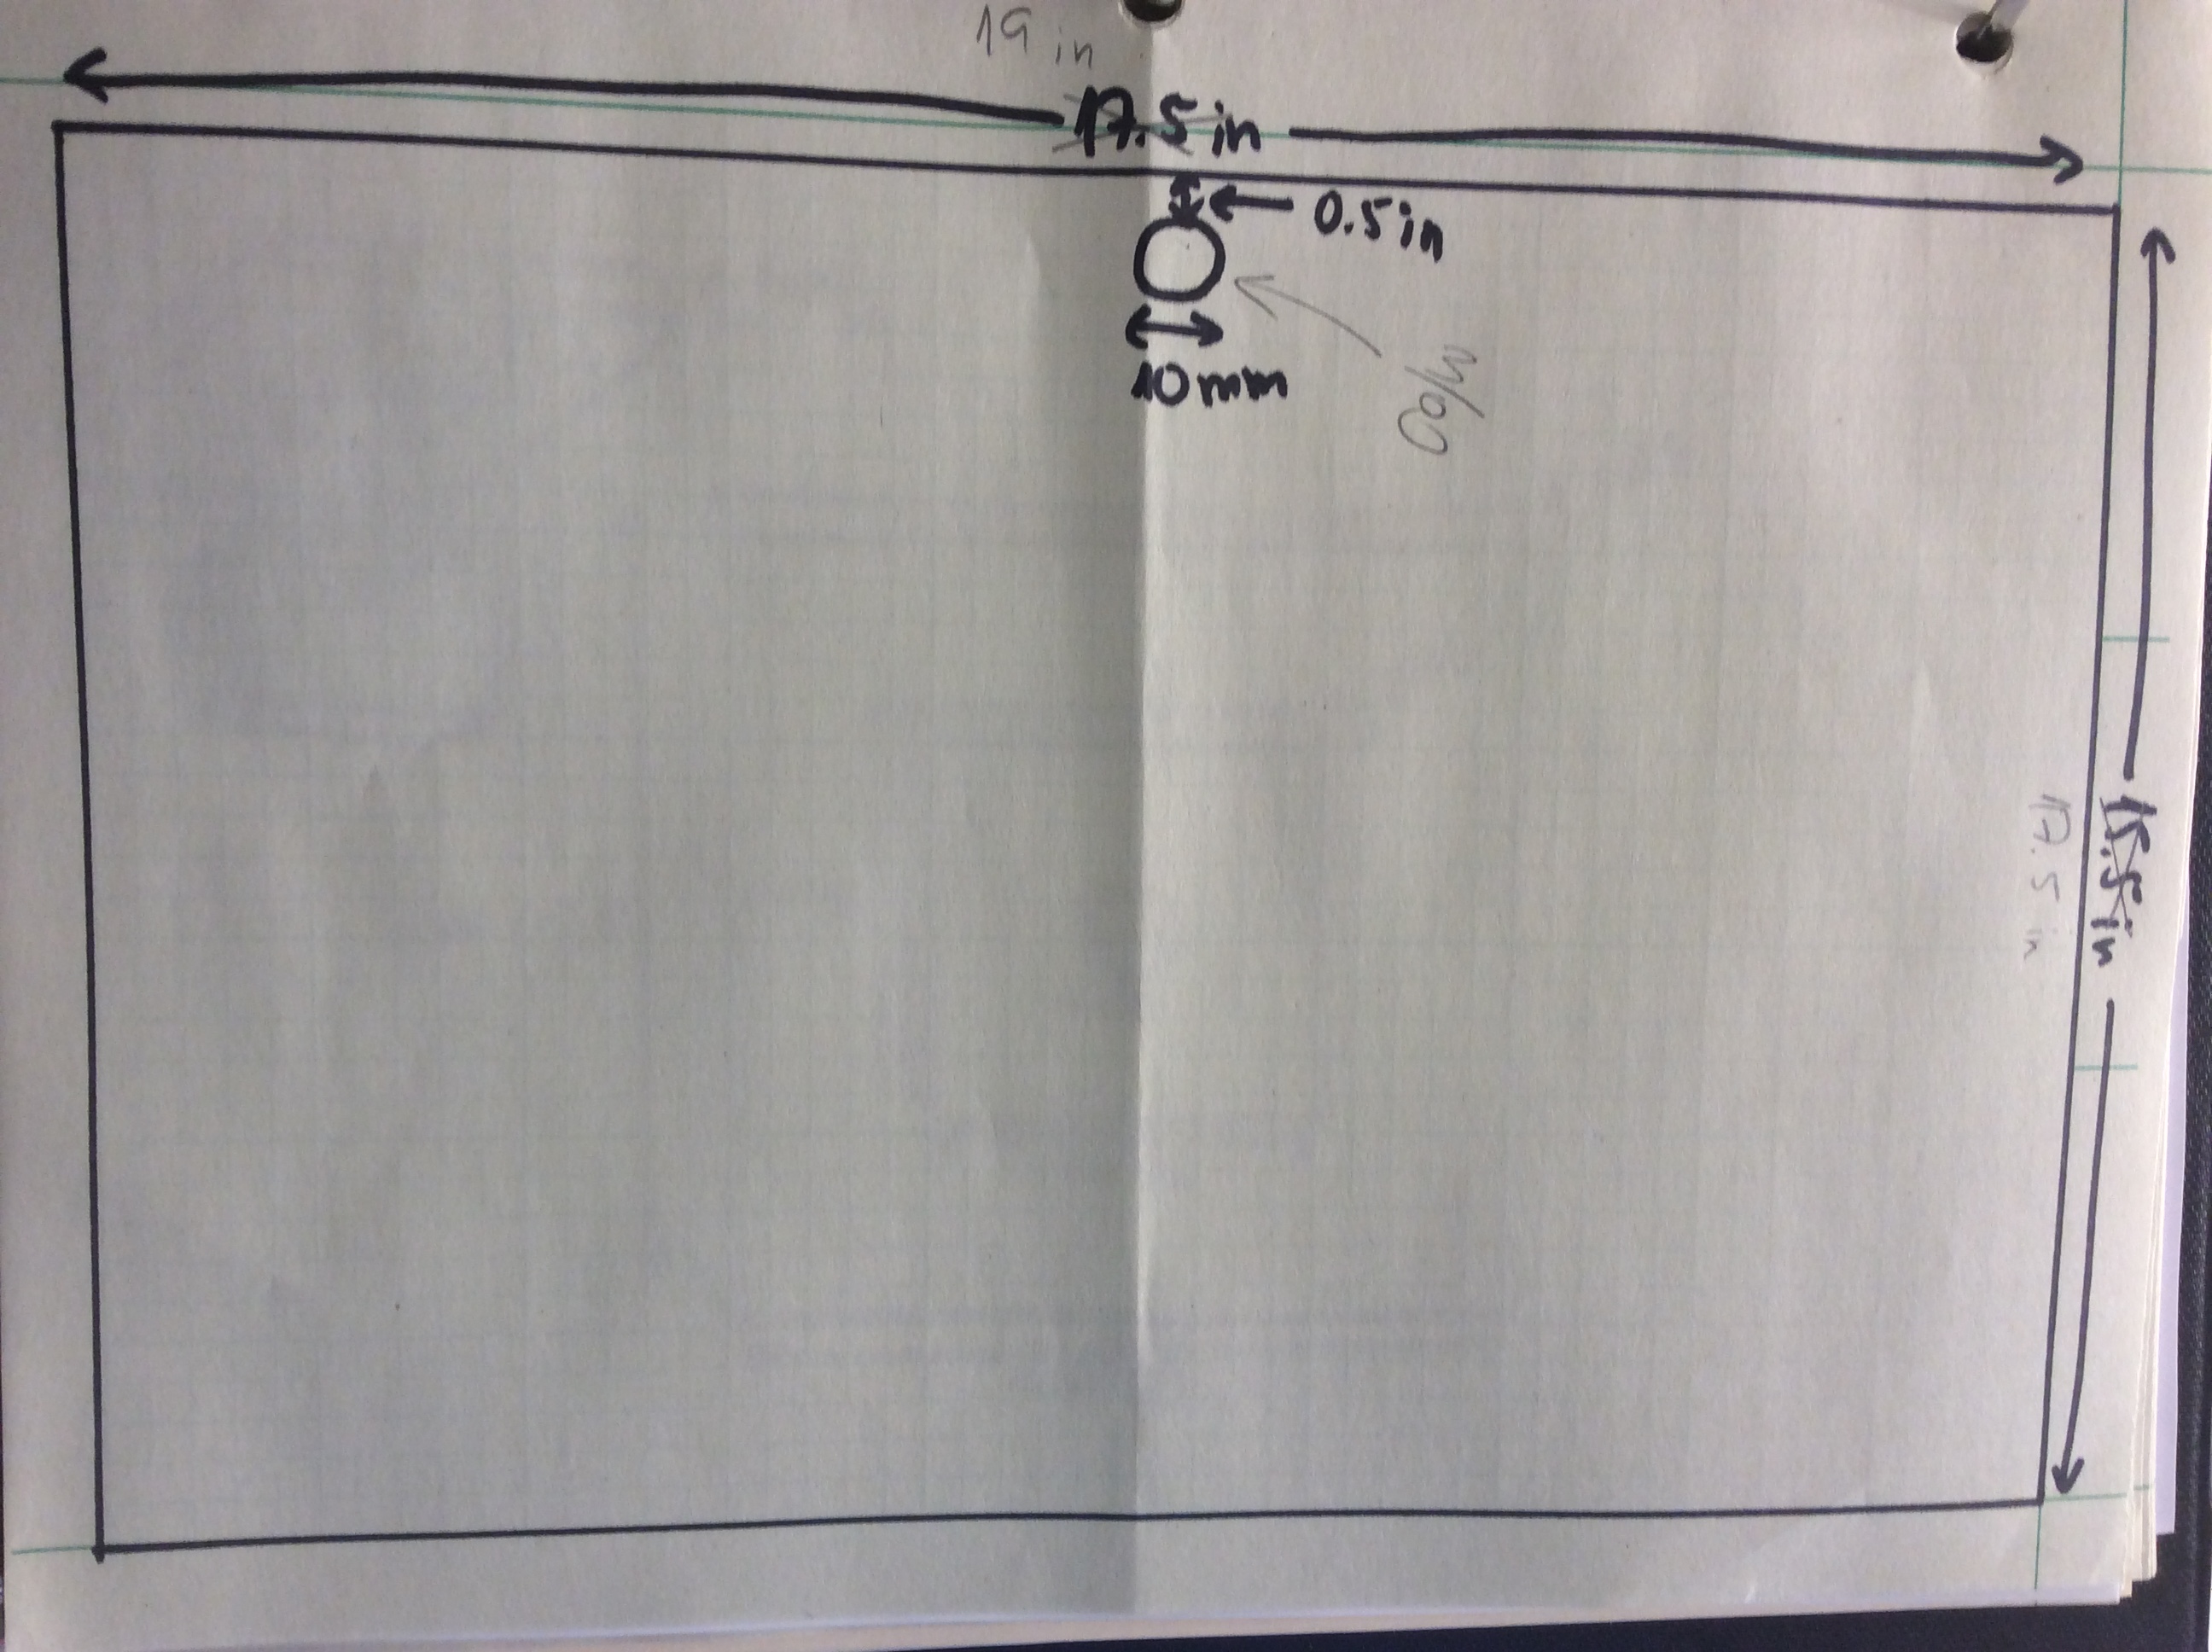
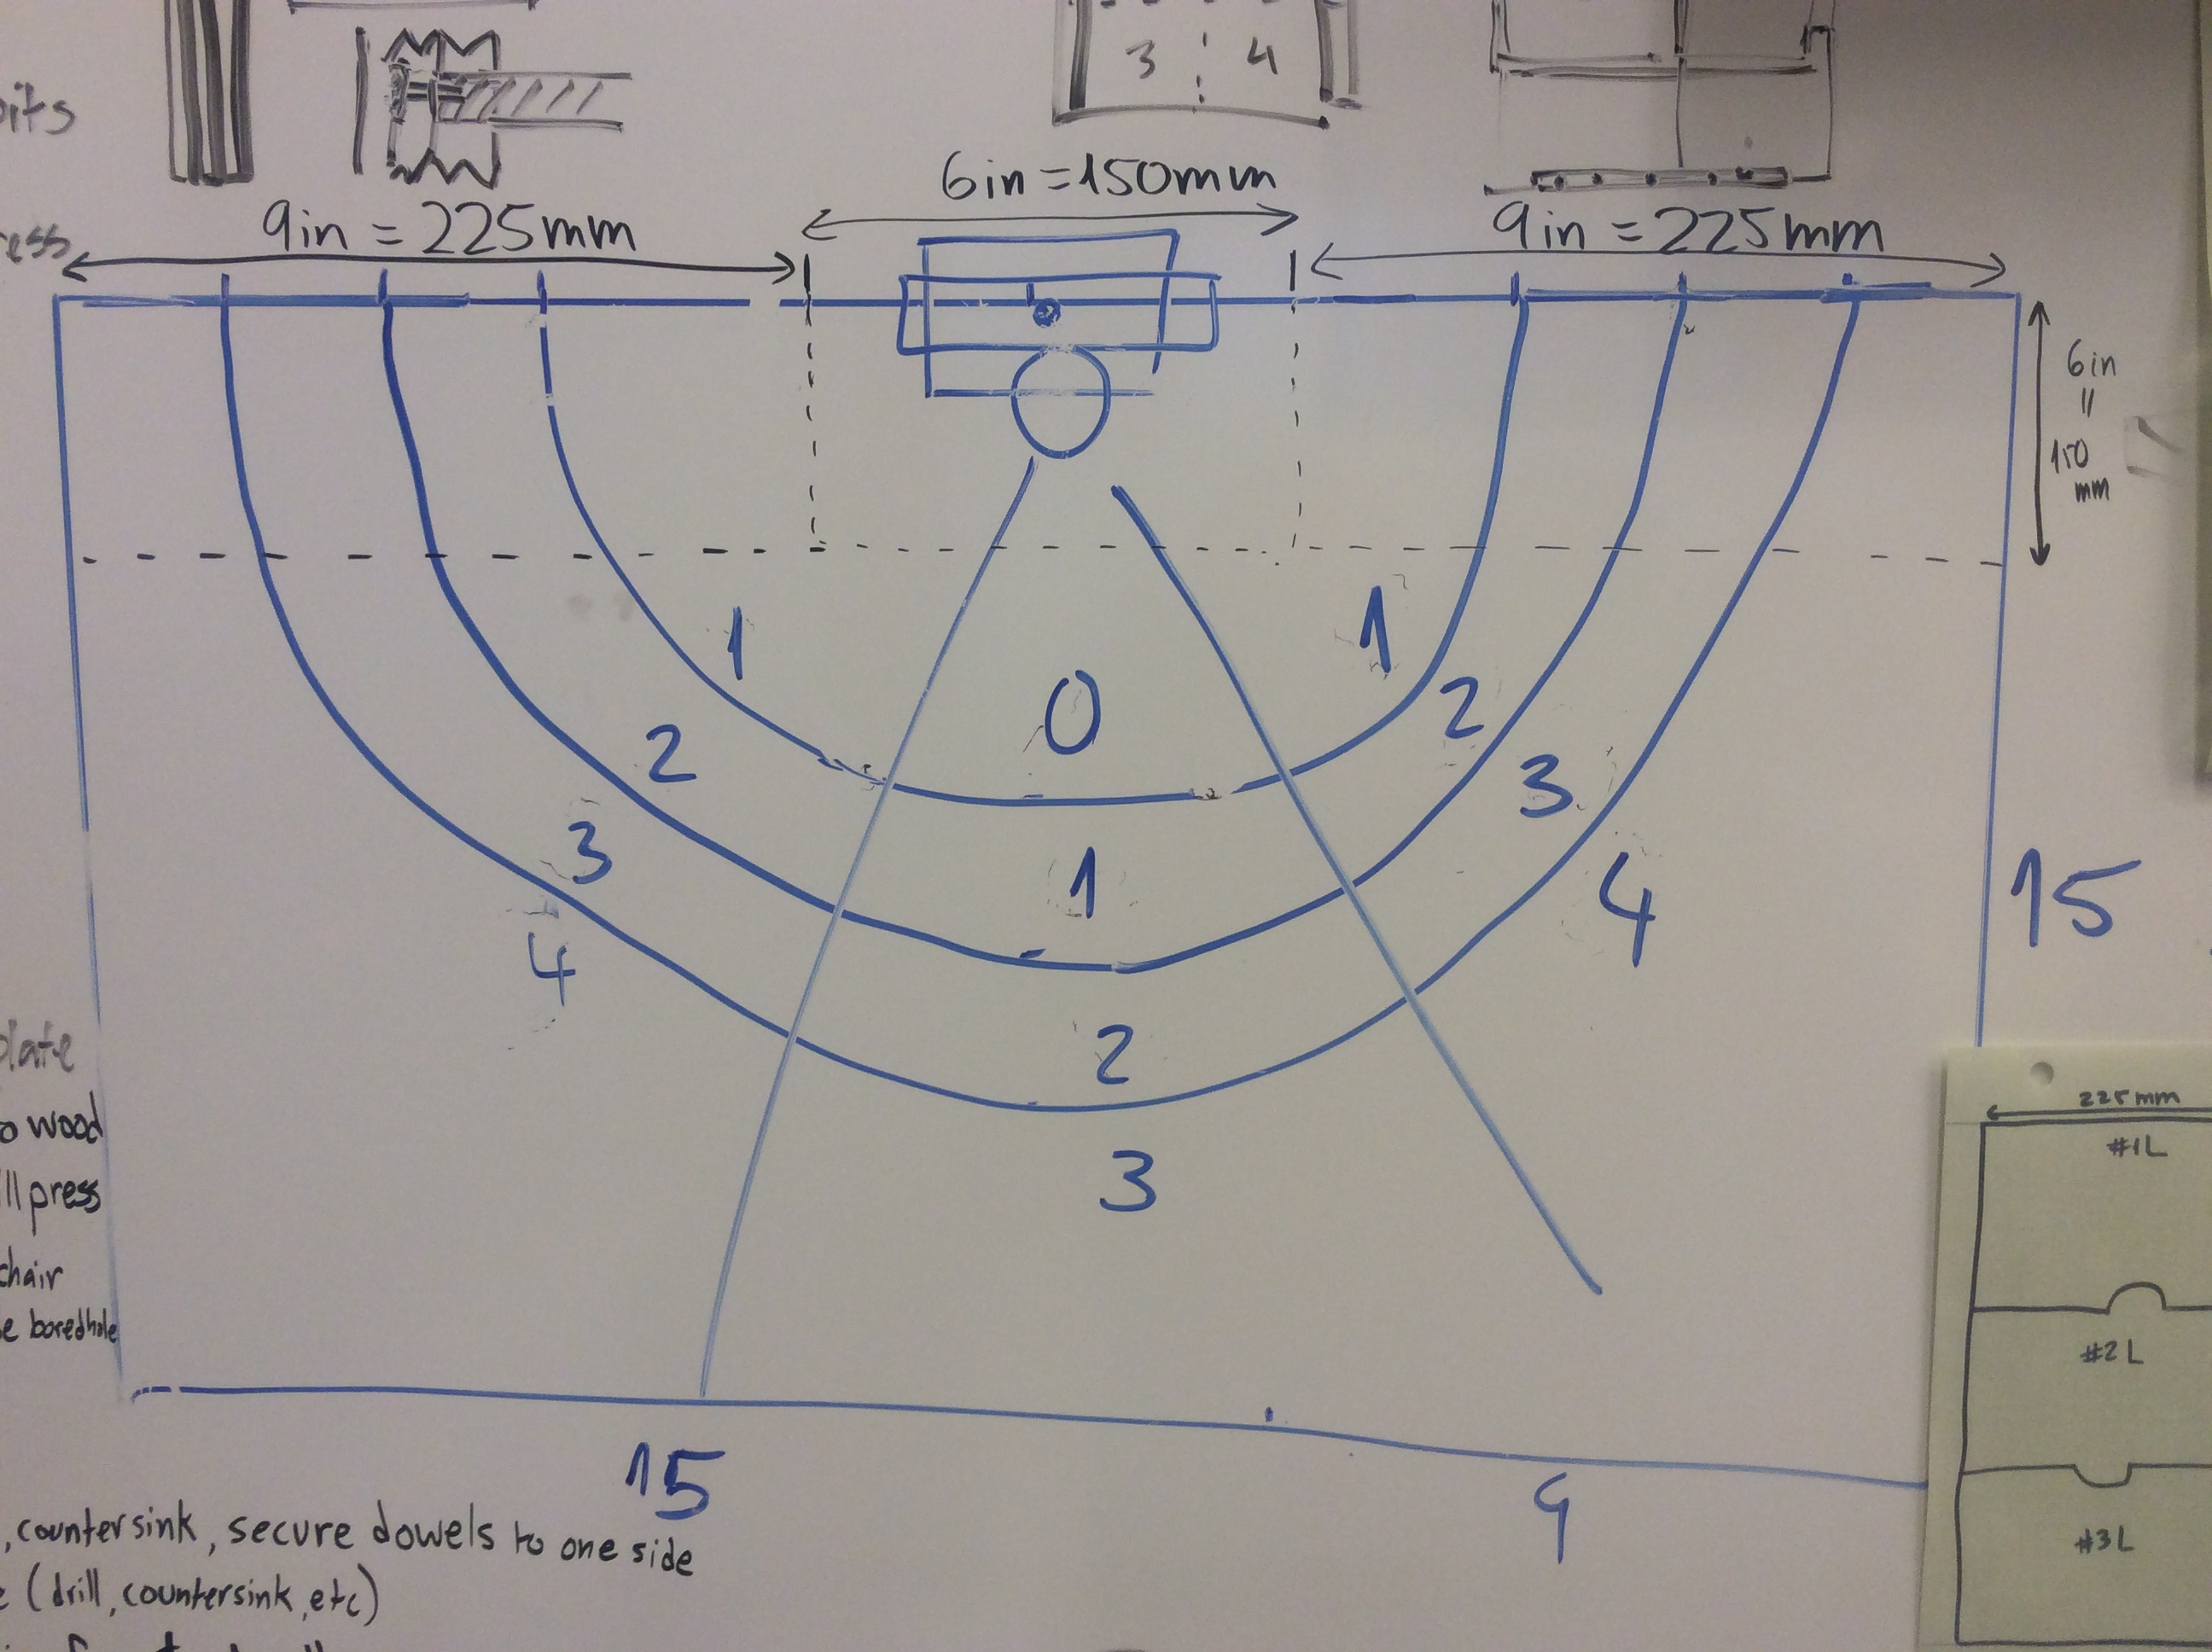
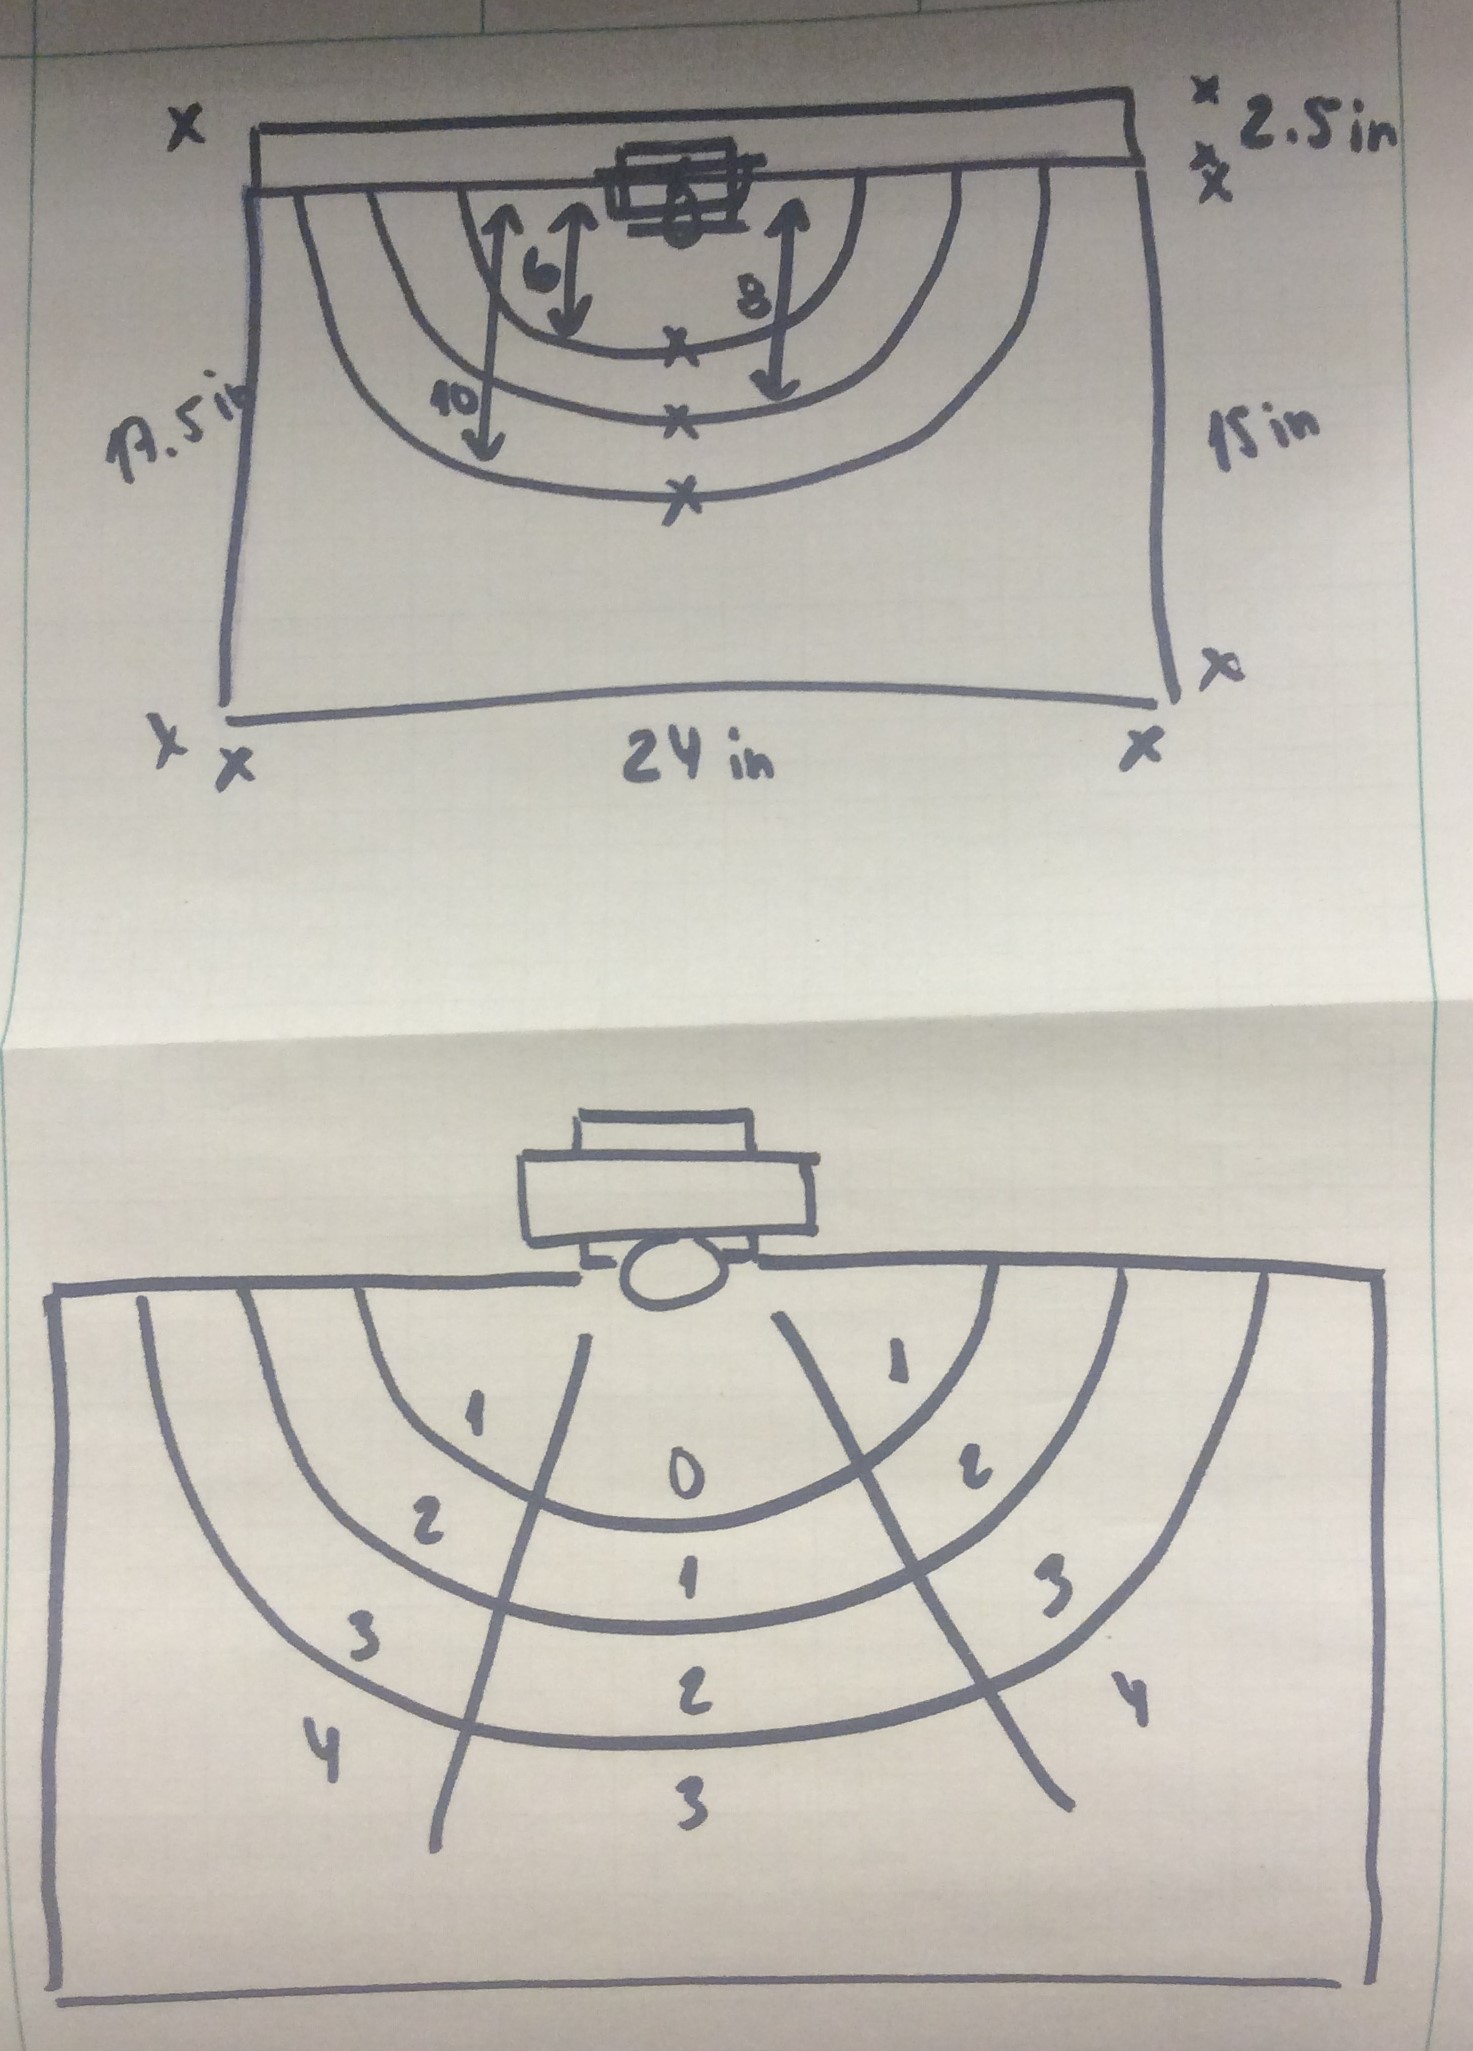
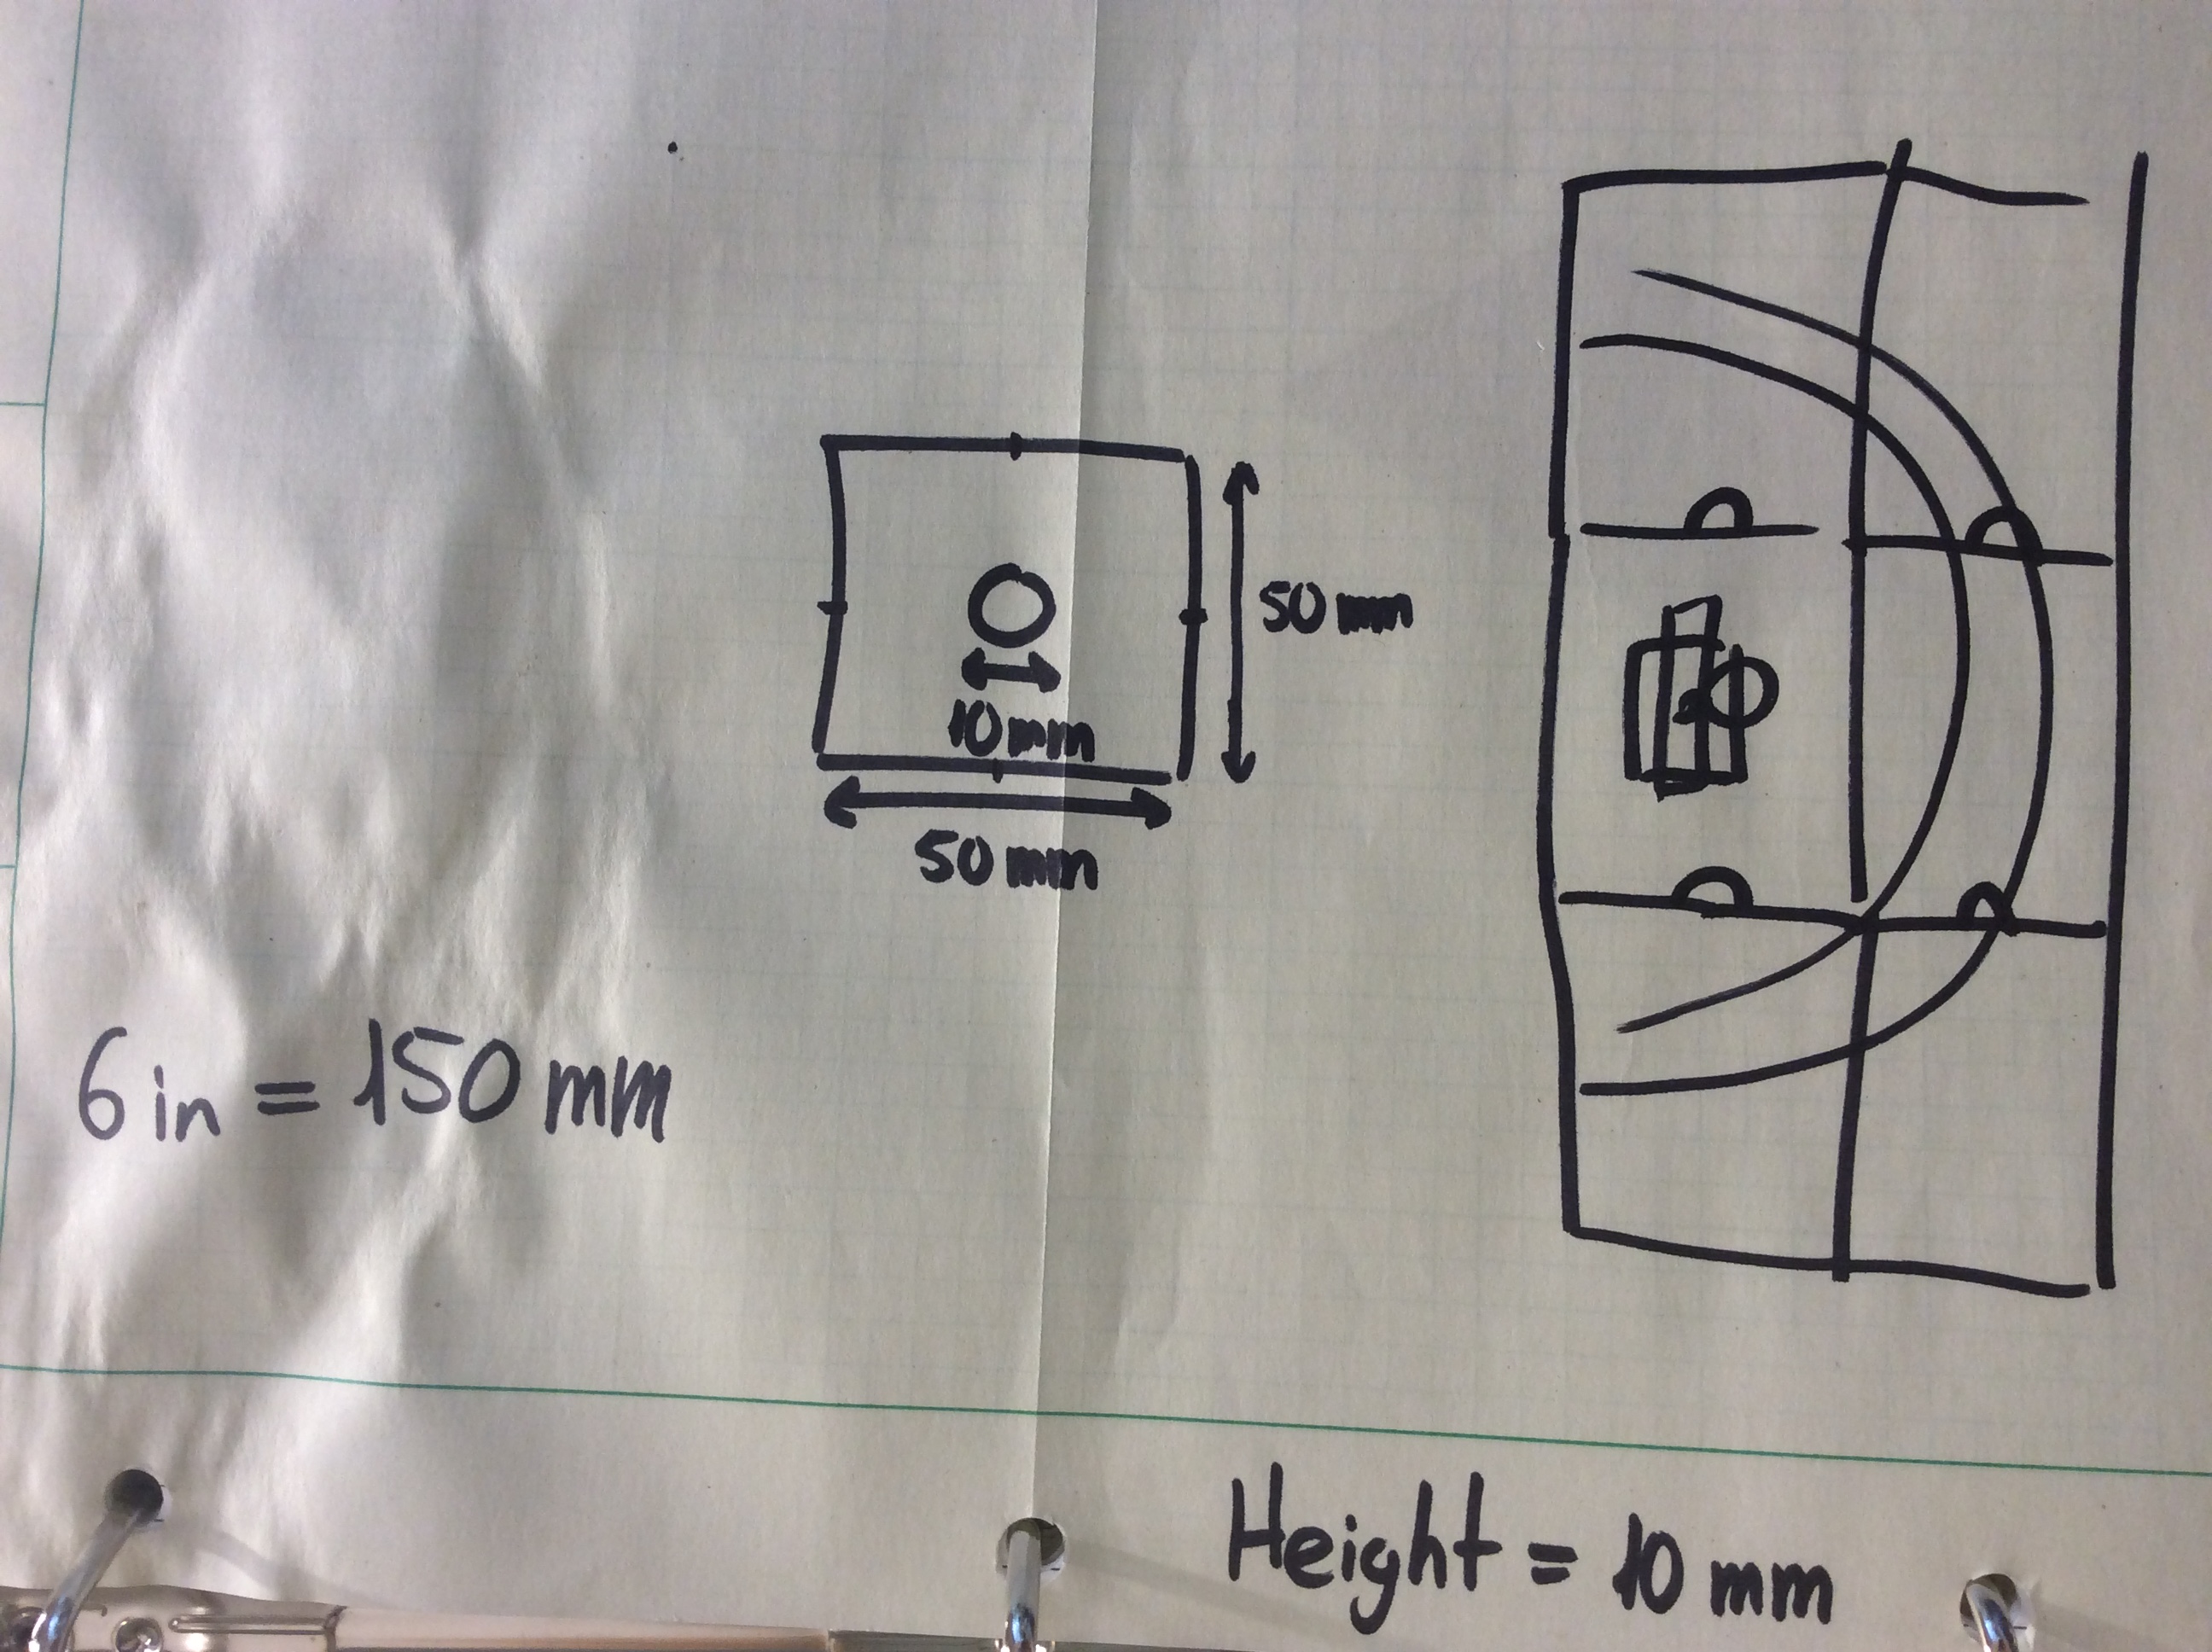
I had decided on the size of the table for the game.
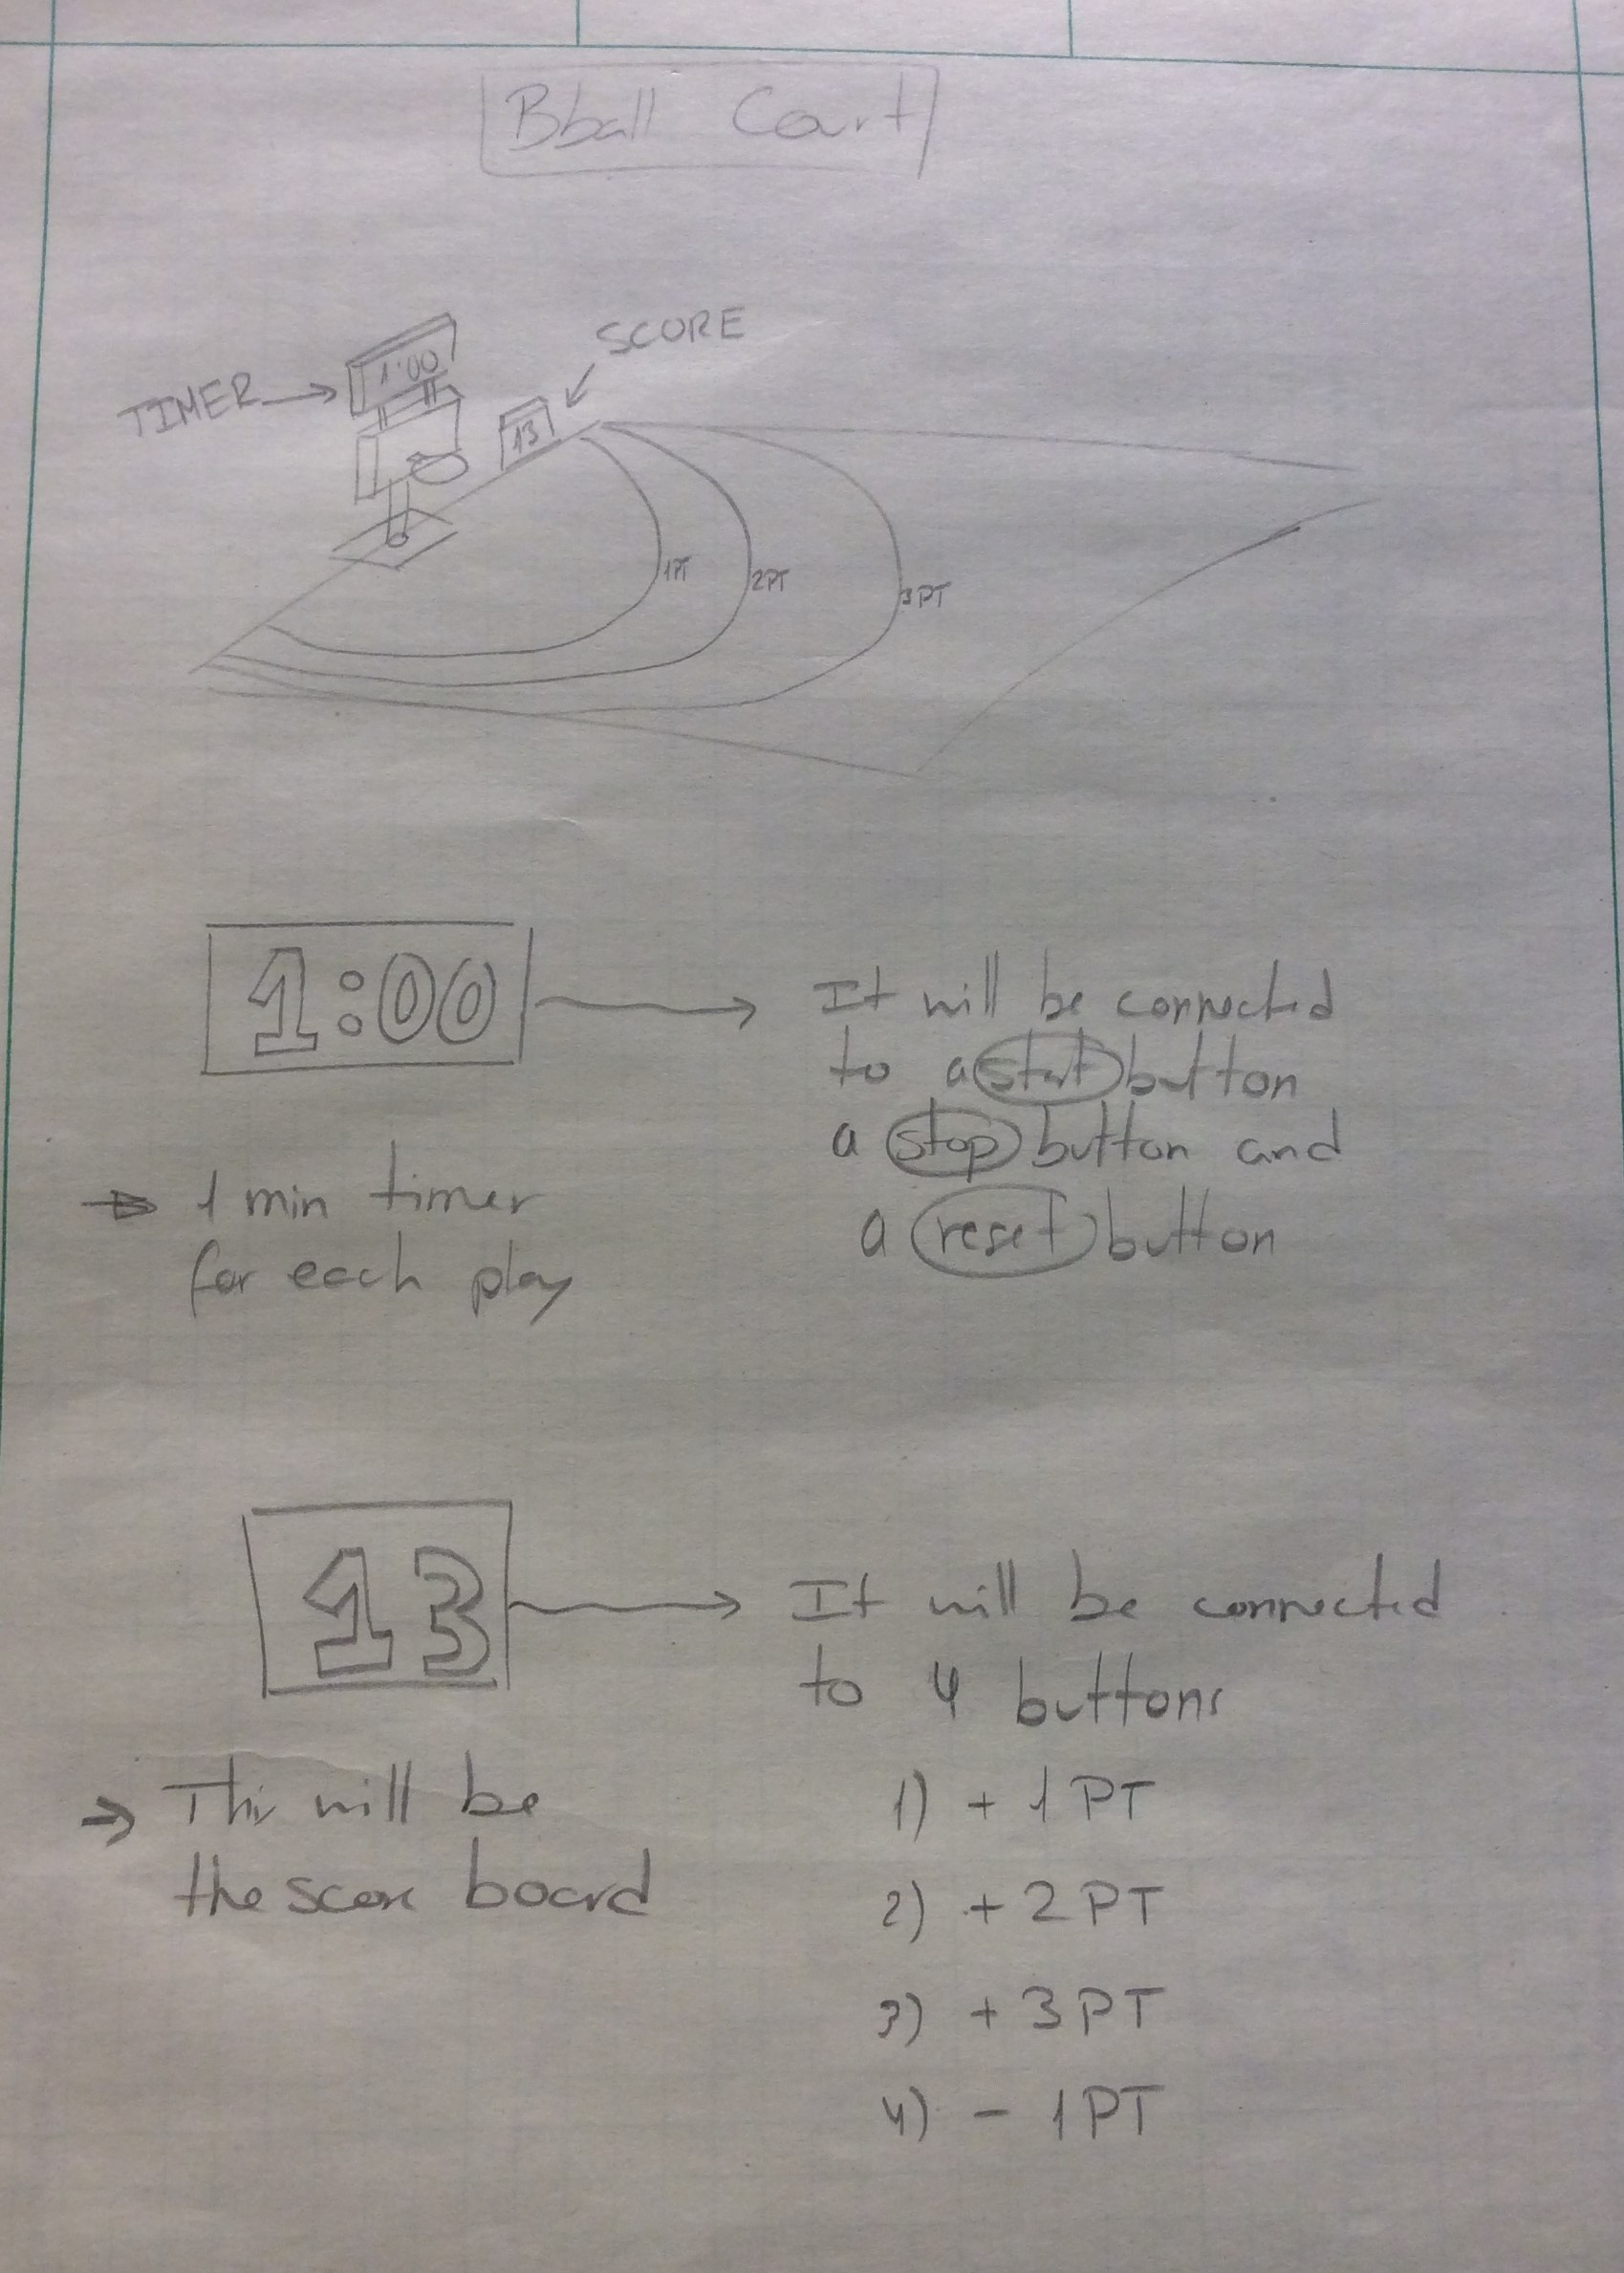
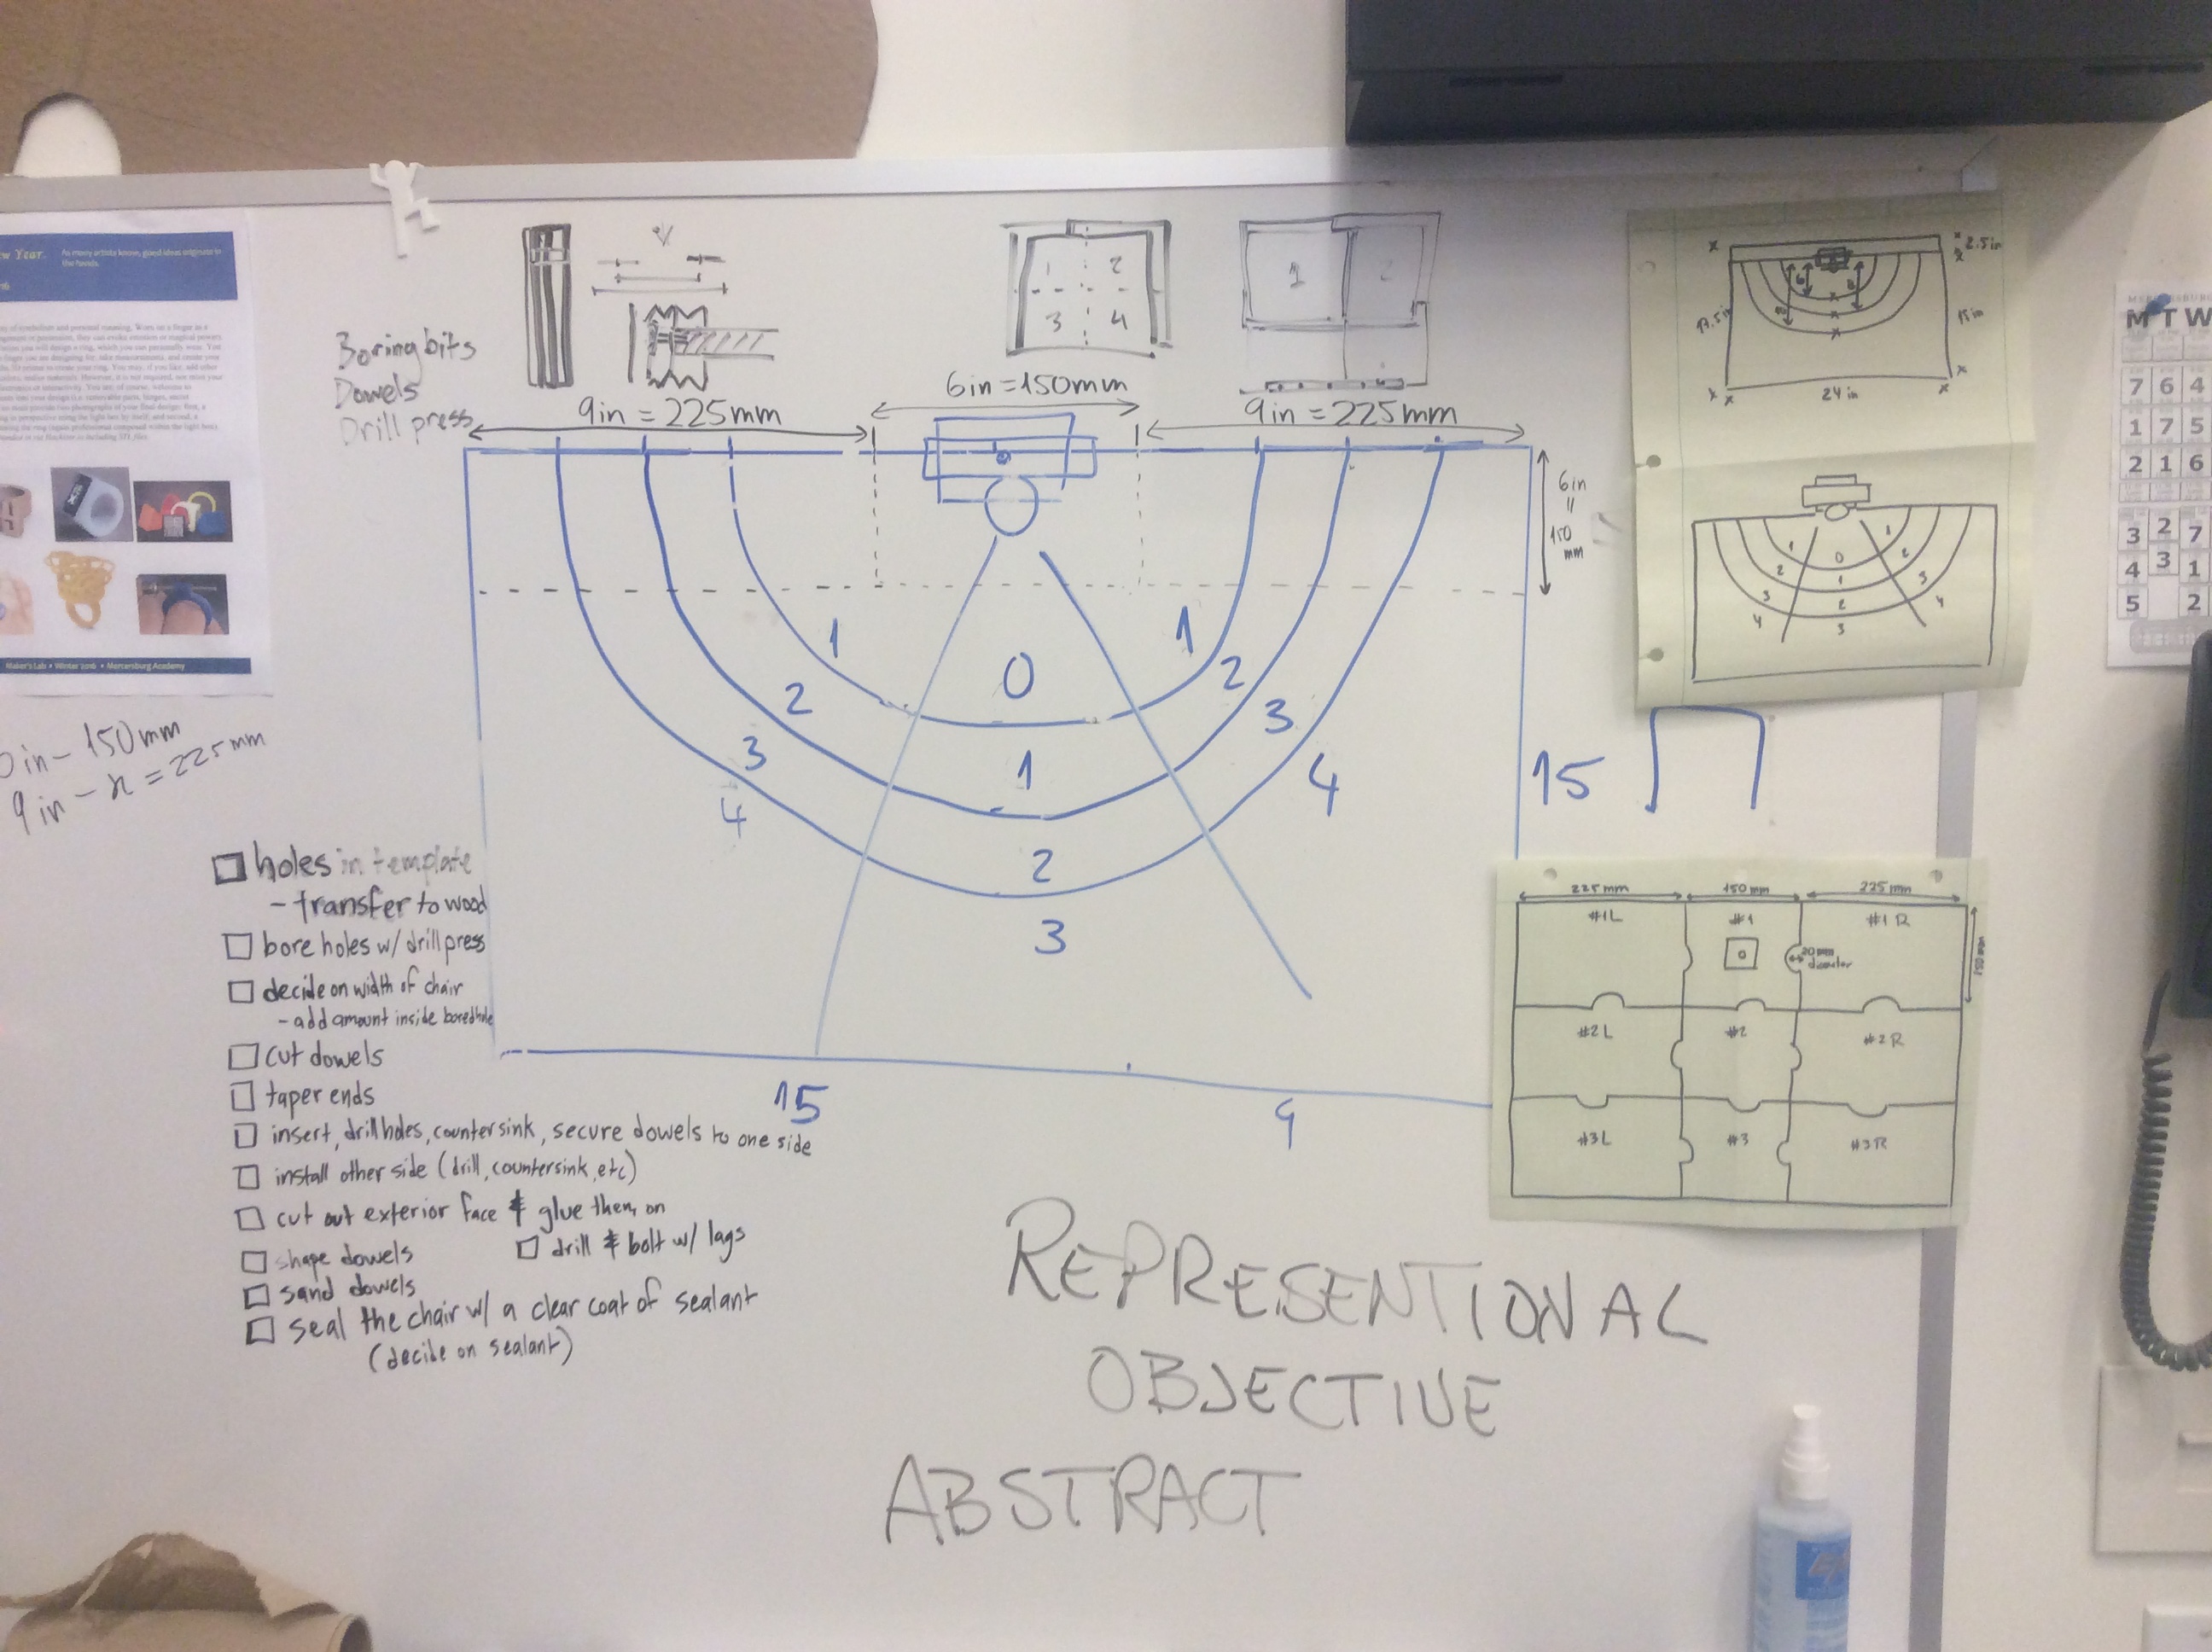
Next I wanted to create rules for the game, and how to get different points within the game.
Now I had to decide what I wanted to base of the game to be like, what kind of material. I thought it would be cool if I made an all 3D printed game, so I started sketching.
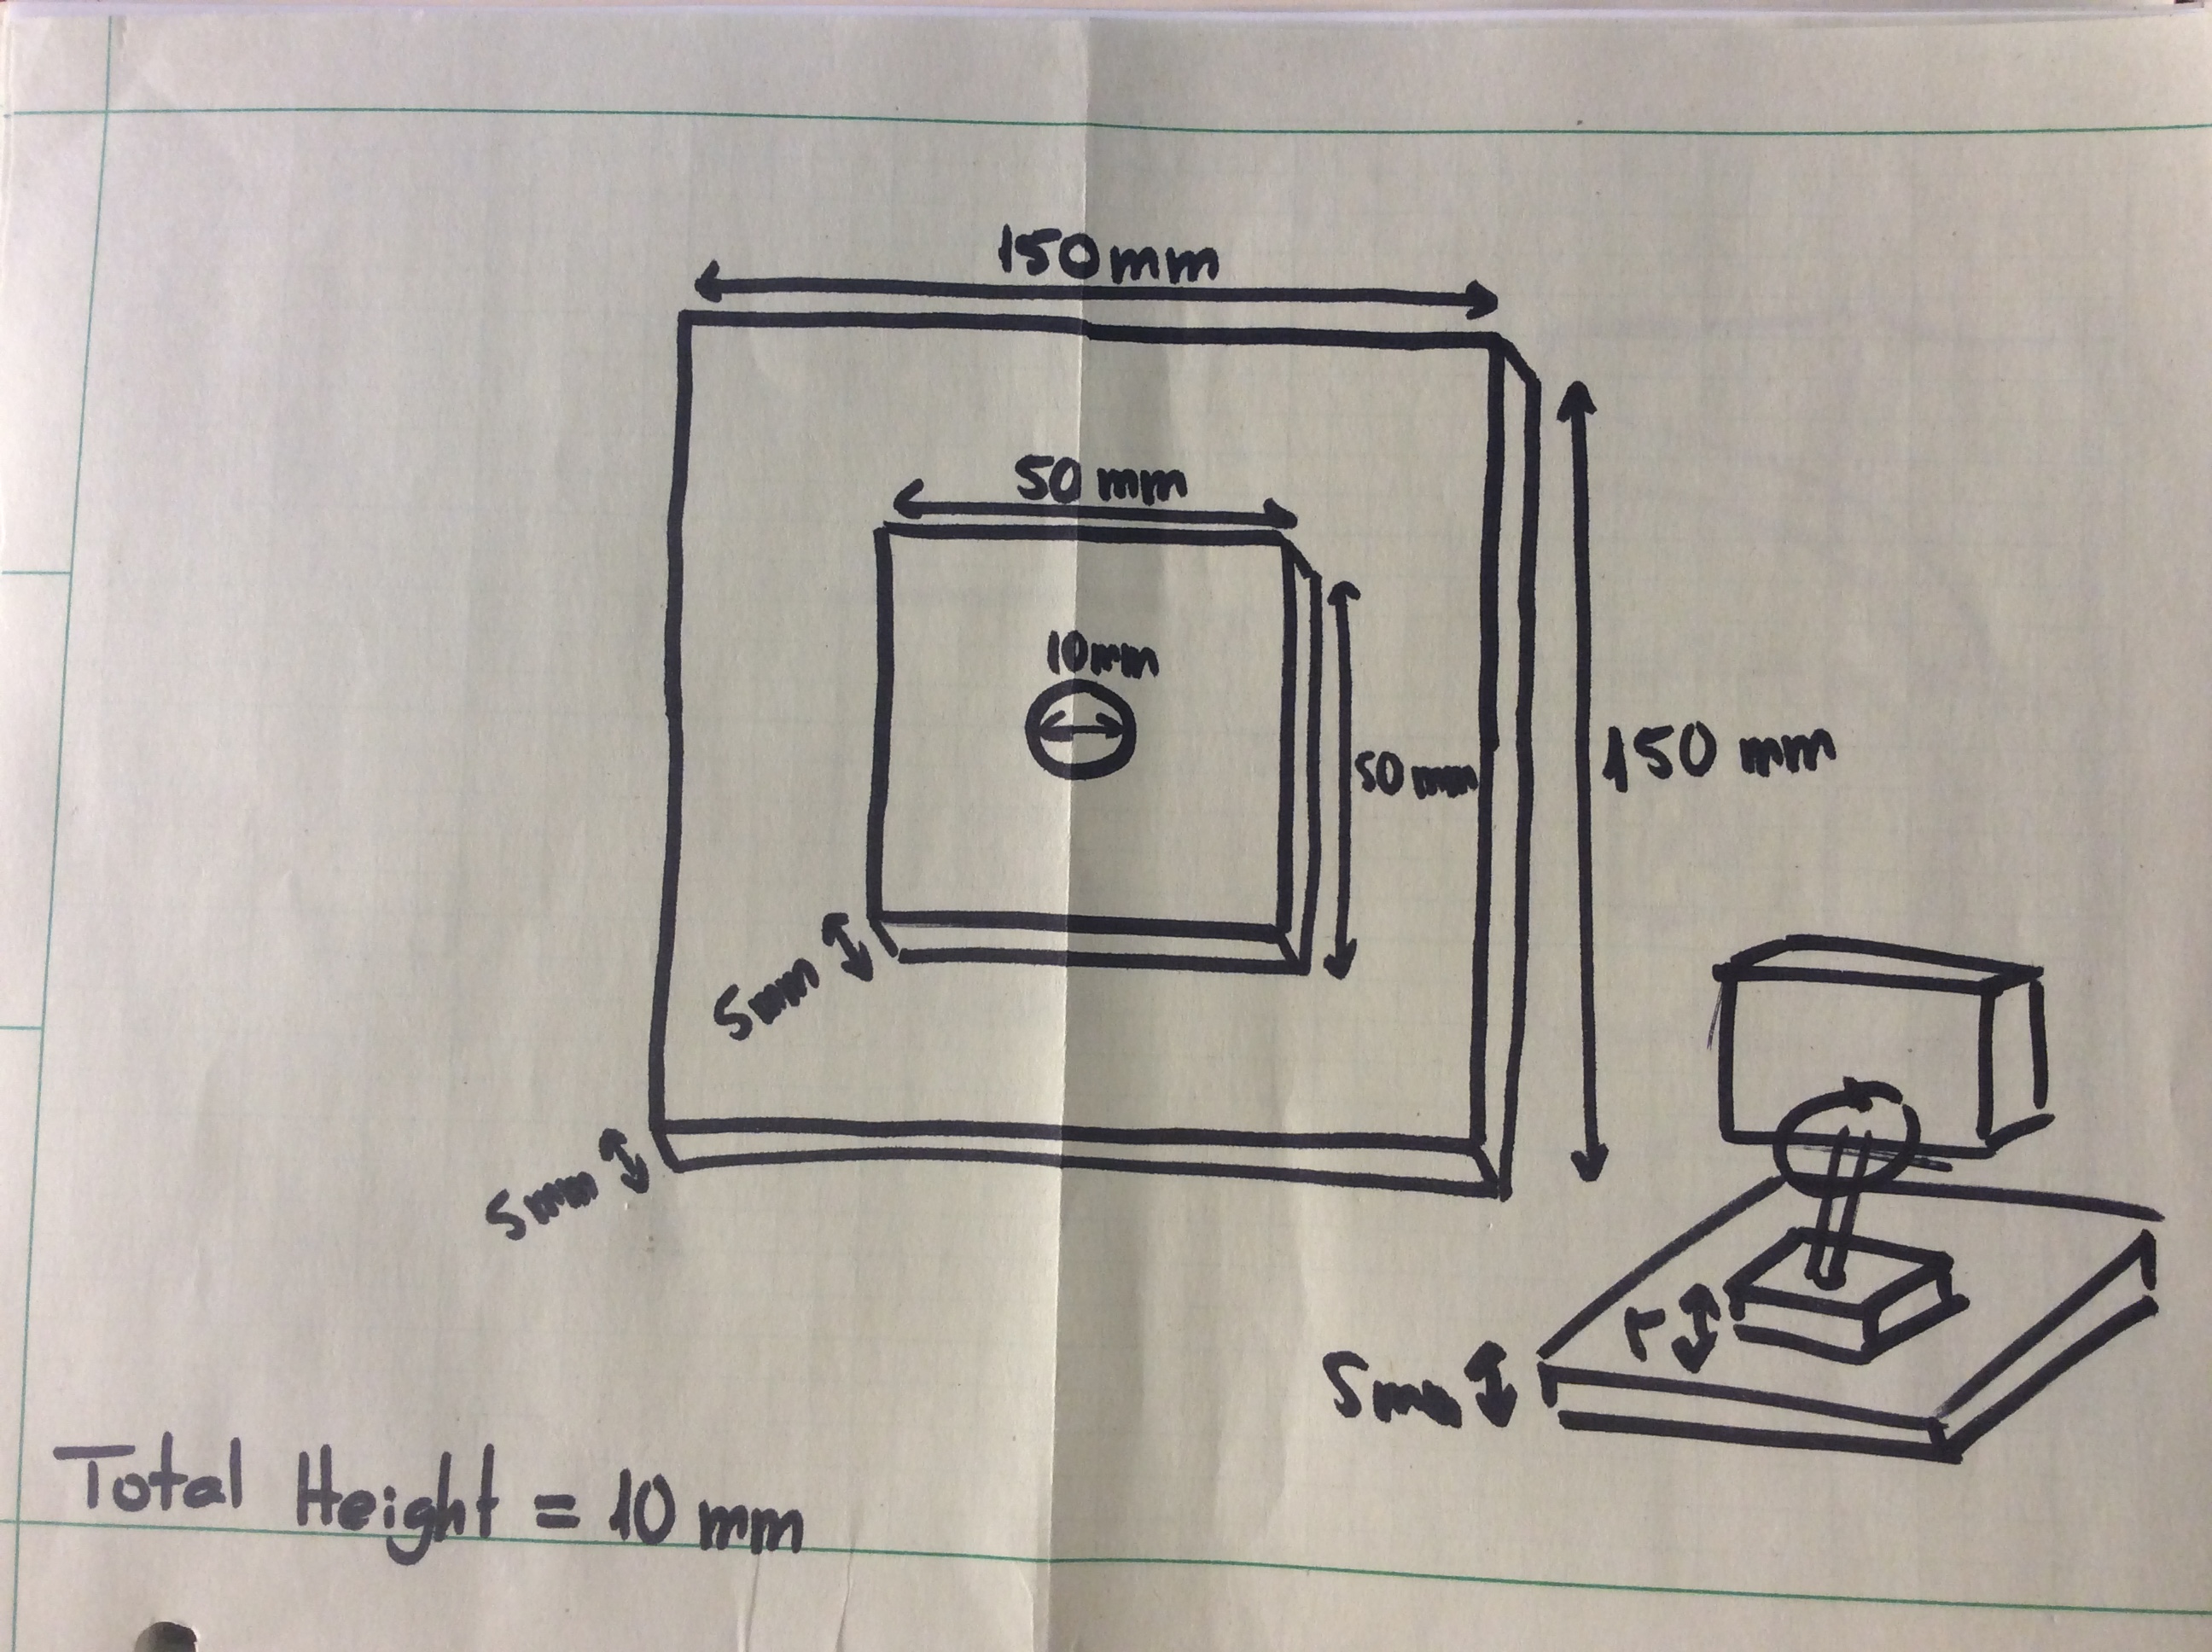
After sketching it on paper, I started designing it on AutoDesk Fusion 360.
The first design (picture above) looked like it would print fine, so I just went ahead and printed it.
On the pictures above you can see that there is a hole missing, so I had to redesign it and reprint it.
The first problem that I found on this design was that the ball that I had 3D printed did not bounce on the 3D printed surface, which was not good since the whole point of the game is to bounce the ball into the rim.
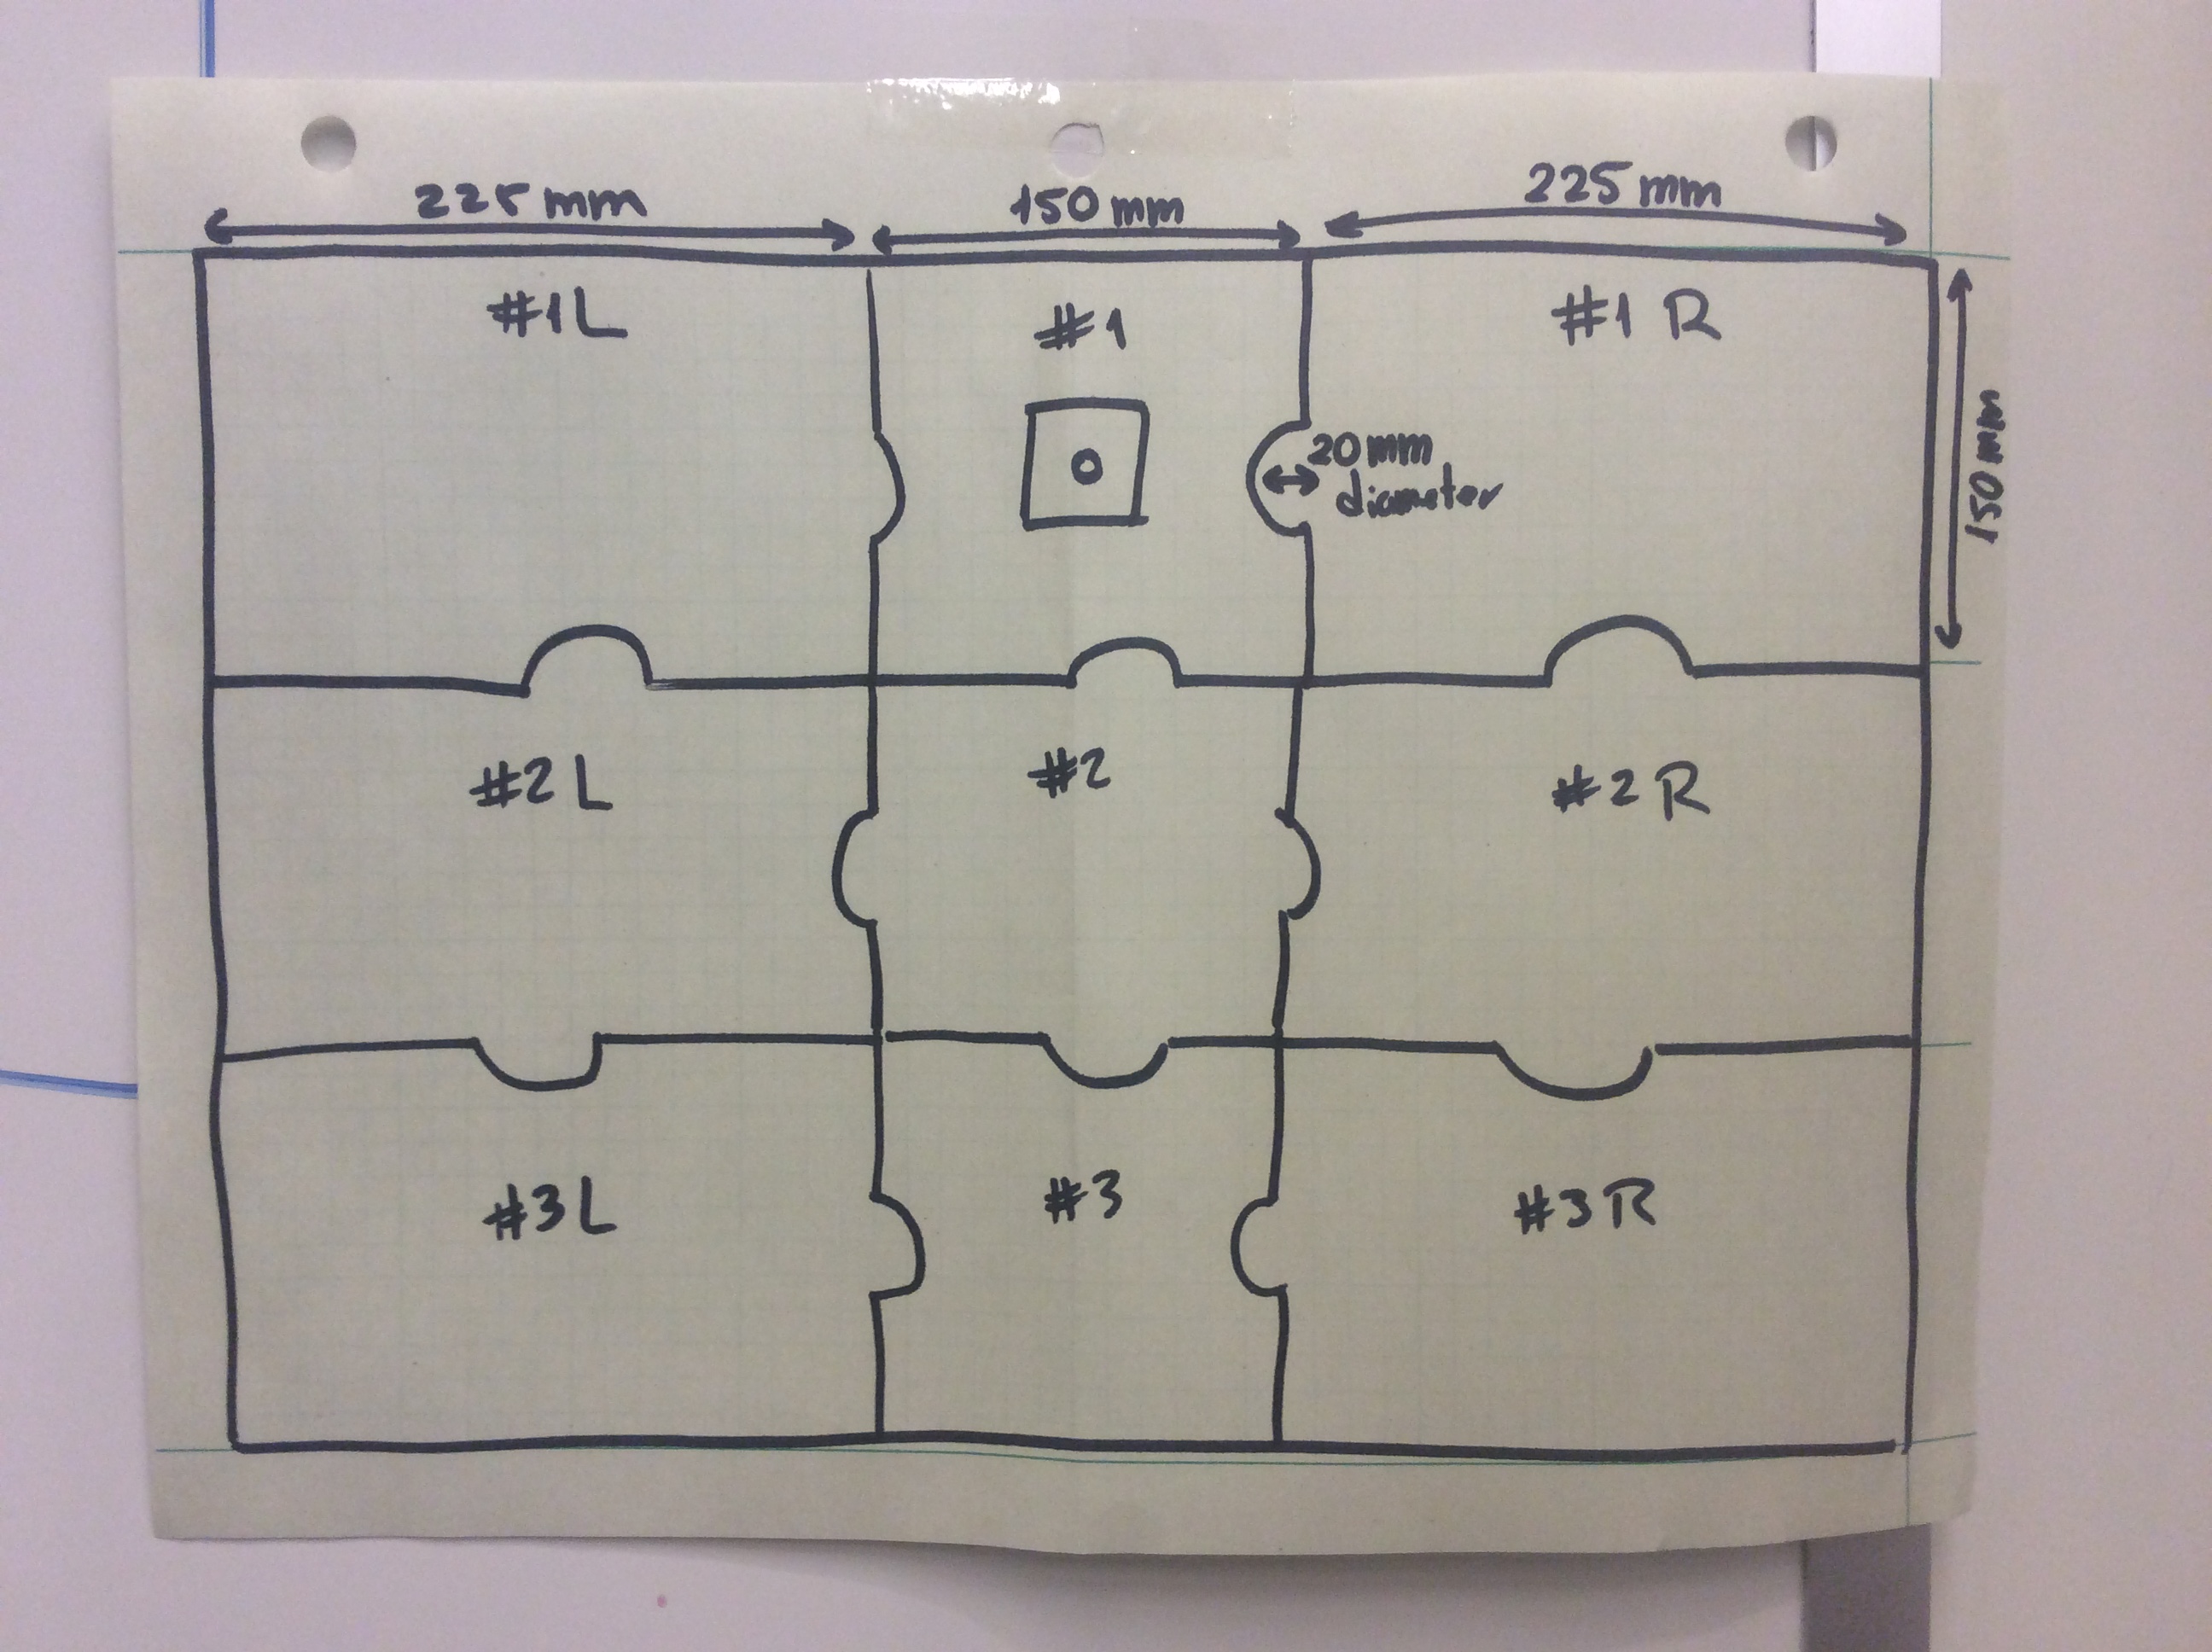
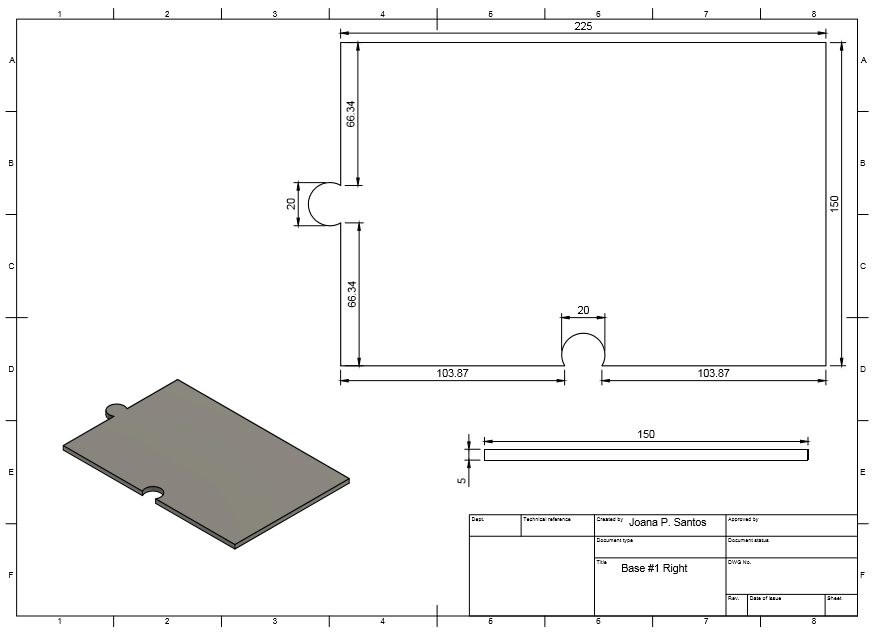
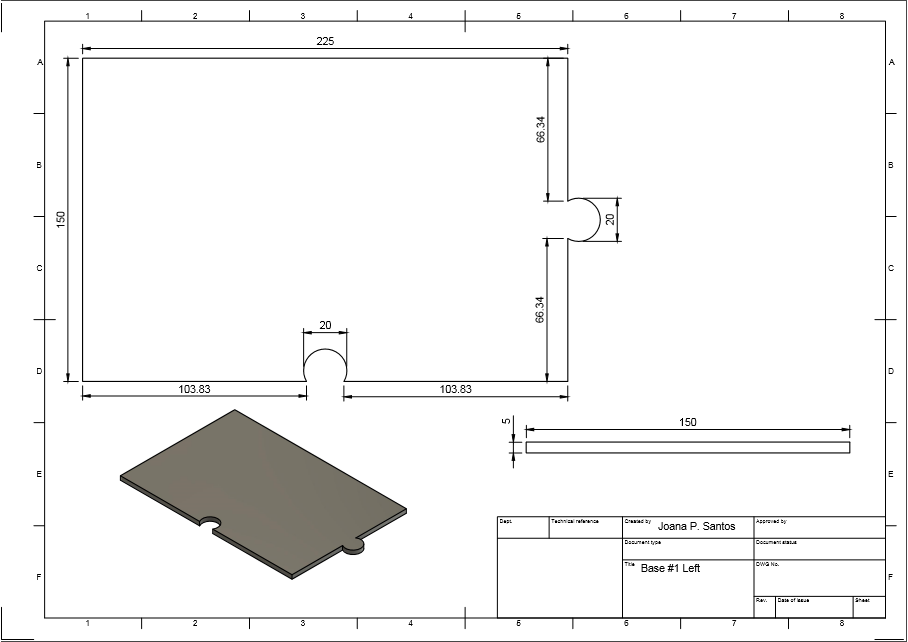
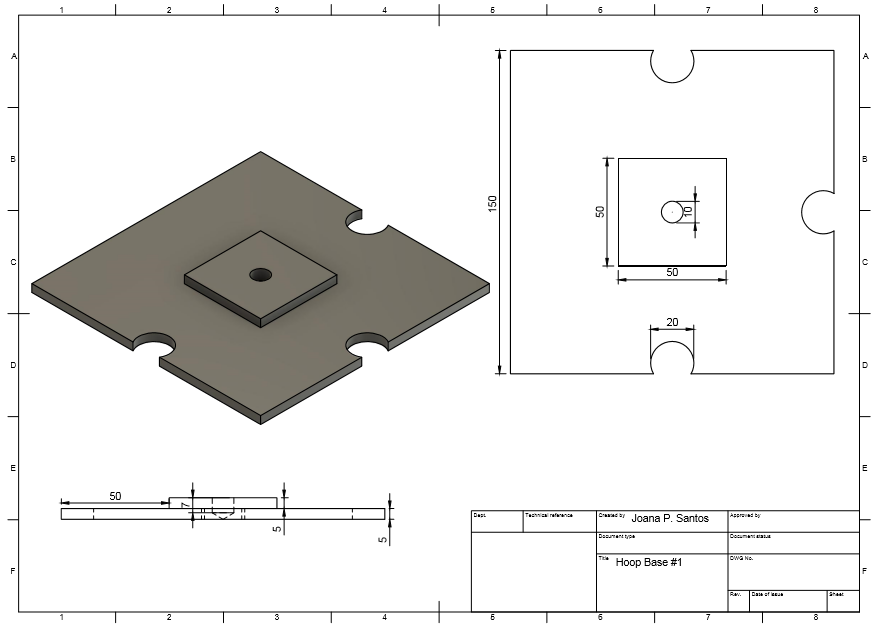
I thought that maybe the problem was that the other pieces were missing, so I designed 2 other pieces of the base “puzzle” to try to see if the problem above went away.
As I was still trying to solve the first problem, another one was found. This time what kept happening, every time I tried to print the pieces designed above, was that the 3D printer would just stop doing the job. After 2 tries I realized that there was nothing I could do about it, so I moved on.
What I decided to do next, while I was still deciding out of what I wanted to build my game base, was to use the very first technique that our teacher taught us in this class: cardboard stacking. (check my other project – cardboard furniture)
I decided to do the base of my game out of wood.
I started thinking about what I wanted to have on the base of the game. I knew I wanted it to resemble the floor of my school’s basketball court, and I also knew that I didn’t have enough time until the presentation and deadline day, so I decided to design the game with just one line, counting only one point for each basket made.
I laser cut the “3-point line”. The way we use our laser cutter is that we create whatever we want to print on a Word Document and then we send that document to print in the Laser Cutter.
As you can see in the picture above, the lines are not straight. This happened because when I designed my semicircle on the Word Document I made it very small. Once I expanded it to the correct measurements on the Laser Cutter Software, the figure got pixelated :(
Coding with ArduinoI took the robotics class that my school offers last year, and the programming language that we used was a C-based programming language. Once I realized that in this class we had to program with Arduino it was already too close to the deadline to start learning how to program with Arduino.
I had the help of Dan Chayes with the programming and with the soldering. He taught me how to work as we worked on getting the code for what I needed for my game.
Going back to the first sketch that I made for this project, I knew that I wanted a display with the clock (time) and another display that showed how many points the players had scored.
For the display with the points of each player I was thinking that the ref of the game would have buttons to add or remove points during the game, but my teacher gave me the idea of using a Photogate instead.
What me and Dan ended up programming was a Photogate connected to the display that each time that the laser of the Photogate was interrupted it would add a point to the display.
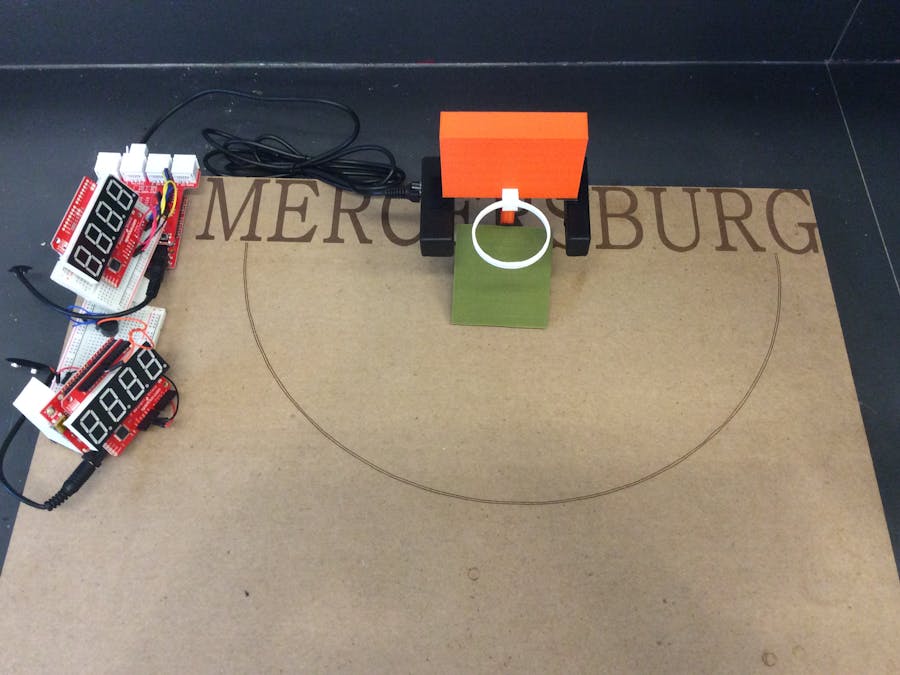
For the display with the timer I connected a little buzzer so that once the time was up the buzzer would sound. The total time to play this game was 15 seconds.
I left a couple of inches of wood on the left side of the base of the game because I knew that I needed a place to put the Sparkfun RedBoards.
I realized also that once a player scored a basket the ball would bounce back up, counting it as more than one basket, so I decided to 3D print a little ramp to prevent that from happening.
I used Velcro to keep all the RedBoards in place, and I also used it to put the Photogate in place, under the hoop.
And this was how the game turned out…


_3u05Tpwasz.png?auto=compress%2Cformat&w=40&h=40&fit=fillmax&bg=fff&dpr=2)
Comments
Please log in or sign up to comment.