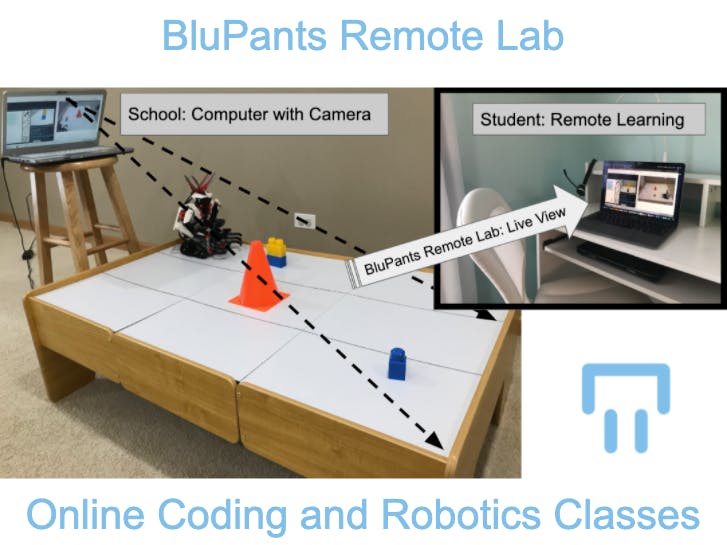
Go to project Chrome Remote Desktop. Once the students log in, they can code the robot using the BluPants IDE and watch the robot execute the code live on camera.
The BluPants Remote Learning Lab requires:
- Computer or laptop with a camera
- A robot running BluPants. Check how to get one here
- A robot track/table where the robot will navigate
Put the robot track/table in front of your computer/laptop camera. Make sure it is is connected to the internet, and install Google Chrome on it.
After installing Chrome, open it and google for "Chrome Remote Desktop"
At the Chrome Remote Desktop page, click "Remote Access"
You will need a Gmail account. I suggest creating a new account just to be used for the remote access. In this tutorial we will use the account blupants.remote@gmail.com, but you will need to create your own.
Once logged in to https://remotedesktop.google.com/access click the "Download Chrome Remote Desktop" button on the bottom right corner of the Setup panel.
Save the installer to your local computer.
Once the download completes, click "ACCEPT & INSTALL":
You will need to allow the downloaded file to be opened:
Click "Run" to install.
In this tutorial, we use a Windows laptop with a webcam to setup the BluPants Remote Learning Lab. If you are using a Linux or Mac OS, the installation dialogs and windows will be slightly different.
After the installation finishes, you will need to define a name for your remote learning lab. Feel free to use your school or dojo name, or whatever makes it easier for your students connecting from home to identify your remote lab.
You will also need to define a PIN number that you will need to share with your students so they can connect to the remote learning lab. After defining the PIN, click start.
Chrome Remote Desktop may take a couple of minutes starting.
If everything goes well, you should see your remote lab with the "Online" status:
Now, open a new tab on the same browser and visit blupants.com
On the BluPants site, click camera on the top menu to start the camera on your computer.
You will need to allow your Chrome browser to access your camera. Click "Allow", and the live camera stream should start.
Make sure you get a good view of your robot track/table, so the students accessing it remotely can have a good experience interacting with the robot.
Go back to the blupants.com tab and click IDE on the top menu.
It will open the blupants.org IDE so your students can create code for programming the robot on the track/table. Make sure you have at least one robot connected to the same WiFi network you are using to setup your remote lab. For instructions on how to get a BluPants robot connected, please visit blupants.com/robots.
To avoid switching tabs all the time, we suggest dragging the camera tab on the browser to a new window, so you arrange the IDE and the camera side by side. It would allow the students to see the IDE with the coding and the live camera on the track at the same time:
The remote lab is now ready to go. Students attending the remote learning classes from their home, will now be able to code the robot by connecting to your lab via Chrome Remote Desktop, as shown on the picture below:
Check this video to see how a student can connect to the remote lab we have just created, write code for the robot, and watch the robot executing it live.
Additionally, please find this sample lesson to give you and idea on how to use the BluPants Remote Learning Lab for online classes.


Comments
Please log in or sign up to comment.