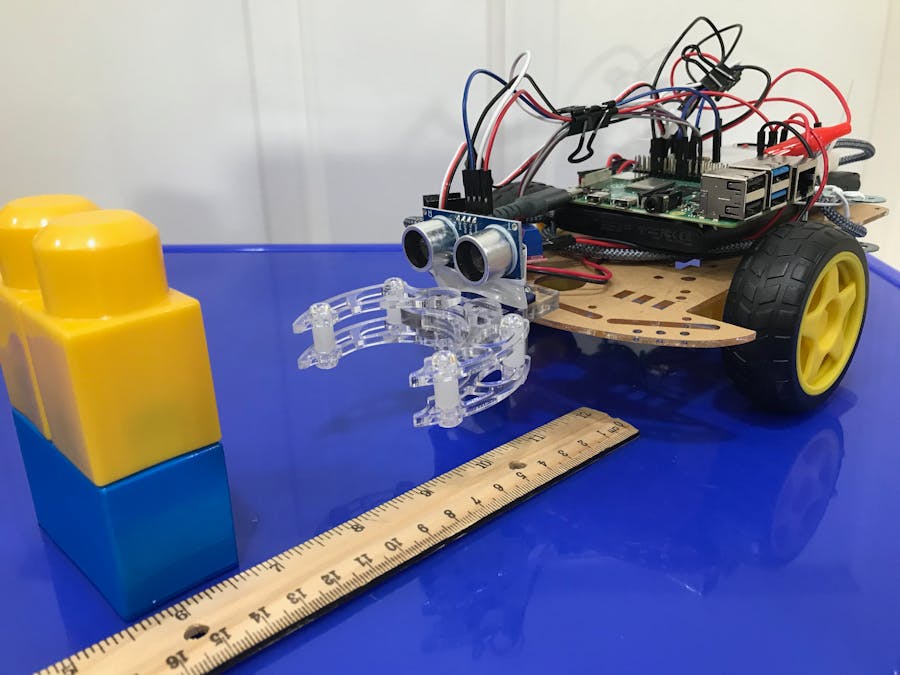
This tutorial shows how to add a distance sensor to an existing BluPants robot. If you don't have your robot yet, please visit our previous tutorials to get one working:
After adding the distance sensor to your robot, you should be able to use the read_distance() function using the BluPants Studio IDE. The final result should be similar to this:
We have a couple of challenges you can do with your new bot. Find them at our lessons page. Other than the basic drag and drop coding blocks shown, it also natively supports Python for more advanced students. For more information about BluPants visit www.blupants.com or watch our Intro to BluPants video.
PartsFor this tutorial, we are going to add the distance sensor to an existing claw/gripper robot. You can find the tutorial to assemble the claw/gripper robot here. Other than the existing robot, we are going to need the additional parts shown below:
We are using tape to fix the HC-SR04 distance sensor to the claw servo. You may want to put your sensor somewhere else in your project and use other material to attach it to the chassis. Check the parts marked as optional at the "Hardware Components" section for a couple of suggestions.
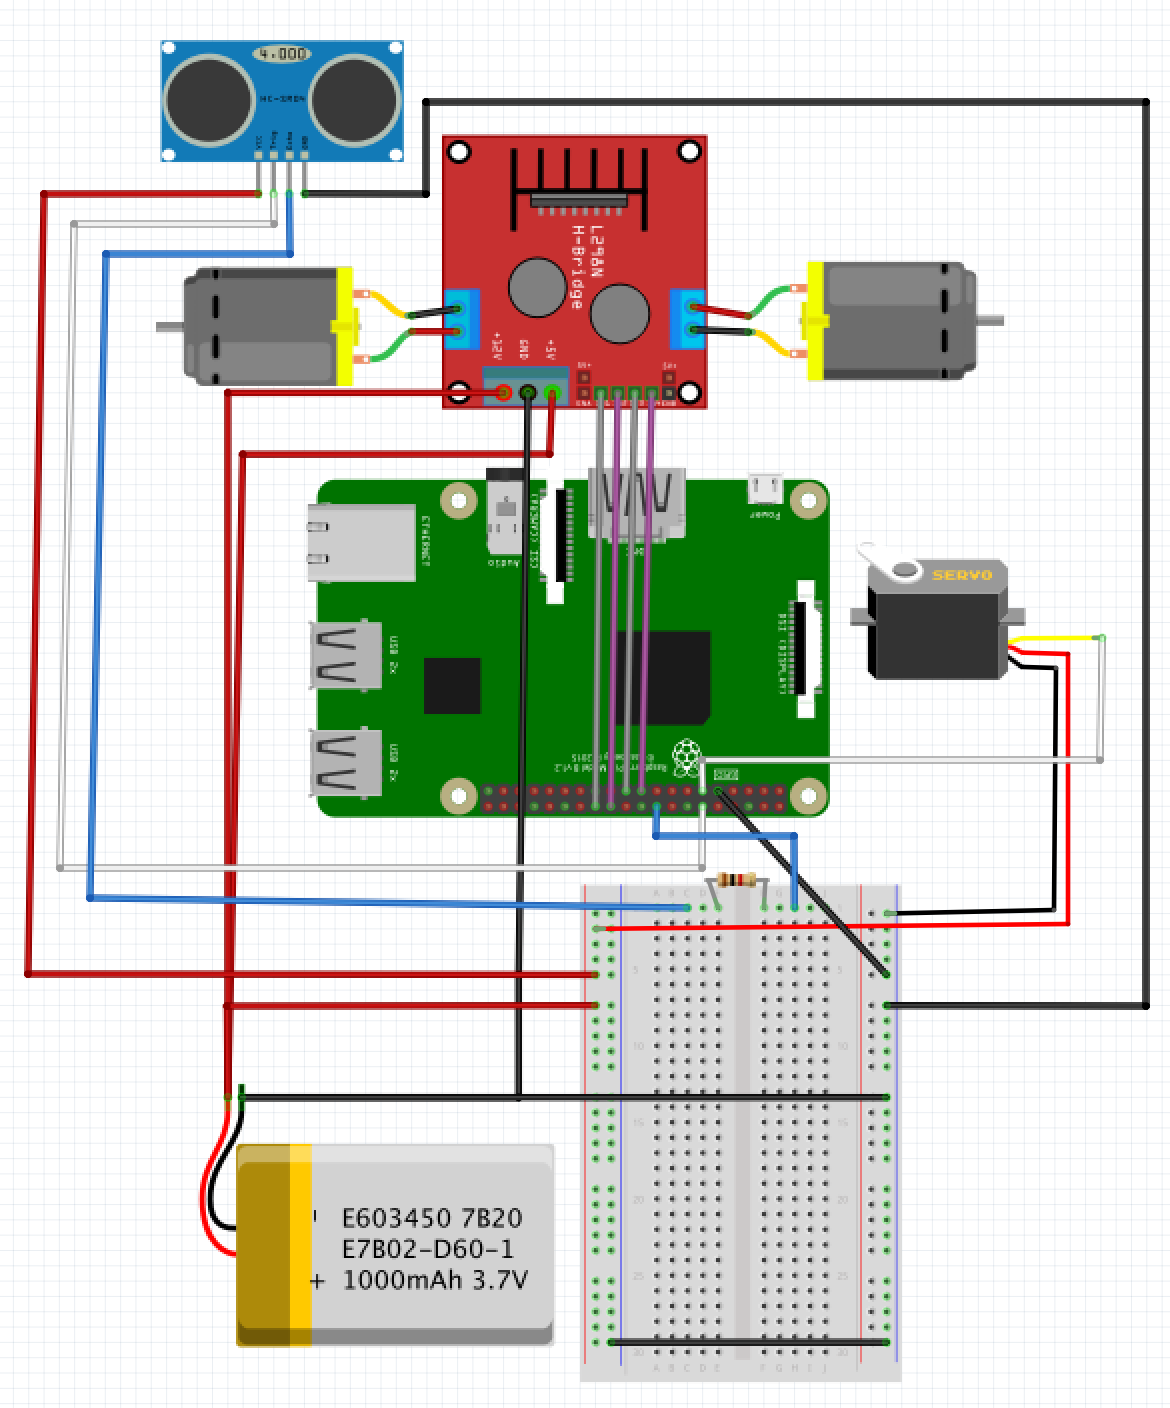
AssemblingThe HC-SR04 distance sensor has 4 pins we need to connect: trigger, echo, GND and VCC. Connect your the trigger pin from your HC-SR04 board to the GPIO 18 on your Raspberry Pi. The VCC pin should be connected to the "+" rail on your breadboard, and the GND pin to the "-" rail on your breadboard. The echo pin should be connected to a resistor (we are using 1.2K-OHM) and then to GPIO 24 on the Raspberry Pi.
Use four female-to-female jumper leads to connect the Raspberry Pi GPIO pins to the pins on the motor controller board.
- Vcc connects to "+" rail (red male-to female jumper)
- Trig connects to GPIO pin18 (white female-to-female jumper)
- Echo connects to GPIO pin24 (1.2K-OHM resistor, blue male-to-female)
- Gnd connects to "-" rail (black male-to-female jumper)
Add a 1.2K-OHM resistor to the breadboard and connect the Echo (blue jumper from the HC-SR04) to it.
Also, connect Vcc (red jumper) to the "+" rail on the breadboard, and the Gnd (black jumper) to the "-" rail on the breadboard.
Connect Trig (white jumper) to GPIO18 on the Raspberry Pi.
Get an extra blue male-to-female jumper, and connect to GPIO24 on the Raspberry Pi board. Then, connect the other end to the breadboard rail with the resistor (1g in the picture).
At this point all your HC-SR04 pins should be properly connected to the Raspberry Pi.
After completing the wiring, we need to attach the HC-SR04 board to the front of the robot. For this tutorial, tape will be used, but feel free to use whatever method that works better for you.
Since the servo that is being used for the claw is made of plastic, the distance sensor will be attached to it with tape.
The final result is shown bellow. At this point you should be ready to turn on your robot and use the the read_distance() function using the BluPants Studio IDE. Try writing some code to make your robot avoid obstacles automatically.
Stay tuned for more tutorials, so you can expand your robot even more. Follow us on Twitter to stay tuned with all new releases.


Comments
Please log in or sign up to comment.