This tutorial shows how to add a camera to an existing BluPants robot. If you don't have your robot yet, please visit our previous tutorials to get one working:
After adding the camera to your robot, the final result should be similar to this:
We have a couple of challenges you can do with your new bot. Find them at our lessons page. Other than the basic drag and drop coding blocks shown, it also natively supports Python for more advanced students. For more information about BluPants visit www.blupants.com or watch our Intro to BluPants video.
PartsFor this tutorial, we are going to add the camera to an existing claw/gripper robot with the distance sensor as a base robot. You can find the tutorial to assemble the base robot here. Other than the existing robot, we are going to need the additional parts shown below:
We are this specific kit to mount the camera to the robot. You may want to put your camera somewhere else in your project and/or not even use a Pan-tilt kit to mount the camera.
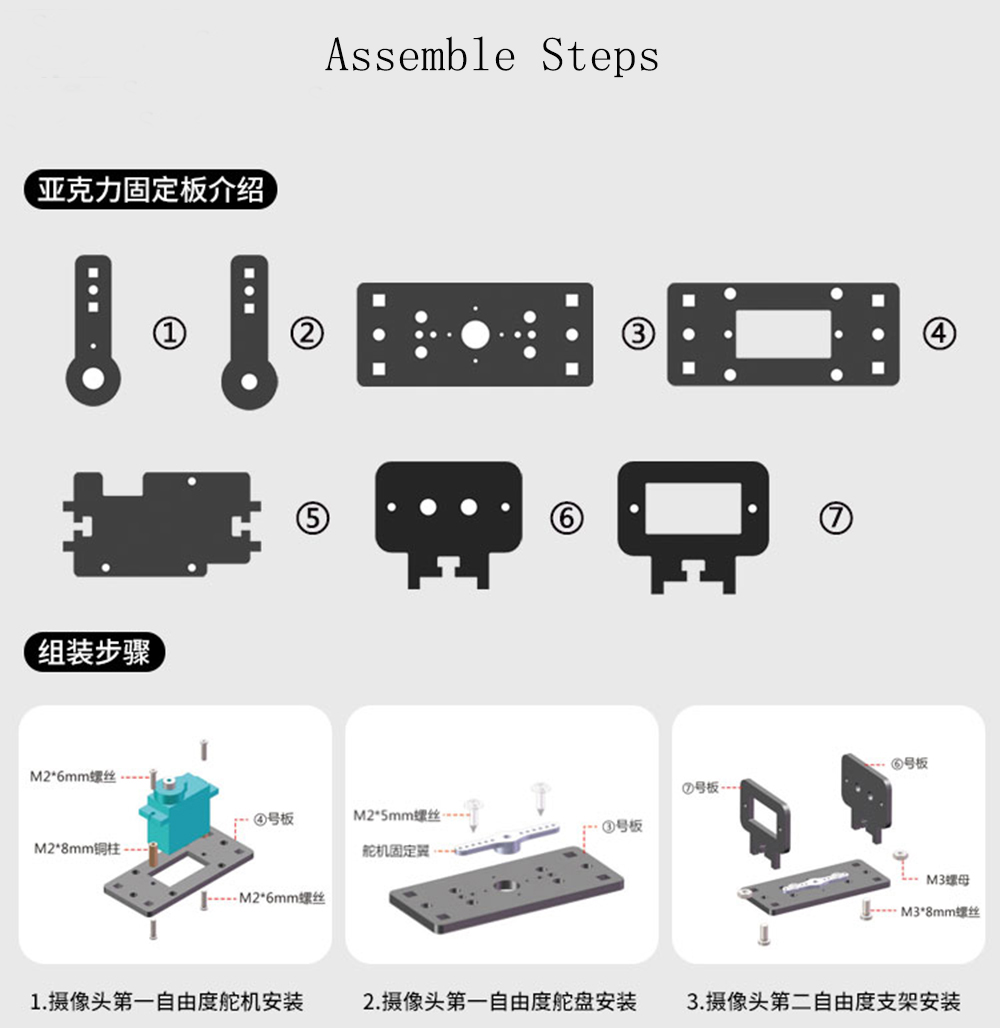
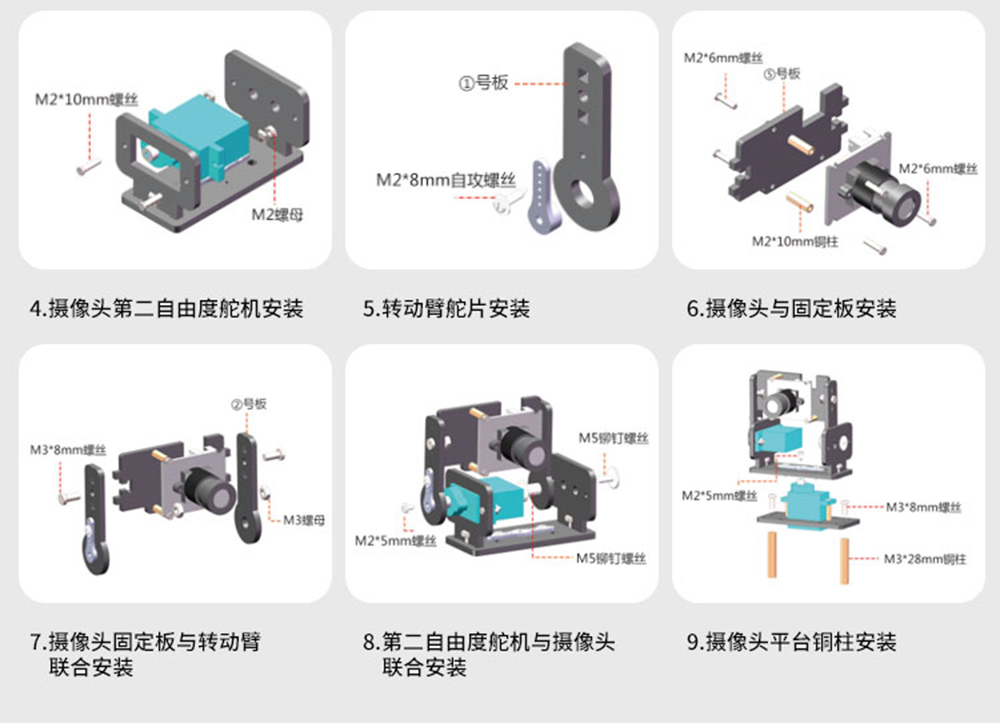
Check steps to assemble the Camera PTZ kit.
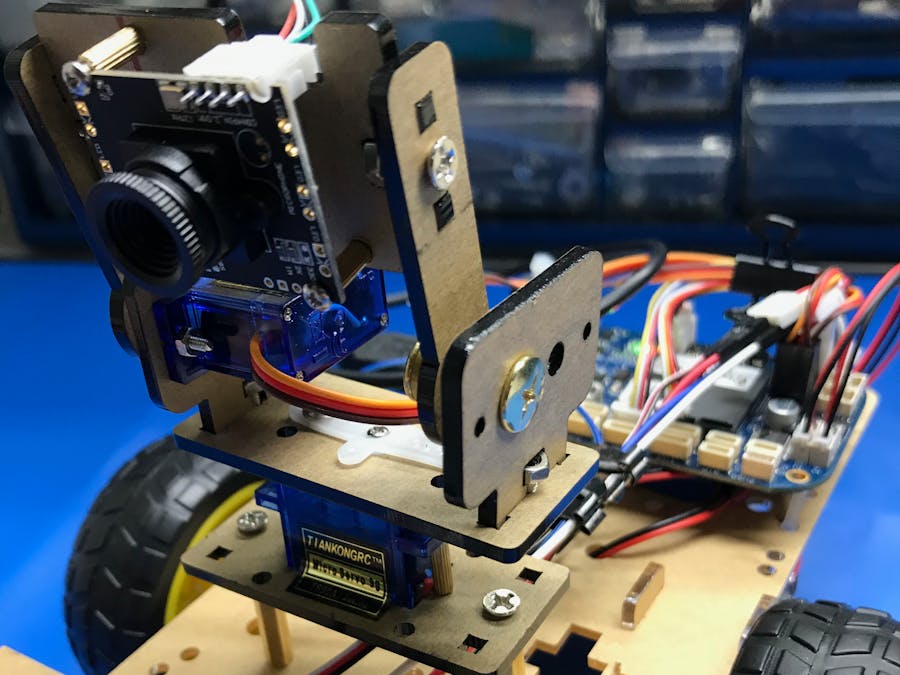
After assembling, it should look like this:
Attach the camera PTZ kit to the the robot chassis.
Connect the USB camera to your Beaglebone USB port.
Connect the servo on the bottom (horizontal) to servo channel 1 on your Beaglebone Blue. Connect the servo on the top (vertical) to servo channel 2:
And that's it. Once you turn on your robot and connect it to the BluPants Studio IDE, you should be able see your live camera video stream.


Comments
Please log in or sign up to comment.