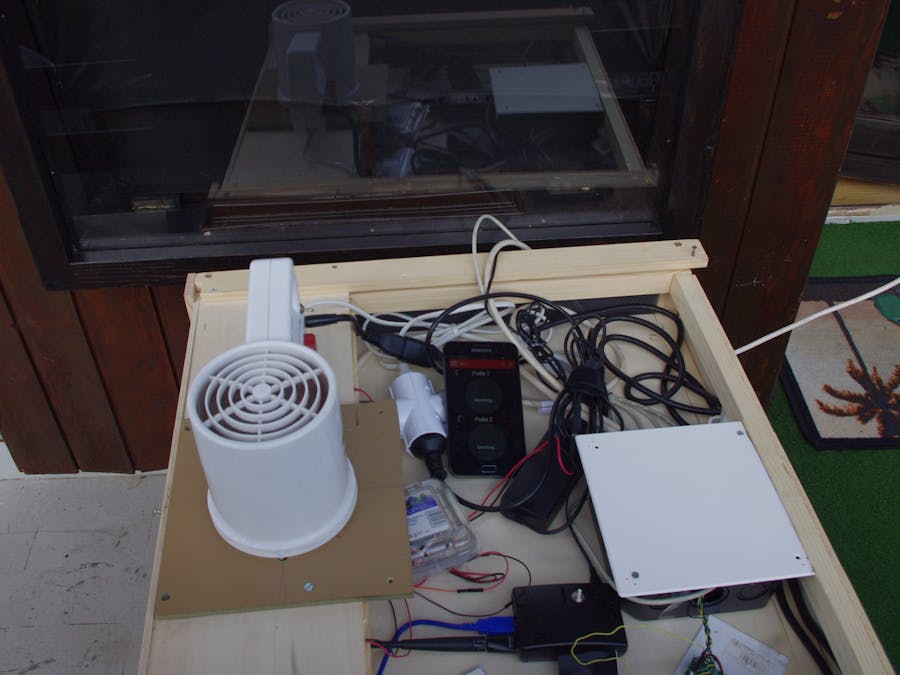
Raspberry Pi Controller is an inexpensive and flexible wireless Web based controller for smart Dehydrator for drying Fruit, Fruit leather, Vegetables, Yoghurt making and Raising Bread. You can use your own homemade or some commercial dehydrator. The system is connected to Amazon cloud using AWS internet of things to smart control. Android client is connected to Expresso and Node.js running on AWS EC2 instance. Data read from the DHT22 sensor are used to measure the temperature and 4-channel relay switch on and off the heater to maintain a specific set temperature point (setpoint).
Applications features
- Instant temperature
- Drying progress
- Programmable [PID Controller] for precise air heater temperature control
- Sound and mobile alert
- Drying modes setting; selectable options: Fruit, Fruit leather, Vegetables, Yoghurt making, Raising Bread)
- Drying history.
- Controllable from web browser, Android device (iPhone coming soon) on Wifi network
- * LCD display for system status, toggle buttons for operation
- * AWS S3 data archiving for analysing
- * AWS IOT register a status of dehydrator and commands from Android device
Additional software is installed to connect to AWS IOT , EC2 and S3:
- Mosquitto libralry from mosquitto.org,
- AWS client ,
- AWS SDK,
- Pyton paho to publish and subscribe to AWS IOT,
- Boto library to connect python to S3,
- Node.js and Expresso.
Raspberry Pi is connected to AWS EC2, IOT and S3. The S3 static web site enables graphical display and process data. EC2, running Node.js, enables Android client to connect to IOT.
Data will persist on AWS S3 for displaying on Web (using S3 static web site ) and for for historical reasons and so it can be re-processed later.
Conceptual SchemeIs comming soon.
There is Node.js application, which simulate simple Android - IOT application. You need Node.js environment as described in https://github.com/aws/aws-iot-device-sdk-js/blob/master/README.md and install aws-iot-device-sdk-js-master on your Node server. Then you can run:
node temperature-control-client.js -f ~/certificate -g eu-west-1
HardwareElectronics used to test:
- Raspberry Pi B+,
- Raspberry Pi Accessories Prototype Pi Plate,
- Sain Smart 4 chanell control relay ,
- DS18B20 digital thermometer, - 20x4 LCD and LCD117 kit (serial interface),
- 4.7k resistor, 1k resistor, 1N4001 diode, and 2N4401 transistor.,2K resistor,10K resistor,TansistorR PN2222A
- Edimax EW-7811UN dongle is used.
You can get up to date description on http://bmili.github.io/RasPiDry/
AWS IoT Makes Things Smarter and IOT Food Dehydrator will bi smart Dehydrator. To start with AWS IOT frst install AWS CLI (Ubuntu 14)
sudo apt-get update;
sudo apt-get install python-pip
sudo pip install awscli
To connect client to AWS, first run config command
sudo aws configure
AWS Access Key ID [None]: XXXXXččćYBTZUDYYYYYYY
AWS Secret Access Key [None]: 3Xx9eYy/j0Axxxxl37žžčiSuuckmM581YYYYYYYfo
Default region name [None]: eu-west-1
Default output format [None]: ENTER
Note
The AWS credentials you configure in the AWS CLI must be the credentials for an IAM user that has permissions to perform IAM and IoT operations used in this quickstart.
aws iam create-user --user-name Boris
{
"User": {
"UserName": "Boris",
"Path": "/",
"CreateDate":"2016-01-15T19:03:24.851Z",
"UserId":"AIDAII32LV6WXXMOM63HO",
"Arn":"arn:aws:iam::585900121227:user/Boris"
}
}
aws iam attach-user-policy --user-name Boris --policy-arn "arn:aws:iam::aws:policy/AWSIoTFullAccess"
Create a Device in the Thing Registry
To connect a thing to AWS IoT, we first create a device in the Thing Registry.
aws iot create-thing --thing-name "FoodDehydrator"
{
"thingArn":"arn:aws:iot:eu-west-1:585900121227:thing/FoodDehydrator",
"thingName":"FoodDehydrator"
}
Secure Communication Between a Device and AWS IoT
Communication between a thing and AWS IoT is protected through the use of X.509 certificates
aws iot create-keys-and-certificate --
Create and Attach an AWS IoT Policy to Your Certificate
Use
the create-policy command
to create an AWS IoT policy. The --policy-document argument
contains JSON that specifies the permissions assigned to the policy:
{
aws iot create-policy --policy-name "PubSubFoodDehydratorTopic" --policy-document file://iot-policy
Attach your Certificate to Your Device
You
use the attach-thing-principal CLI
command to attach a certificate to a thing.
aws iot attach-thing-principal --thing-name
Verify MQTT Subscribe and Publish
The steps in this section show you how to verify you can use your certificate to communicate with AWS IoT over MQTT. You will use an MQTT client to subscribe and publish to an MQTT topic. MQTT clients require a root CA certificate to authenticate with AWS IoT. Download the root CA certificate file from root certificate.
Install mosquitto
sudo apt-get install mosquitto-clients
Check mosquitto
mosquitto_pub -t test-f mqtt/mosquitto/publish.txt -d
Client mosqpub/14824-raspberry sendingCONNECT
Client mosqpub/14824-raspberry receivedCONNACK
Client mosqpub/14824-raspberry sendingPUBLISH (d0, q0, r0, m1, 'test', ... (6 bytes))
Client mosqpub/14824-raspberry sendingDISCONNECT
Open a window and run a command:
mosquitto_sub --cafile $HOME/certificate/root-CA.crt --cert $HOME/fooddehydrator/cert.pem --key $HOME/fooddehydrator/privateKey.pem -h "A9HHD5G1IXZ9I.iot.eu-west-1.amazonaws.com" -p 8883 -q 1 -d -t '$aws/things/FoodDehydrator/shadow/update/rejected'
mosquitto_sub --cafile $HOME/certificate/root-CA.crt --cert $HOME/certificate/cert.pem --key $HOME/certificate/privateKey.pem -h"A9HHD5G1IXZ9I.iot.eu-west-1.amazonaws.com" -p 8883 -q 1 -d-t '$aws/things/FoodDehydrator/shadow/update/accepted'
Client mosqsub/1955-raspberryp sending CONNECT
Client mosqsub/1955-raspberryp received CONNACK
Client mosqsub/1955-raspberryp sending SUBSCRIBE (Mid: 1, Topic: $aws/things/FoodDehydrator/shadow/update/accepted, QoS: 1)
Client mosqsub/1955-raspberryp received SUBACK
Subscribed (mid: 1): 1
Client mosqsub/1955-raspberryp sending PINGREQ
Client mosqsub/1955-raspberryp received PINGRESP
Client mosqsub/1955-raspberryp received PUBLISH (d0, q0, r0, m0, '$aws/things/FoodDehydrator/shadow/update/accepted', ... (133 bytes))
{"state":{"reported":{"TEMPIN":"66"}},"metadata":{"reported":{"TEMPIN":{"timestamp":1452892787}}},"version":1,"timestamp":1452892787}
Client mosqsub/1955-raspberryp received PUBLISH (d0, q0, r0, m0, '$aws/things/FoodDehydrator/shadow/update/accepted', ... (133 bytes))
{"state":{"reported":{"TEMPIN":"66"}},"metadata":{"reported":{"TEMPIN":{"timestamp":1452892803}}},"version":2,"timestamp":1452892803}
Open another window and run a command:
mosquitto_pub --cafile $HOME/certificate/root-CA.crt --cert $HOME/fooddehydrator/cert.pem--key $HOME/fooddehydrator/privateKey.pem -h"A9HHD5G1IXZ9I.iot.eu-west-1.amazonaws.com" -p 8883 -q 1 -d-t '$aws/things/FoodDehydrator/shadow/update' -m "{ \"state\":{\"reported\": {\"TEMPIN\": \"33\" } }}"
To run mqtt in Python install paho library.
"pip install paho-mqtt"
In python you shuld add
import paho.mqtt.client as mqtt
client = paho.Client() client.on_connect = on_connect client.connect(“XXXXXYYYYY.iot.eu-west-1.amazonaws.com", port=8883) #AWS IoT service hostname and portno
To send data to AWS S3 in python, you need to install boto library. Boto3 provide native support in Python versions 2.6.5+, 2.7, 3.3, and 3.4.
"pip install boto3"


Comments
Please log in or sign up to comment.