Hi Everyone!
In today's world, every electronics hobbyist works with Arduino and Raspberry Pi to do his/her projects. With the introduction of Windows 10 IOT Core, Microsoft is also into the embedded world. Today Internet Of Things is a buzzword, but for basic things we need an Arduino to communicate with a Raspberry Pi. In this project I will explain how to communicate the Arduino with the Pi using an I2C bus and Windows 10 IOT Core.
Getting StartedFirst diving into coding: discussing the basics.
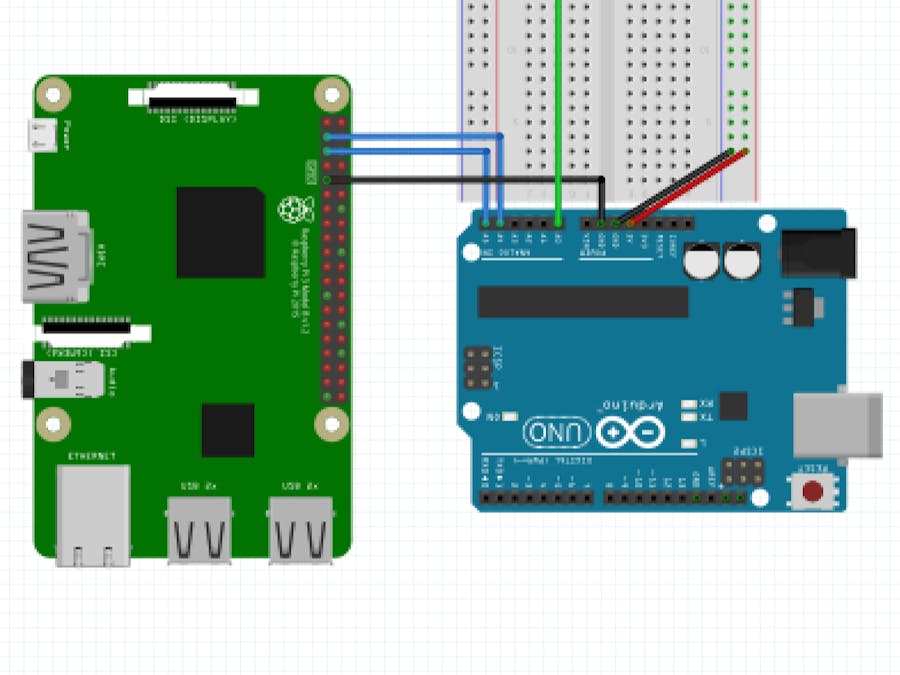
Arduino UnoThe image above shows an Arduino Uno in which we use the analog pin 0 for reading LDR value. I have added one resistor so that we get accurate results because Arduino reads the voltage difference. If we connect only LDR (Photocell) then it will have same voltage drop. Analog pin 4 and 5 are used as SDA and SCL lines which are required to have I2C Communication and these pins need not be initiated. By default they will be acting as SDA and SCL.
Arduino sends data read from LDR to Pi using the function:
Wire.write(response)
With the Raspberry, I have used windows 10 IOT core and have developed a Windows UWP app which reads data from Arduino and displays it. You can use Windows IOT Remote Client to remotely connect to the Raspberry Pi. First extract the code and open .sln file and dump the code in Raspberry Pi.


_ztBMuBhMHo.jpg?auto=compress%2Cformat&w=48&h=48&fit=fill&bg=ffffff)


Comments
Please log in or sign up to comment.