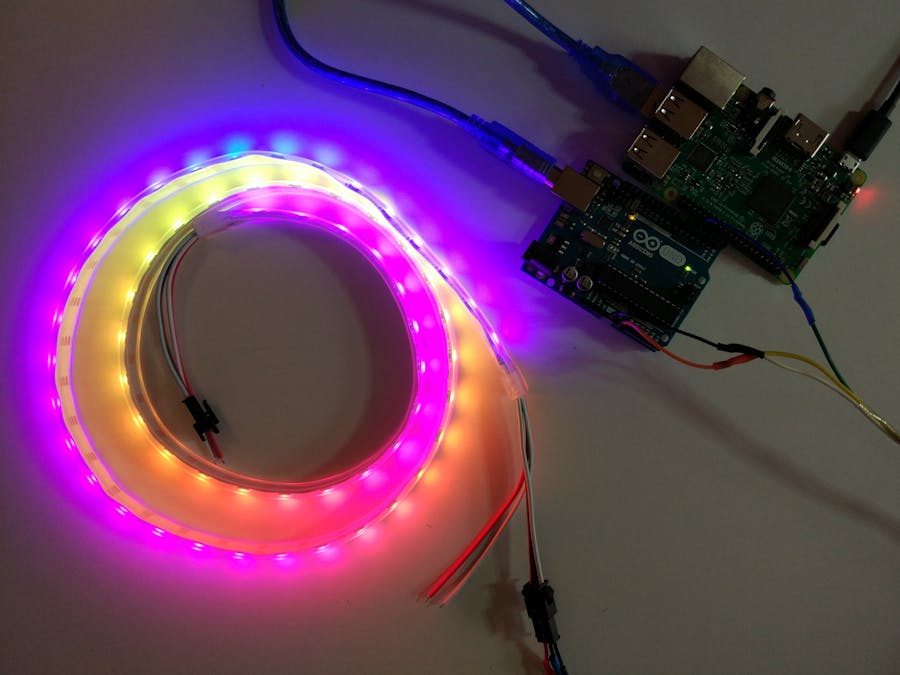
I was always fascinated by addressable RGB LED strips. The endless color effects and animation capabilities have always catch my creativity so few years ago I have decided to develop a library for the Arduino boards called ALA (Arduino Light Animations). Alexa is now giving me the possibility to control room lighting and effects with my voice and that's cool!
Project OverviewThere are the components necessary for this project.
- Amazon Alexa: A custom Alexa skill (Light Strip) defines the voice interaction model and translates commands (intents) that are issued to the Lambda function.
- Amazon Lambda: A Python script that receives messages from Alexa and send updates to the IoT service.
- Amazon IoT: The IoT service stores a 'thing shadow' which is a representation of the state of the RGB strip. Every time the shadow is updated, the subscribed MQTT clients (Raspberry PI) are notified.
- Raspberry PI: This small PC runs an MQTT client to receive messages from the Amazon IoT service. On the other side it will power and send commands to the Arduino board through the USB port.
- Arduino: This nice microcontroller will run the ALA library to drive the LED strip receiving the commands from the Raspberry PI over the USB serial port. You can use Arduino Uno, Nano or Mega board.
- WS8212 RGB LED strip: These are addressable LED strips so each led can be controlled individually. This allows beautiful and colorful light animations.
Nothing in the project is very challenging, but there are a lot of interconnected pieces. I suggest you to follow the suggested structure to build your project on a solid foundation before moving on to the next step. To make things as simple as possible I have split the project in two sub-projects.
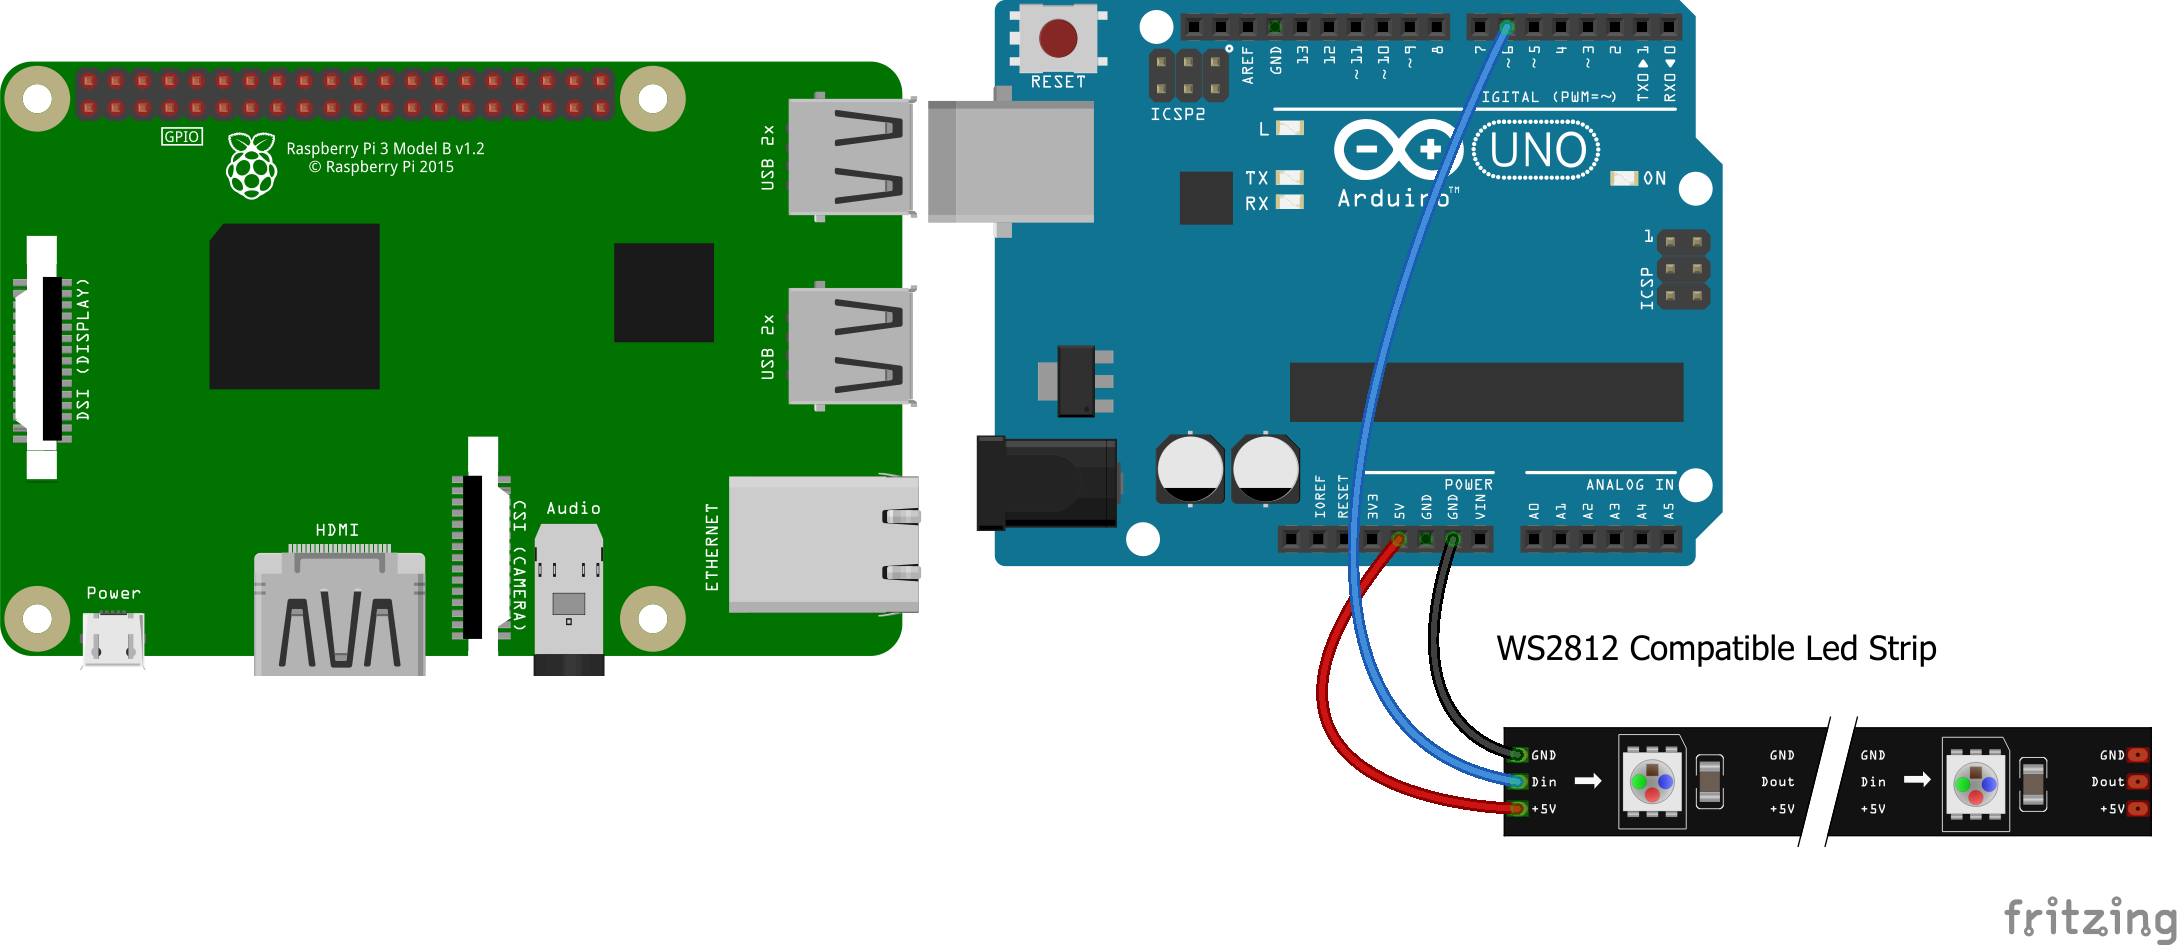
The first part of the project is described in my Web-Controlled LED Animations with Raspberry Pi and Arduino Hackster.io project and will guide you through the steps required to connect the Raspberry PI, the Arduino board and the WS8212 LED strip. At the end of this phase you will be capable of controlling the LED animations from a smartphone or a PC using the web browser.
The second part of the project described here will add voice control to the previous implementation using Amazon Alexa. There are several steps to be executed to setup the entire chain correctly so be patient and follow the instructions carefully..
Amazon IoTHave you completed the hardware part? It's now time to go to the cloud! We will use the AWS IoT platform to manage our 'thing' from the internet.
We will be using a "Device Shadow" , which is a copy of the state of a thing, along with the desired changes. The Raspberry PI will subscribe to a notification feed that publishes the changes ("delta") to this Shadow. Checkout this link for more info about AWS IoT platform and APIs.
Create an IoT Thing
Log in to the AWS Console. If you haven’t done so already, you’ll need to create a free account.
Ensure you are logged into US East (N. Virginia) or EU (Ireland) zone in the upper right corner.
Search for ‘IoT’ and select the AWS IoT service. Click on Get Started button (if any) to close the introduction tutorial.
We first need to create a security policy for our "thing". Go to Secure > Policies menu and then click on Create a Policy button and enter the following info:
- Name: LightStripPolicy
- Action: *
- Resource: *
- Effect - Allow: checked
- Click ‘Create’
Now we can create the IoT Thing.
- Select Manage > Things menu and create a new AWS IoT Thing by clicking on the Register a Thing button (or Create button in the upper right corner) and then on Create a single thing.
- Type ‘LS01’ in the Name field. Leave defaults for other fields and click Next.
- Click on the Create certificate button in the One-click certificate creation section.
- Download the 3 certificates for your device and the Root CA. For the Root CA you may need to right-click and then save it.
- After having downloaded the certificates, click on the Activate button.
- Click on the Attach a Policy button, and select the LightStripPolicy you have created before and then click on Register Thing.
Before moving on you need to note down the AWS IoT Endpoint. Click on the Settings menu in the bottom-left corner of the AWS IoT web page, open it and take note of Endpoint.
Configure Raspberry PI to listen to the 'Thing'
We first need to install the AWS IoT Device SDK for Python with the following command on the Raspberry PI command line:
sudo pip3 install AWSIoTPythonSDK
Now download LightStrip repository from GitHub and unzip it.
mkdir
cd /home/pi/LightStrip
wget https://github.com/bportaluri/LightStrip/archive/master.zip
unzip master.zip
Copy the four certificates you have downloaded when you created the IoT Thing in the /home/pi/LightStrip/LightStrip-master/pi folder.
Edit the lightstripcfg.py script. You can use any text editor. Here are the commands for the nano editor.
cd /home/pi/LightStrip/LightStrip-master/pi
nano lightstripcfg.py
Now edit the settings to match your configuration.
- AWSIOT: Enter the AWS IoT Endpoint that you noted previously.
- ROOT_CA: file name of the root CA certificate
- CERTIFICATE: file name of the certificate
- PRIVATE_KEY: file name of the private key
- DEVICE_NAME: leave it unchanged to "LS01"
Close nano editor and save the file by pressing 'Ctrl+X' and then 'Y'.
Launch the lightstrip.py script as follows.
sudo python3 lightstrip.py
The script will list the connected USB ports. The Arduino should be connected to /dev/ttyACM0 so run the script passing the port like this.
sudo python3 lightstrip.py /dev/ttyACM0
The test client will connect to the Amazon Thing Shadow service and subscribe to changes of the LS01 shadow device. Upon successful connection the client script will update its status to the LS01 device shadow and receive an acknowledge message like this.
To verify everything is working correctly, go back to the AWS IoT console and select the Manage > Things menu then open the LS01 device. Select the Shadow menu and you will see device shadow state.
Click on the Edit link in the Shadow Document section and paste the following JSON document in the Shadow state box.
{
 "desired": {
   "animation": "101"
 }
}
Here is what you should see.
When clicking on the Save link a ‘delta’ message will be sent to the MQTT client on the Raspberry PI that will turn on the led strip.
The following JSON document will turn the color to blue.
{
 "desired": {
   "color": "0066CC"
 }
}
At this point we are able to control our LED strip from the ASW IoT service so you should be proud of you.
AWS Lambda functionAWS Lambda allows to run code in the cloud without provisioning or managing servers. It is the perfect bridge between the Alexa Skills Kit that will enable the voice control in the last step of this project.
Log in to the AWS Console. From the list of services, select Lambda.
Ensure you are logged into the same region you have used in the previous step: US East (N. Virginia) or EU (Ireland) zone in the upper right corner.
Click on Create Function button. Click on Author from scratch and configure as follows:
- Name = LightStrip
- Runtime = Python 3.6
- Role = Create a Custom Role. This will launch a new tab. Just click “Allow” button to create a new role named lambda_basic_execution.
- Existing role: lambda_basic_execution
- Click Create Function button
Take note of the Lambda ARN ID in the upper-right corner.
Click on LightStrip box to bring up the function code section.
Code entry type: Edit code inline
- Runtime: Python 3.6
- Handler: lambda_function.lambda_handler
The lambda_function.py script should be already defined. Paste the code from LightStrip\lambda\lambda_function.py file into the code editor.
Create another file named ala_controller.py and paste the code from LightStrip\lambda\ala_controller.py file into the code editor.
This is how the whole thing should look like.
When you are done, click on the orange Save button in the upper-right corner.
Alexa SkillWe can now create the Light Strip custom skill for Alexa.
Go to Amazon Developer Console and sign in as needed. You may need to register your account first.
Go to Alexa > Alexa Skills Kit (Get Started).
Click on the Add a New Skill button in the upper-right corner and enter the following data in the Skill Information tab:
- Skill Type: Custom Interaction Model
- Language: English (U.S.)
- Name: LightStrip
- Invocation Name: light strip
- Click Save
This creates the skill. Note the Skill ID.
Select the Interaction Model menu and then click on the Launch Skill Builder button.
Click on the Code Editor button and paste the content of LightStrip/alexaskill/lightstrip_skill.json file in the text box.
Click on Save Model and Build Model buttons. It will take few minutes to build the model so be patient. Click on Skill Information button to go back to the skill configuration page.
Now click on the Configuration menu.
In the Service Endpoint Type select AWS Lambda ARN and then paste the Lambda function ARN you noted above.
Leave all the default values and click on the Save button below.
Connect Alexa skill to the Lambda functionGo back to your Lambda function. On the right side there is a list of predefined triggers. Select Alexa Skills Kit and it will be added to your function.
Configure as follows:
- Application Id = the Skill ID that you noted above
- Click Add
- Click Save
The project is now complete. Try the following voice commands:
- Open Light Strip
- Turn on
- Set brightness to 20 percent
- Set brightness to 50 percent
- Set color to red
- Set color to turquoise
- Turn off
- Run an exciting animation
- Run a relaxing animation
The LightStrip skill allows more advanced voice interactions as well
- Me: Alexa, open Light Strip
- Alexa: Welcome to LightStrip - The LED strip will glow with a blue light
- Me: Launch an animation
- Alexa: Do you want a relaxing or exciting animation?
- Me: Relaxing
- Alexa: OK - The LED strip will show a random animation
- Me: Next animation
- Alexa: OK - Another random animation will be displayed
To better understand the interaction model here is the full VUI diagram of the skill.
Automatically start the AlaWeb at boot
A small enhancement to the project is to automatically start the lightstrip.py script at boot so you don't need to manually launch it every time you power the Raspberry PI or something goes wrong and you have to reset. Follow this instructions.
Adding and tweaking animations
The Light Strip cskill already have 20 animation variations defined. However, the ALA library allows to easily setup your own animations choosing the animation preset, color palette and speed. You can add your own animations or tweak existing ones in the ala_controller.py script. Around line 80 you will see a list of animations settings that you can modify or enhance based on your tastes.


_ztBMuBhMHo.jpg?auto=compress%2Cformat&w=48&h=48&fit=fill&bg=ffffff)


Comments
Please log in or sign up to comment.