


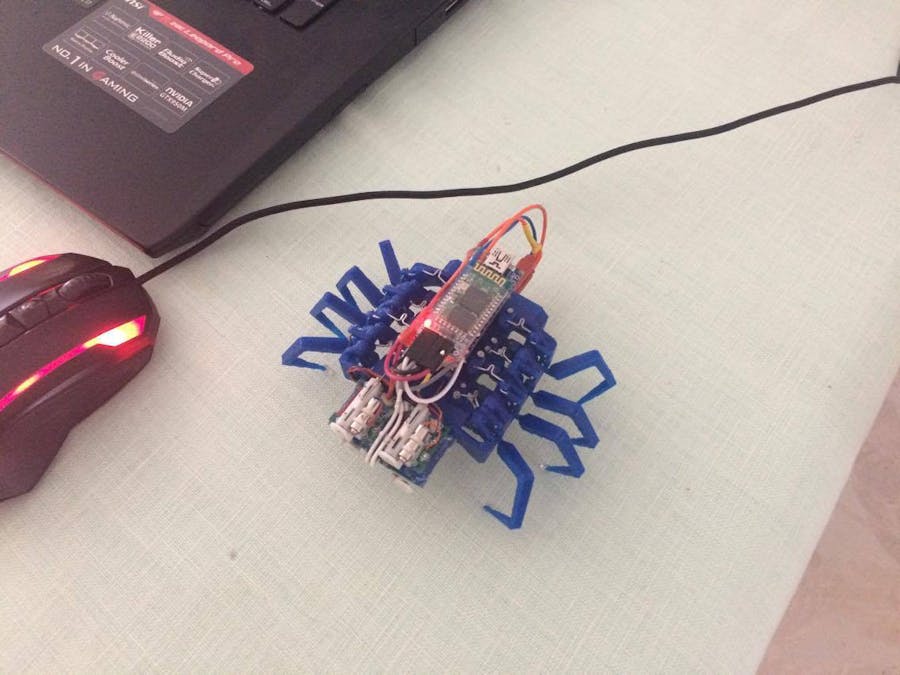
The goal of this robot was to keep it as simple as possible but remain the most important movements. This robot uses 4 micro servos salvaged from old and broken indoor rc-planes and helicopters. these servos are controlled by an Arduino Nano and powered by two 1-cell 200mAh lipo battery's. To control the movement of the robot I use a Bluetooth transeiver connected with an android device. This allows me to make the robot go forwards, backwards, turn left and turn right. In the download link you can find a video and some pictures so you can see how it works.
DetailsThis spider like robot uses only 4 micro servos salvaged from old and broken indoor rc-planes and helicopters. these servos are controlled by an Arduino Nano and powered by two 1-cell 200mAh LiPo batteries. So I eventually made a 2-cell LiPo instead of my original idea of using a single-cell LiPo battery. So now I have 2 voltages: 7.4 volts wich goes to the Vin pin on the Arduino Nano and 3.7 Volts which goes directly to the servos and the Bluetooth module. To control the movements of the robot, I use a Geekcreit HC-06 Wireless Bluetooth Transceiver connected to an android device. All parts are designed by me and printed with my 3D printer in PLA plastic. I have uploaded all the part files in the files section on this page and also on Thingiverse. And I also added a complete version of the robot in the download link so you can see how it works.
STL-files can be found here : https://www.thingiverse.com/thing:2470882
video:
Build InstructionsStep 1
3D print all the components:
- 2 x hinge high left
- 2x hinge high right
- 12 x hinge
- 2 x left aft leg
- 2 x left front leg
- 2 x left midle aft leg
- 2 x left midle front leg
- 4 x long hinge
- 2 x movable plate holder 1
- 2 x movable plate holder 2
- 2 x movable plate holder 3
- 2 x movable plate left right
- 4 x movement hinge
- 8 x outer hinge
- 2 x pushrod
- 1 x servo base
- 8 x slider
- 4 x small hinge
All the files can be found in the download link.
Step 2
I recommend you drill al the holes with a 1 mm drill to get the best result.
Step 3
You can use the complete spider bot 3D model as a guide to how to assemble the robot.
Step 4
To mount the servos you can just hot glue it to the servo base.
Step 5
Once you have completely assembled the robot, you can lubricate it with some grease. I use WD40.
Filesspider bot.stl: This is an stl from the complete robot so can see how it looks and works.


Comments
Please log in or sign up to comment.