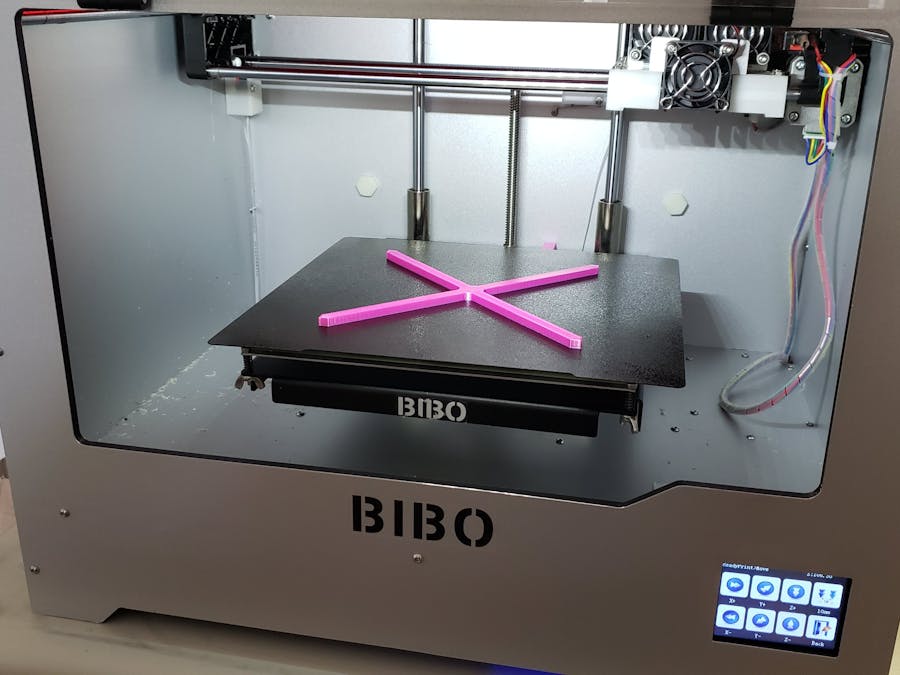
The first layer is the most important step in the entire 3D printing process. All other layers are built onto that first one, and you need to ensure that it sticks well. Unfortunately, most 3D printers come with glass or aluminum beds. Some filament may stick to those, but not reliably. That forces you to use blue painter’s tape, glue sticks, or disposable sheets to help with adhesion. In many cases, parts end up sticking too well, and become very difficult to remove.
Fortunately, there is a better way! Flexible build plates allow you to easily remove parts with a quick bend that causes the parts to pop right off. Some 3D printers, such as the Prusa i3 MK3, come with build plates like that. If yours didn’t, I’m going to explain how you can retrofit your 3D printer with one, and do it affordably.
I’m going to cover how I did this in two different ways on my BIBO 2 Touch Dual-Extruder 3D printer, which originally had a glass bed. But the same process should work for most 3D printers. I tried two different types of beds, and will explain the pros and cons of each.
PEI Spring Steel SheetThis is the type of build plate that comes on Prusa 3D printers. It’s made of spring steel, which can easily flex and then return to its original shape. The plate is coated in PEI, which most filaments will adhere to well—though PETG will stick toomuch and could damage the coating. It’s also attracted to magnets, which means you can effortlessly remove the plate in order to detach your parts.
To use this with your 3D printer, you’ll need to order:
· New glass bed (optional)
All you have to do is glue your magnets to your printer’s original bed—ideally it’ll have a removable glass bed, so you don’t risk damage to the actual machine. If you have the BIBO 3D printer, measure the thickness of the magnets and bed before you start gluing. That way you can 3D print a spacer of equal height to attach below the Z axis limit switch in order to account for the additional material. A similar process will be necessary for most 3D printers that use limit switches for the Z axis.
When you glue the magnets to the bed, first stack them all to ensure they’re all oriented in the same direction. Then simply glue them in an evenly-distributed pattern. As you can see, I focused on the edges and center before filling in the rest of the area. That was to account for a slight bow in my PEI spring steel sheet.
After allowing the glue to dry, you simply reattach the glass to your 3D printer. Then you can snap the PEI spring steel sheet to the magnets and start printing! You shouldn’t need any glue or tape, and it’s okay to heat the bed. Even PVA—which I use for soluble supports—sticks well to the PEI without glue.
I have only identified two downsides to this setup:
1. The PEI spring steel sheet can’t be easily trimmed down, so it may not fit all printers.
2. The build plate takes longer to heat, as the heated bed has to go through the magnets.
Flexible Magnetic Build SurfaceThis kind of surface comes in a variety of materials, styles, and sizes from different manufacturers. I’ve linked to the one I used below. What these all have in common is that they come in two pieces: the magnet “sticker” that attaches to your printer’s original build plate, and the build surface that sticks to the magnetic sticker. Both are very flexible, and can be trimmed with scissors.
· Two-Layer Magnetic Hot Bed Sticker
Please note that the two pieces are polarized, so the attraction will be stronger in one direction than the other. If it seems weak, try rotating the top piece by 90 degrees. Start by trimming yours down to size. If you have a BIBO 3D printer like I do, make sure to trim it a little bit small to leave room for the clips that hold the glass in place. As with the PEI spring steel sheet, you’ll need to 3D-print a spacer for the Z axis limit switch to account for the extra thickness. Then simply remove the backing from the adhesive, and stick it your glass bed.
PLA and ABS stick well to this surface, but PVA does not. I was forced to use a glue stick to get the PVA to adhere. In my opinion, that defeats a large part of the purpose of doing the upgrade. But it does still let you easily remove parts. It’s also possible for the strength of the magnet to be reduced by the heat from the bed, which might limit your ability to print material like ABS.
TL;DRFor my purposes, the PEI spring steel sheet is the best upgrade you can make to your 3D printer. It should cost under $50 for the needed parts, and is well worth the expense. If, however, you can’t find a PEI spring steel sheet in a size that will work for your printer and don’t have the tools to trim one down, then a two-piece flexible magnetic build surface may be worthwhile.


Comments
Please log in or sign up to comment.