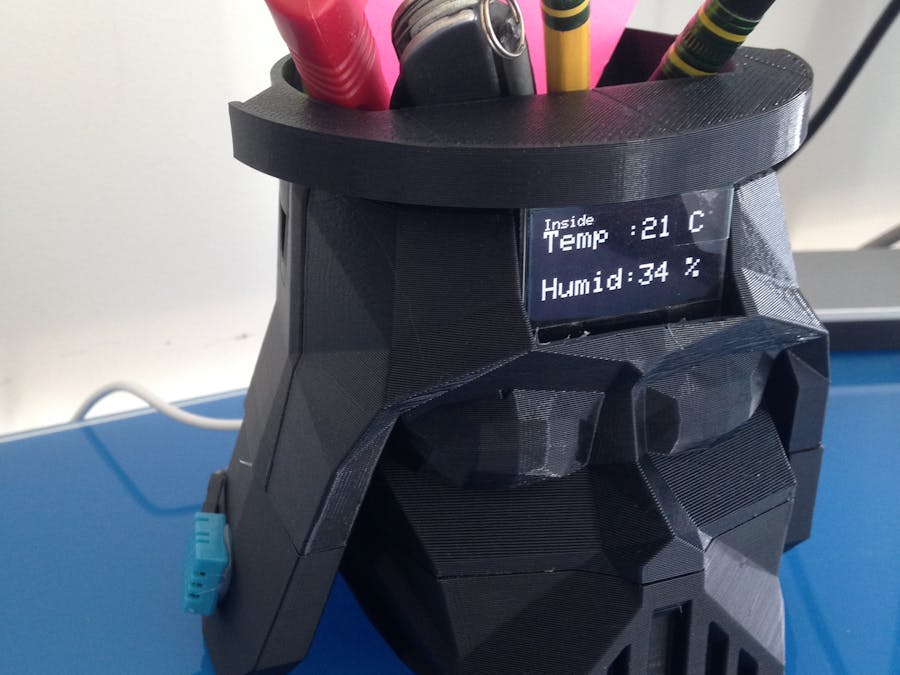
Here is a great weekend project to undertake, if you are a Star Wars fan and specially a fan of Darth Vader. Use the Photon by particle.io and 3D printed parts to make your very own Darth Vader command center. Here are some features that I managed to implement using IFTTT recipes (https://ifttt.com/recipes) and Adafruit's OLED screen, to show data using a potentiometer as a dial as shown in the pictures below..
Here is a quick video demo of the project, which takes you through all the features mentioned below
Features
#1 Show the temperature and humidity inside your house using a DHT11 sensor
#2 Show the High and LOW temperature using IFTTT recipe for particle
https://ifttt.com/recipes/384730-send-high-low-temperature-to-oled-display-connected-to-photon
#3 Show the Weather conditions out side so that you can decide what to wear before heading out for the day
https://ifttt.com/recipes/384943-sending-weather-condition-to-photon
#4 Latest tweet that you are mentioned in, this will also make the NeoPixels run a rainbow cycle
https://ifttt.com/recipes/384763-display-mention-of-yourself-on-oled-screen-connected-to-photon
#5 Display the Surf report if the surfing conditions are faire or higher
https://ifttt.com/recipes/384942-surf-report-posted-to-oled-screen-connected-to-photon
#6 Use a simple web page to send message to the OLED screen from any computer/tablet at home.
Build steps
3D print the STL files attachedDownload the STL files attached and print. 3D printing all the part could take about 8-10 hours based on your 3D printer settings.Here are some suggested setting
- layer height - 0.3mm
- Infill - 20%
- For the transparent part use a Brim for bed adhesion
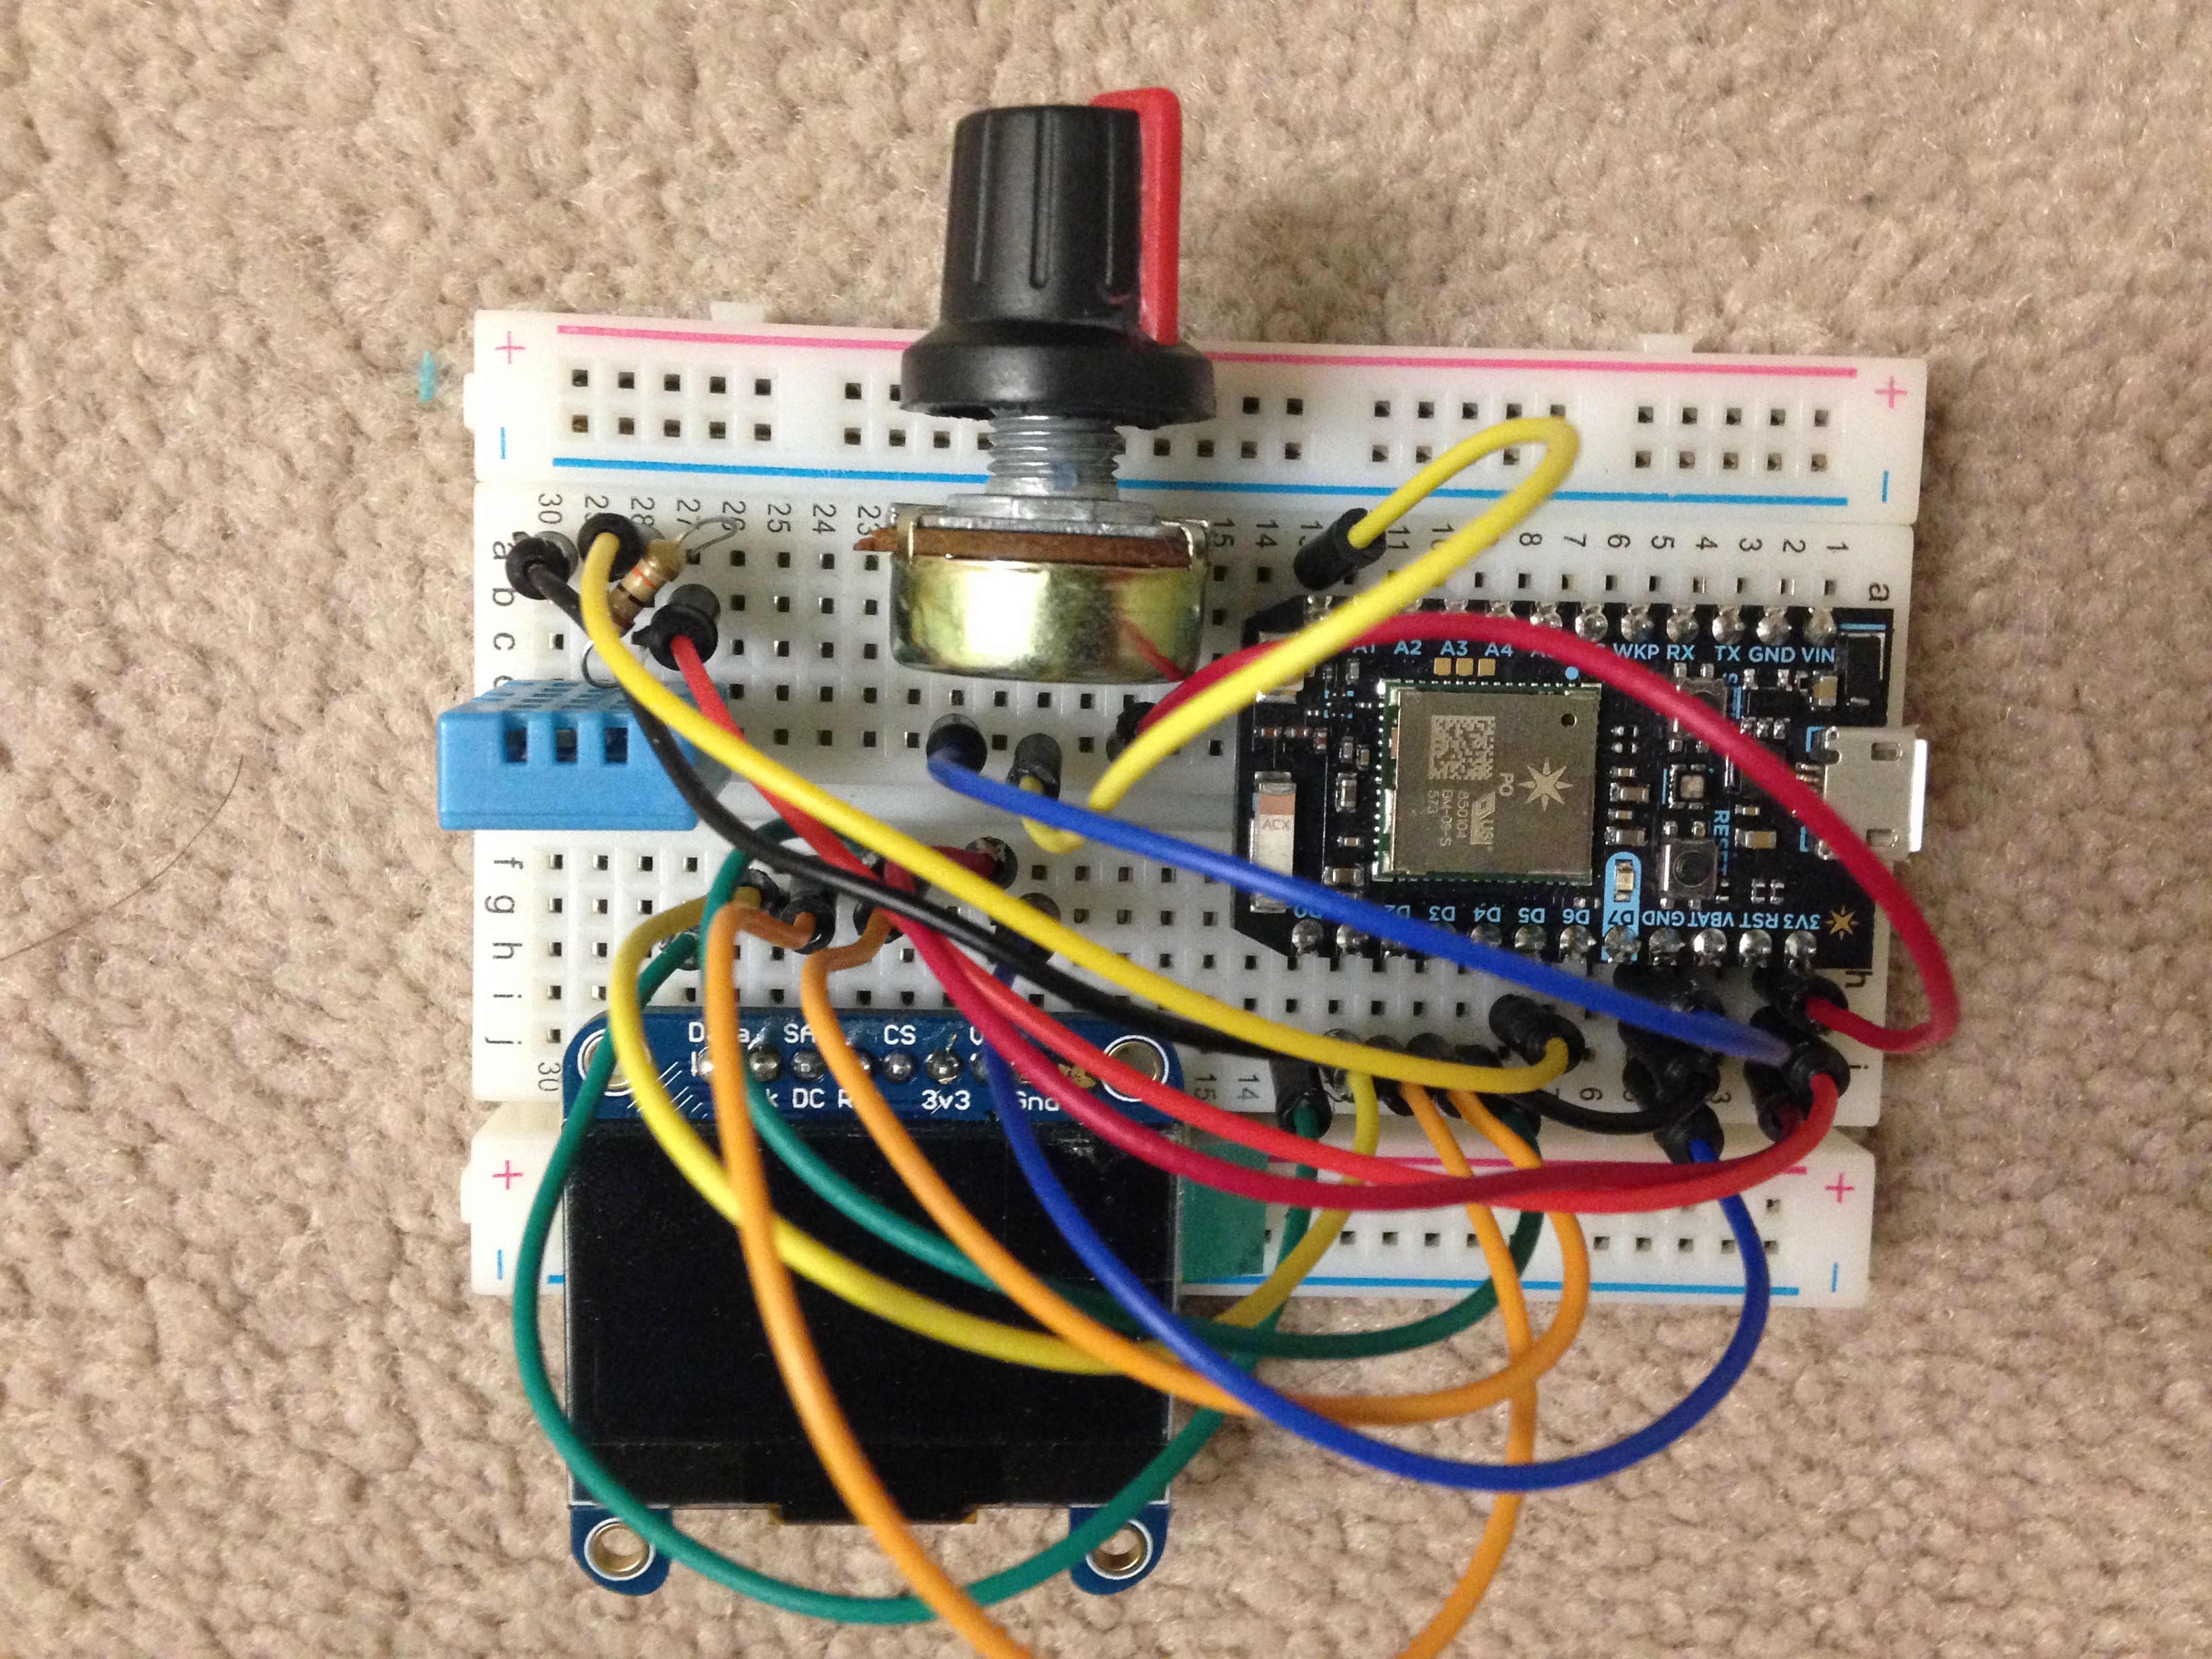
Follow the Circuit schematic below to build the circuit , at a high level
- DHT11 sensor to D5
- Potentiometer to A0
- Nepixels connected to
- And the screen in the SPI, that is
- MOSI to D0
- CLK to D1
- DC D2
- CS D3
- RESET D4
Upload code to the Photon
Before you get to the code you will need to setup up your brand new photon,refer to the photon documentation at
https://docs.particle.io/guide/getting-started/intro/photon/
Download the code attached and upload it your the photon , here I had some issues using the Web IDE with the OLED display .h file,so give it a try if it works for you or use Particle Dev which is based on the Atom editor, for more details
https://atom.io/packages/particle-offline-compiler
One you have every thing setup and you are logged in using your particle id , select your Photon and use the flash button to upload the code to the photon.
Modify the IFTTT Recipes
If you plan on using the same code, update the public recipes under my profile on IFTTT website or create your own
https://ifttt.com/p/carmelito/shared
Basically click on the recipe above and add you details , like your twitter account or your location and you will also have to associate the spark function .
Note : you need to upload the code to photon first and have it running for spark function to show up when you are modifing your recipe, here is an example of the Sending Weather condition to Photon recipe
For more info on IFTTT recipes refer to
https://docs.particle.io/guide/tools-and-features/ifttt/
Before you test your setup you will need to modify the POT values for each of your IFTTT recipe related message as shown in the Video below
Sending Message to Photon from web page
Download the html code attached and change the
- Access token and
- Device Id value in the code
the easiest way to get these values from https://build.particle.io/build/new in the setting section or the build section
Basically this can be use to send a message from any where at home by storing the HTML file on computer or tablet or if you have a Raspberry Pi running a web server host the page on the Pi.
NOTE : since this page contains your photons access token and device id , do not deploy the page to a server on the internet..
To test sending a message open the HTML page and send type in your message and hit the send button, you should see the message on the screen as shown in the picture below and you should also see the Neopixels change color.
Now to reset the message turn the POT dial to the right.
Once you are done with the testing of your circuit , glue the components together using your favorite glue, in my case I am using super glue.
Start of by moving the Photon to a smaller breadboard and then add the Neopixels that are soldered together to the bottom of the helmet piece.
Drill a hole for the Pot and glue it to the part. And also use male to female header pins to connect the OLED screen and DHT11 sensor.


Comments
Please log in or sign up to comment.