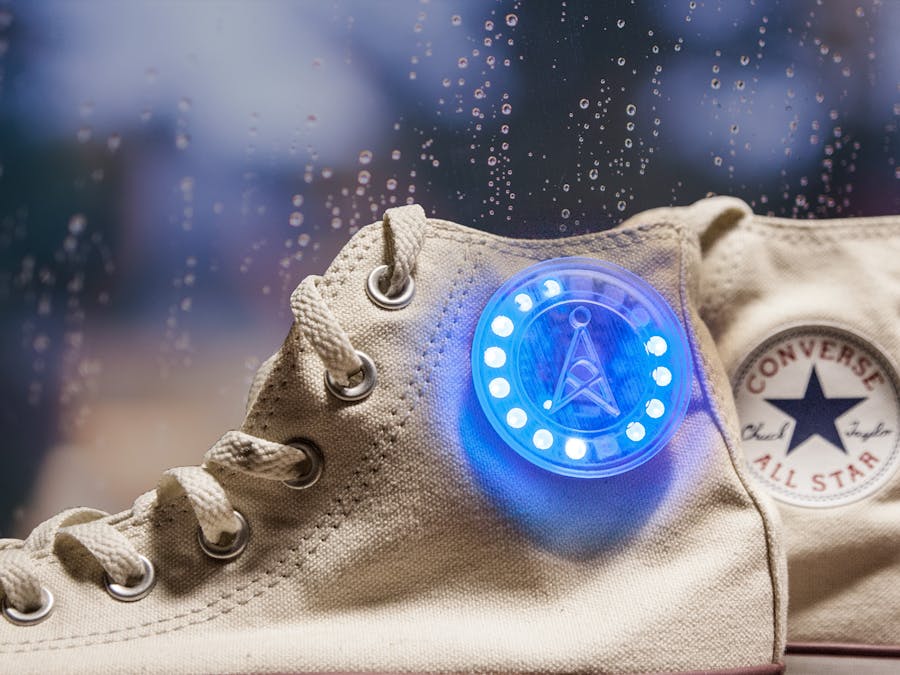
Converse Beacon is a DIY hack that uses an Arduino board, Bluetooth, and a NeoPixel ring to alert you to custom weather conditions through IFTTT. Know when it's going to rain or snow, when the temperature outside is perfect, or when the surf is firing with custom alerts that add style to your Chucks.
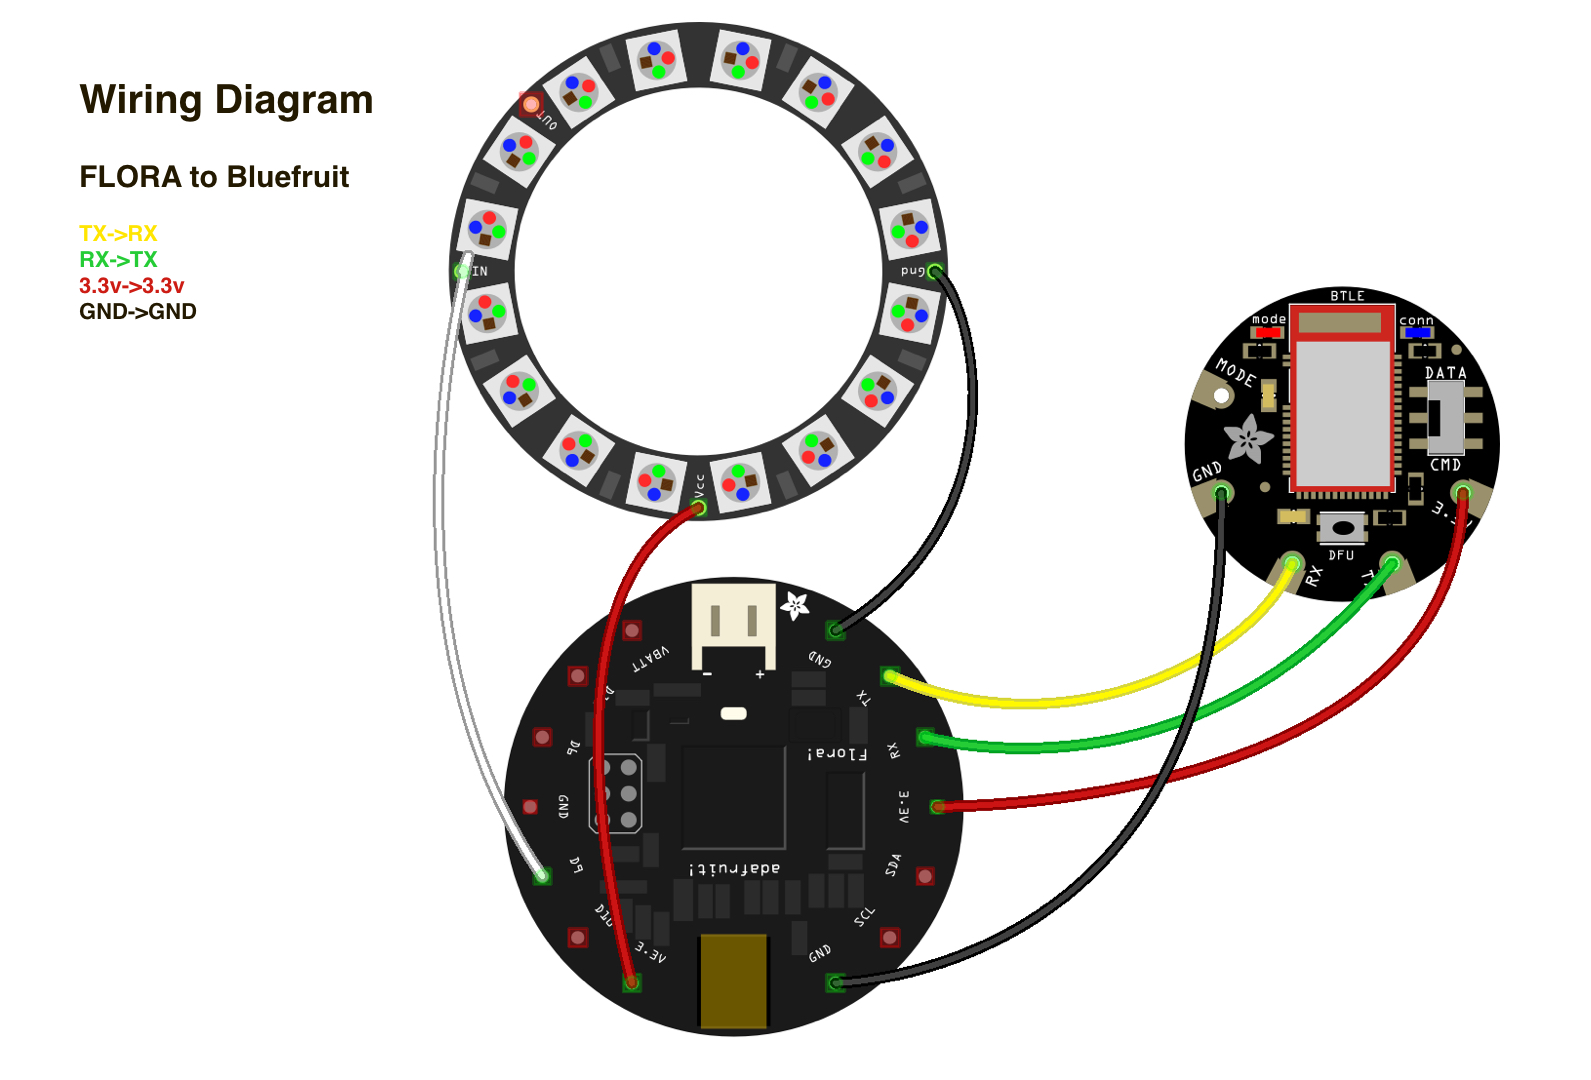
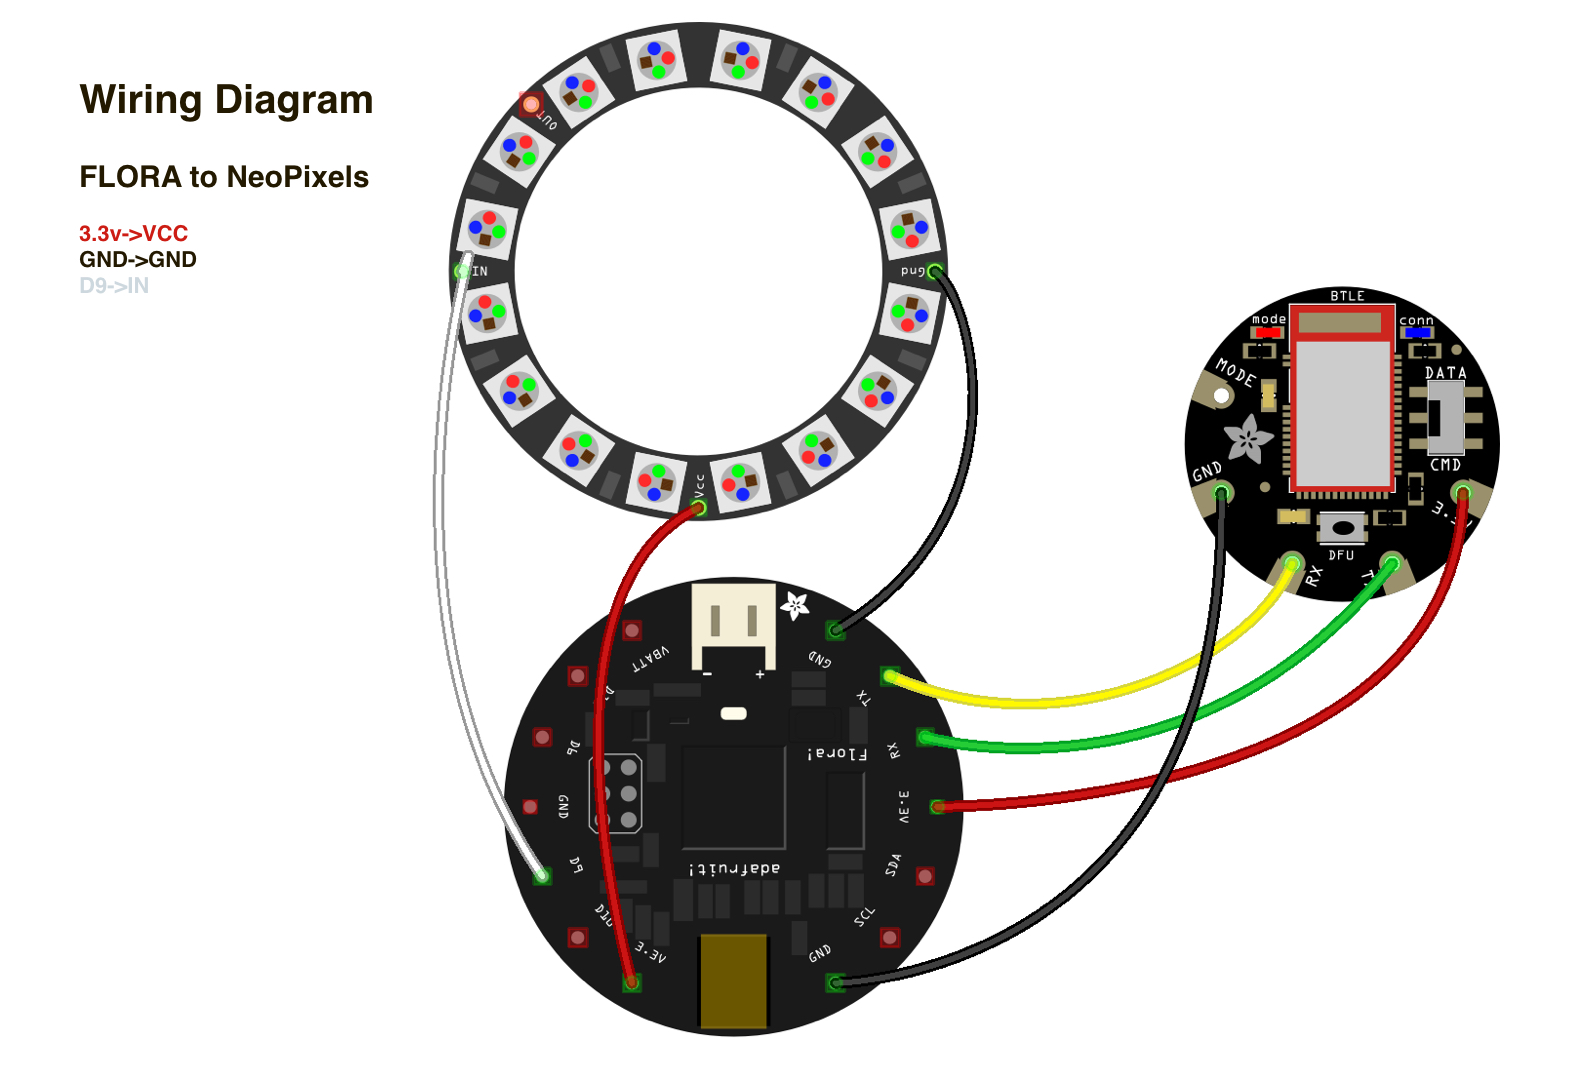
Assemble the componentsBefore soldering, check out the wiring schematics below.
Once you've finished soldering your wires, use a craft glue (like E6000) to carefully affix the NeoPixel ring to the Flora. Using clamps will help secure it while the glue sets, but be careful not to damage the NeoPixels.
Finishing your BeaconEnsure the Flora power switch is set to 'On' before gluing or sewing. Similarly, the Bluefruit LE's mode switch should be set to 'CMD'.
The Flora has several holes for sewing the disc onto clothing. Align the Beacon so the battery receptor (the black port opposite the Flora's micro USB port) is on top. Using a needle and thread, attach the Beacon to the outside panel of your Chuck (not the side with the Chuck Taylor All-Star emblem).
Once the unit is sewn onto the shoe, carefully use the glue to secure all components. A good method is to put a liberal dab under the Bluetooth module first, and then secure the NeoPixel ring to the Flora.
Using an X-Acto knife, make a small incision above the Beacon near the black battery port. With adhesive velcro patches, attach the battery to the inside of the shoe in a comfortable location. Run the wire through your incision, and plug the battery into the Beacon.
You can find a design for a 3D-printed cover in the CAD section of this guide. To find a local 3D printer, head to 3Dhubs.com. You can also place an order online with a company like Shapeways. We used a local 3D printer to create our cover with a transparent resin finish.
Once you receive the cover, glue the edges of the Beacon, place the case on it and leave it to dry.
Now’s a good time to install the Arduino software and test the LEDs. You can find the software here: https://www.arduino.cc/en/Main/Software
Install and open the program. Select 'Preferences' from the 'Arduino' menu. In the "Additional Boards Manager URLs" field at the bottom of the screen, paste this URL: https://adafruit.github.io/arduino-board-index/package_adafruit_index.json and hit OK.
Navigate to the Tools menu > Board > Boards Manager.
Set the Type to 'Contributed', search for "Adafruit AVR Boards" and install it.
You should now be able to set the Board for "Adafruit Flora" from the Tools menu > Board.
Plug the Flora into your computer with a micro USB cable.
In the Arduino program navigate to Tools > Port and select the port marked (Adafruit Flora).
Go to the Sketch menu and choose Include Library -> Manage Libraries. Search for "FastLED" and install it.
Go to File > Examples > FastLED > DemoReel100. Change lines 18–20 in the program to the following:
#define DATA_PIN    9
//#define CLK_PIN   4
#define LED_TYPE    WS2812
Hit the arrow in the upper left corner to upload the code to the Flora:
The Flora should illuminate after your code has uploaded.
Install the Adafruit Bluefruit app:
Android - https://github.com/chapter-sf/bluefruit-android/blob/master/app-debug.apk?raw=true
iOS - https://itunes.apple.com/us/app/adafruit-bluefruit-le-connect/id830125974?mt=8
Note: iOS limits the amount of background activity an app can execute. Android will permit the app to stay connected while the phone is asleep.
Head to Arduino's Sketch menu > Include Library > Manage Libraries. Search for "Adafruit Bluefruit nRF51" and install it.
Download the Beacon code from our Github: https://github.com/chapter-sf/Beacon/archive/master.zip. Open the 'ble_led_mqtt_fastled4.ino' file in Arduino. Upload to your Flora board by hitting the arrow in the upper left corner.
Next open the Serial Monitor by navigating to the Tools menu > Serial Monitor. You will see a text window confirming that the Bluetooth module has successfully reset.
Open the Bluefruit LE Connect app on your device, select "Scan for Peripherals", and find your Bluefruit LE device. Hit 'Connect' and choose UART mode. Send a test command such as r, g, b, h, or l (L) and you should get a test sequence.
Set up your weather triggersHead to http://adafruit.com, create an account (or sign in), and sign up for the open beta of Adafruit IO at https://io.adafruit.com.
Create a new feed from Your Feeds page (https://io.adafruit.com/feeds) using any name and description you like. Take note of the feed's key listed at the top of the feed page.
From your Bluefruit LE Connect app's UART interface, click on the "MQTT" button. In the server address field type in io.adafruit.com. In the Subscribe field, the 'Topic' should be set to [your Adafruit username]/f/[feed key] -- e.g., "chapter/f/beacon". Set the Action to 'Transmit'. Under Advanced, enter your username.
Go back to your feed's page at https://io.adafruit.com/[username]/feeds/[feed key] and click "View AIO Keys". Copy this and paste into the Bluefruit Connect app's MQTT Settings > Advanced > Password.
At the top of the MQTT Settings page hit 'Enable' or 'Connect' (depending on your OS).
If you want to test the signal, head to https://io.adafruit.com/[username]/feeds/[feed key], scroll down to the '+' and Create Data. Enter an s, t, r, l (lowercase L), or a. And then there was light!
Head to our IFTTT page to see the current recipes -- snow, surf, rain, heat, and cold. Login to IFTTT (or sign up) and add any or all of the recipes. Make sure to update your local/personal information as necessary, including your Adafruit feed from above.
Hack the hackOnce you've connected IFTTT to the Adafruit channel, you aren't limited by just the weather. There are hundreds of possible recipes to link various inputs to your NeoPixels. Get creative and post your best in the comments!


Comments
Please log in or sign up to comment.