I'm a big fan of .Net, and Windows 10 IoT, so it was very exciting the first time when I know that I could control a hardware using .Net.
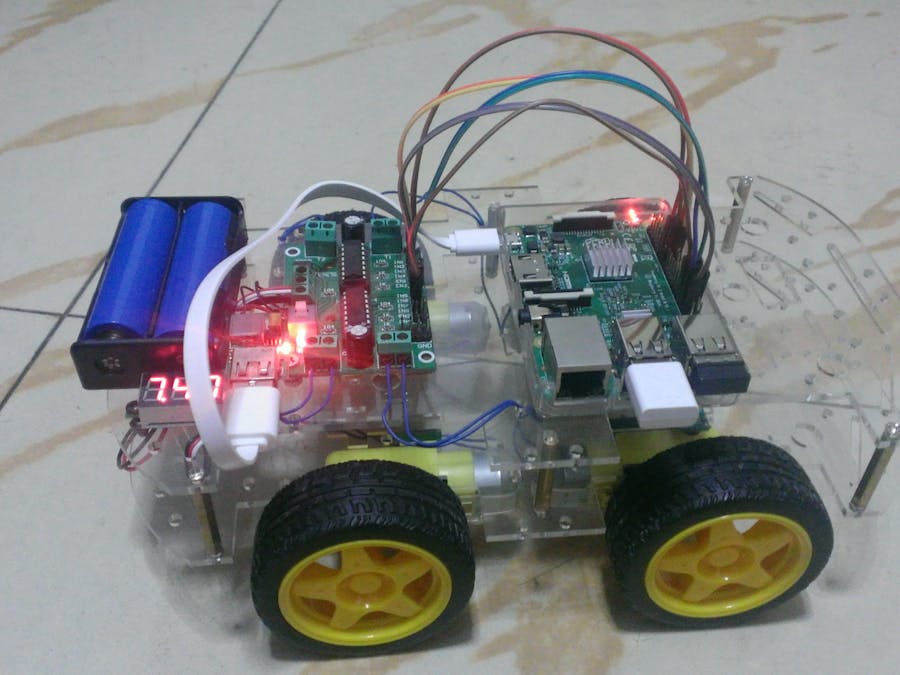
After a period of time, I finally finished my first homework: a WIFI Smart Car.
This version of the smart car is kind of simple, the only thing I can control is forward, reverse, turn left and right. I'm trying to add more functionalities later on.
Now, let's see how I made it.
Components
There're two core components: Motor Driver and Raspberry PI. The former is used to trigger those four motors, and the latter is used to control the motor driver.
Let me introduce the Motor Driver a little bit more.
A motor driver is consist of dual L293D IC. The L293D IC is a H Bridge type IC, can be used to drive two DC motors at a time.
When the enable input is high, the associated driver gets enabled. If the Input 1 is HIGH, and Input 2 is LOW, the motor will start working. On the contrary, If the Input 1 is LOW, and Input 2 is HIGH, the motor will turn to the other way. If both Input 1 and Input 2 is Low, the motor will stop.
If we want to control the speed, we could use PWM (Pulse Width Modulation) as the input to Enable 1. But as the current version of Windows 10 IoT doesn't provide native API to support PWM, I will not talk about it now.
Besides, the motor driver also have a +5V output pin, which could be used to be the power source for Raspberry PI.
To do it, I used another component USB DC 1~5V to DC 5V Voltage Step Up Boost Module.
Circuit
Base on the above information, it should be easy to figure out a circuit for it.
Simply use 8 GPIO pins to control 4 motors. That's it!
Code & Debug
Please refer to below sections for the code. Here, I just want to talk about the debug.
I have just updated the Windows 10 IoT inside preview (flash the OS 10513.0 to the Raspberry PI), when I try to debug my code using remote debugger, the VS told me the remote debugger in my IoT device is old than my Visual Studio 2015. I tried everything I could, but all failed until I found a sentence in the release note:
Windows 10 UWP projects created with Visual Studio RC are not compatible with the current Visual Studio release. Users should create a new blank UWP project or Background Application (IoT) project and copy their source code into the new project.
I don't know what's the difference, but it did work after I followed this instruction.
Deploy
Create a package
Before deploying, we must make an installer which is an appx file.
After created the package, you can find following files in that location:
Install the app
Use WebM to install the app directly:
Choose those files which were just generated and click Deploy -> Go.
Set startup
This is another thing which drove me crazy.... I have searched a lot and only found tutorials talking about how to debug via Visual Studio, but what I want is to make a standalone background app, and make it running once booted.
Finally, thanks to Anurag S. Vasanwala, his article saved me a lot of time. You could find useful information about how to set the startup app.
Two things need to be noticed:
1. You can find two of your apps installed in the IoT device even you installed only one app.
I'm not quite sure why, but it's very obviously to know that, if your app is a headless app just like a background app, after installation, you could find a headed app whose name is very similar to your headless app.
2. Set the headless app as startup app.
If your app is a headless app, you should not set the headed app as startup app, otherwise, you will face to the blue screen while the IoT device rebooted.
Everything is done, after reboot the IoT device, you could find your app is running properly.
You could also find the Chinese version of this article from this link.


Comments
Please log in or sign up to comment.