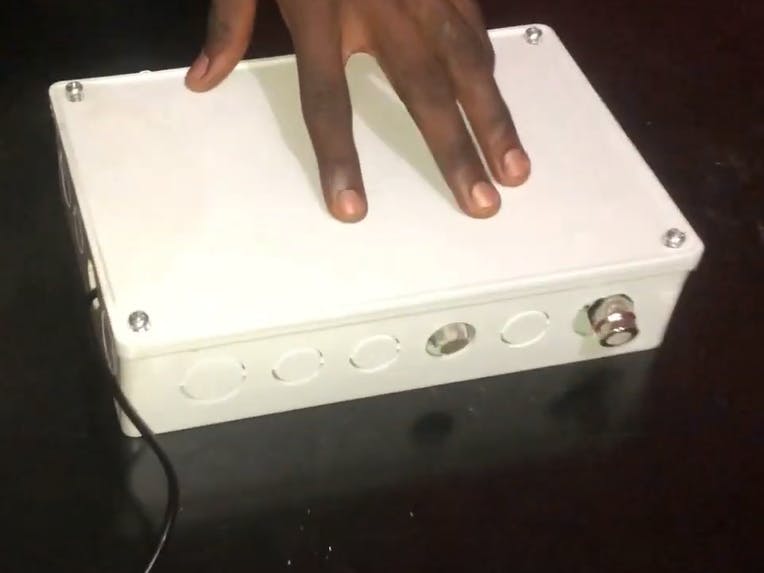
The Chemotron V1 is a simple IoT sensing device that senses the (Carbon dioxide) and Co (Carbon Monoxide) concentration in the atmosphere. It uses two sensors, MG811 (Co2) and MQ9(Co) sensor. This doc is a quick rundown of how we built it, and how you can replicate it.
What we used (components and devices):
1) A Computer to program the microcontroller (windows o.s)
any Intel CPU can conveniently perform the task.
2) ESP8266 NodeMcu LUA Wifi development board:
Cost: ₦2, 700.00
Link to where we purchased the product on hub360 in Lagos: https://hub360.com.ng/product/nodemcu-ch340/
NodeMCU is built based on the mature ESP8266 technology to take advantage of the abundant resources available on the web.
NodeMCU has ESP-12-based serial WiFi integrated on board to provide GPIO, PWM, ADC, I2C, and 1-WIRE resources at your fingertips, built-in USB-TTL serial with super reliable industrial strength CH340 for superior stability on all supported platforms
3) The MG811 sensor.
Cost: ₦20, 000.00
Link to where we purchased the product on hub360 in Lagos: https://hub360.com.ng/product/mg811-co2-carbondioxide-sensor-module/
Carbon dioxide detection sensor module (with analog signal output, TTL level signal, temperature compensation output).
4) The MQ9 sensor.
Cost: ₦1, 500.00
Link to where we purchased the product on hub360 in Lagos: https://hub360.com.ng/product/mq9-carbon-monoxide-gas-sensor-module/
The MQ-9 gas sensor has a high sensitivity to Carbon Monoxide, Methane, and LPG. The sensor could be used to detect different gases containing CO and combustible gases, it is low cost and suitable for different applications.
5) Jumper cables
Cost x 6: ₦120.00
Link to where we purchased the product on hub360 in Lagos: https://hub360.com.ng/product/male-male-jumper-wire-single/
This is a single-piece male-male jumper wire, each piece was sold for ₦20 we bought 6.
6) Breadboard.
Cost: ₦600.00
Link to where we purchased the product on hub360 in Lagos: https://hub360.com.ng/product/breadboard-mb102/
This is a construction base for prototyping of electronics before transferring to a permanent board.
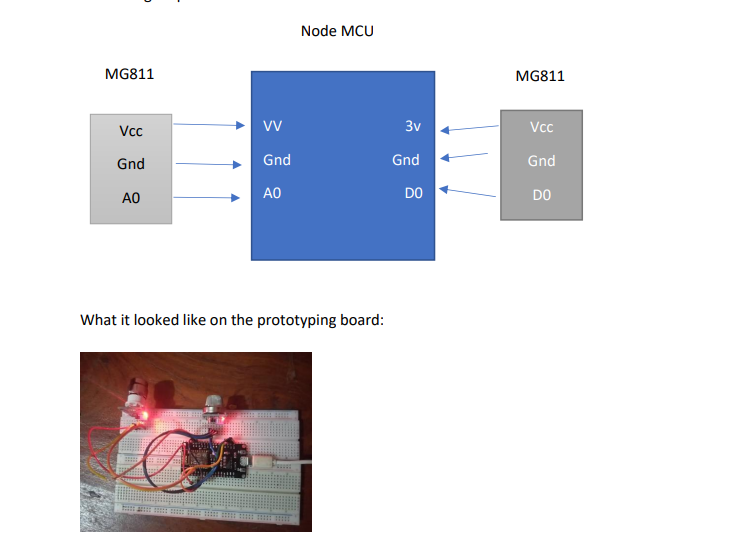
Steps.1) Connecting the Hardware:a) Connecting the hardware via Jumper cables is quite easy, The MG811 sensor has 4 pins; VCC, GND, A0, and D0.
The Vcc pin is connected to vv pin on the Esp board.
Gnd is connected to any GND pin on the ESP board
A0 is connected to the A0 pin on the ESP board such that you can read the analog values of the sensor.
b) For the MQ9 Sensor, we connect such that:
Vcc pin is connected to a 3v pin on the Esp board, the MQ9 sensor uses 3v.
Gnd is connected to any GND pin on the ESP board
D0 is connected to the D0 pin on the ESP board. The ESP board has only one analog pin, and several digital pins.
What it looked like on the prototyping board:
Arduino IDE is the most suitable to program the board. First, download and install the Arduino ide software; this software is used to read from and write(program) to the microcontroller. You can download it here https://www.arduino.cc/en/software
After downloading the software, you’ll need to install the ESP8266 Add-on.
To do this:
1. In your Arduino IDE, go to File> Preferences
2. Enter http://arduino.esp8266.com/stable/package_esp8266com_index.json into the “Additional Boards Manager URLs” field as shown in the figure below. Then, click the “OK” button:
3. Open the Boards Manager. Go to Tools > Board > Boards Manager…
4. Search for ESP8266 and press the install button for the “ESP8266 by ESP8266 Community“:
5. That’s all we’ve now installed the board.
3) Uploading the Code:The Code needed to run this is in the hardware section of the GitHub repository. The code itself has been well-explained line by line using comments.
1. Download the code and open it with the Arduino IDE, be sure to edit your WiFi name and Password, and also the API key when you’ve completed the last section.
2. Select the board: We selected one of the NodeMCU boards available, for Us, any generic ESP board would work just fine:
3. Then also select the port where you insert the USB device:’:
4. Next, you upload the code to the board:
Thingspeak.com manages your read and write for your IoT device.
1. create an account on http://thingspeak.com/
2. Go to the Channels tab and create a new channel.
3. Fill in the necessary details, For this project, we made use of 2 fields:
4. Design the Dashboard to your taste:
The End. I hope you found this useful!
Feel free to reach out to me on LinkedIn.


Comments
Please log in or sign up to comment.