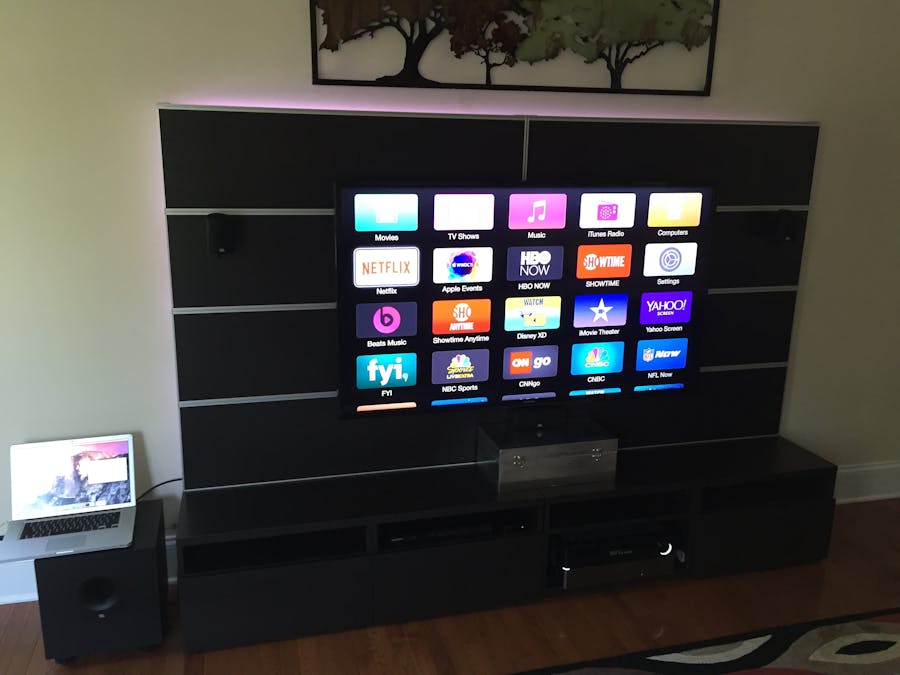
I wanted to liven up my entertainment center and bring a little more color and movement into the family room. I attend a monthly embedded systems meeting at North Carolina State University called TriEmbed and I came to know Adam Haile and Dan Ternes, founders of Maniacal Labs, who were launching a Kickstarter campaign for AllPixel. You can think of AllPixel as a graphics board for programmable LEDs. They demonstrated their prototype device and a very powerful library called Bibliopixel. This combination made it incredibly easy to create eye-catching animations for LED strips and matrices.
The idea was to use the AllPixel and the Pi to provide a simple visual representation of the day's weather using the Weather Undergound's great APIs. Then, in the evening, the display would change to moving graphics for subtle lighting or movement and color for a party.
I decided to back their AllPixel campaign and have been looking to put it to work ever since. My wife and I had a big event in our house which finally gave me the excuse to give a geeky makeover to our cool but somewhat dull IKEA entertainment center. I developed some new skills in making this project. This Hackster.io article is my attempt to capture and share some of what I learned.
Since I did not know how well this project would work out. I thought it would be good to install these LEDs out of sight. When they are on, the LED strip wraps the sides and top of my entertainment center - requiring about 5m (15'). These strips come in different densities of LEDs/meter and with my 32, this ended up being 164 LEDs. The strip is tucked in about 6" from the edge of the entertainment center's back paneI and the LEDs points outward to light up the wall behind the TV. During the day, I intend to experiment with different visualizations of data. At night, I thought a slowly changing and subtle color effect would be soothing and not distract from the TV.
By the way, the BiblipPixel library comes with a demo animation that is very bight and colorful - this is what I call "Party Mode".
Hardware:
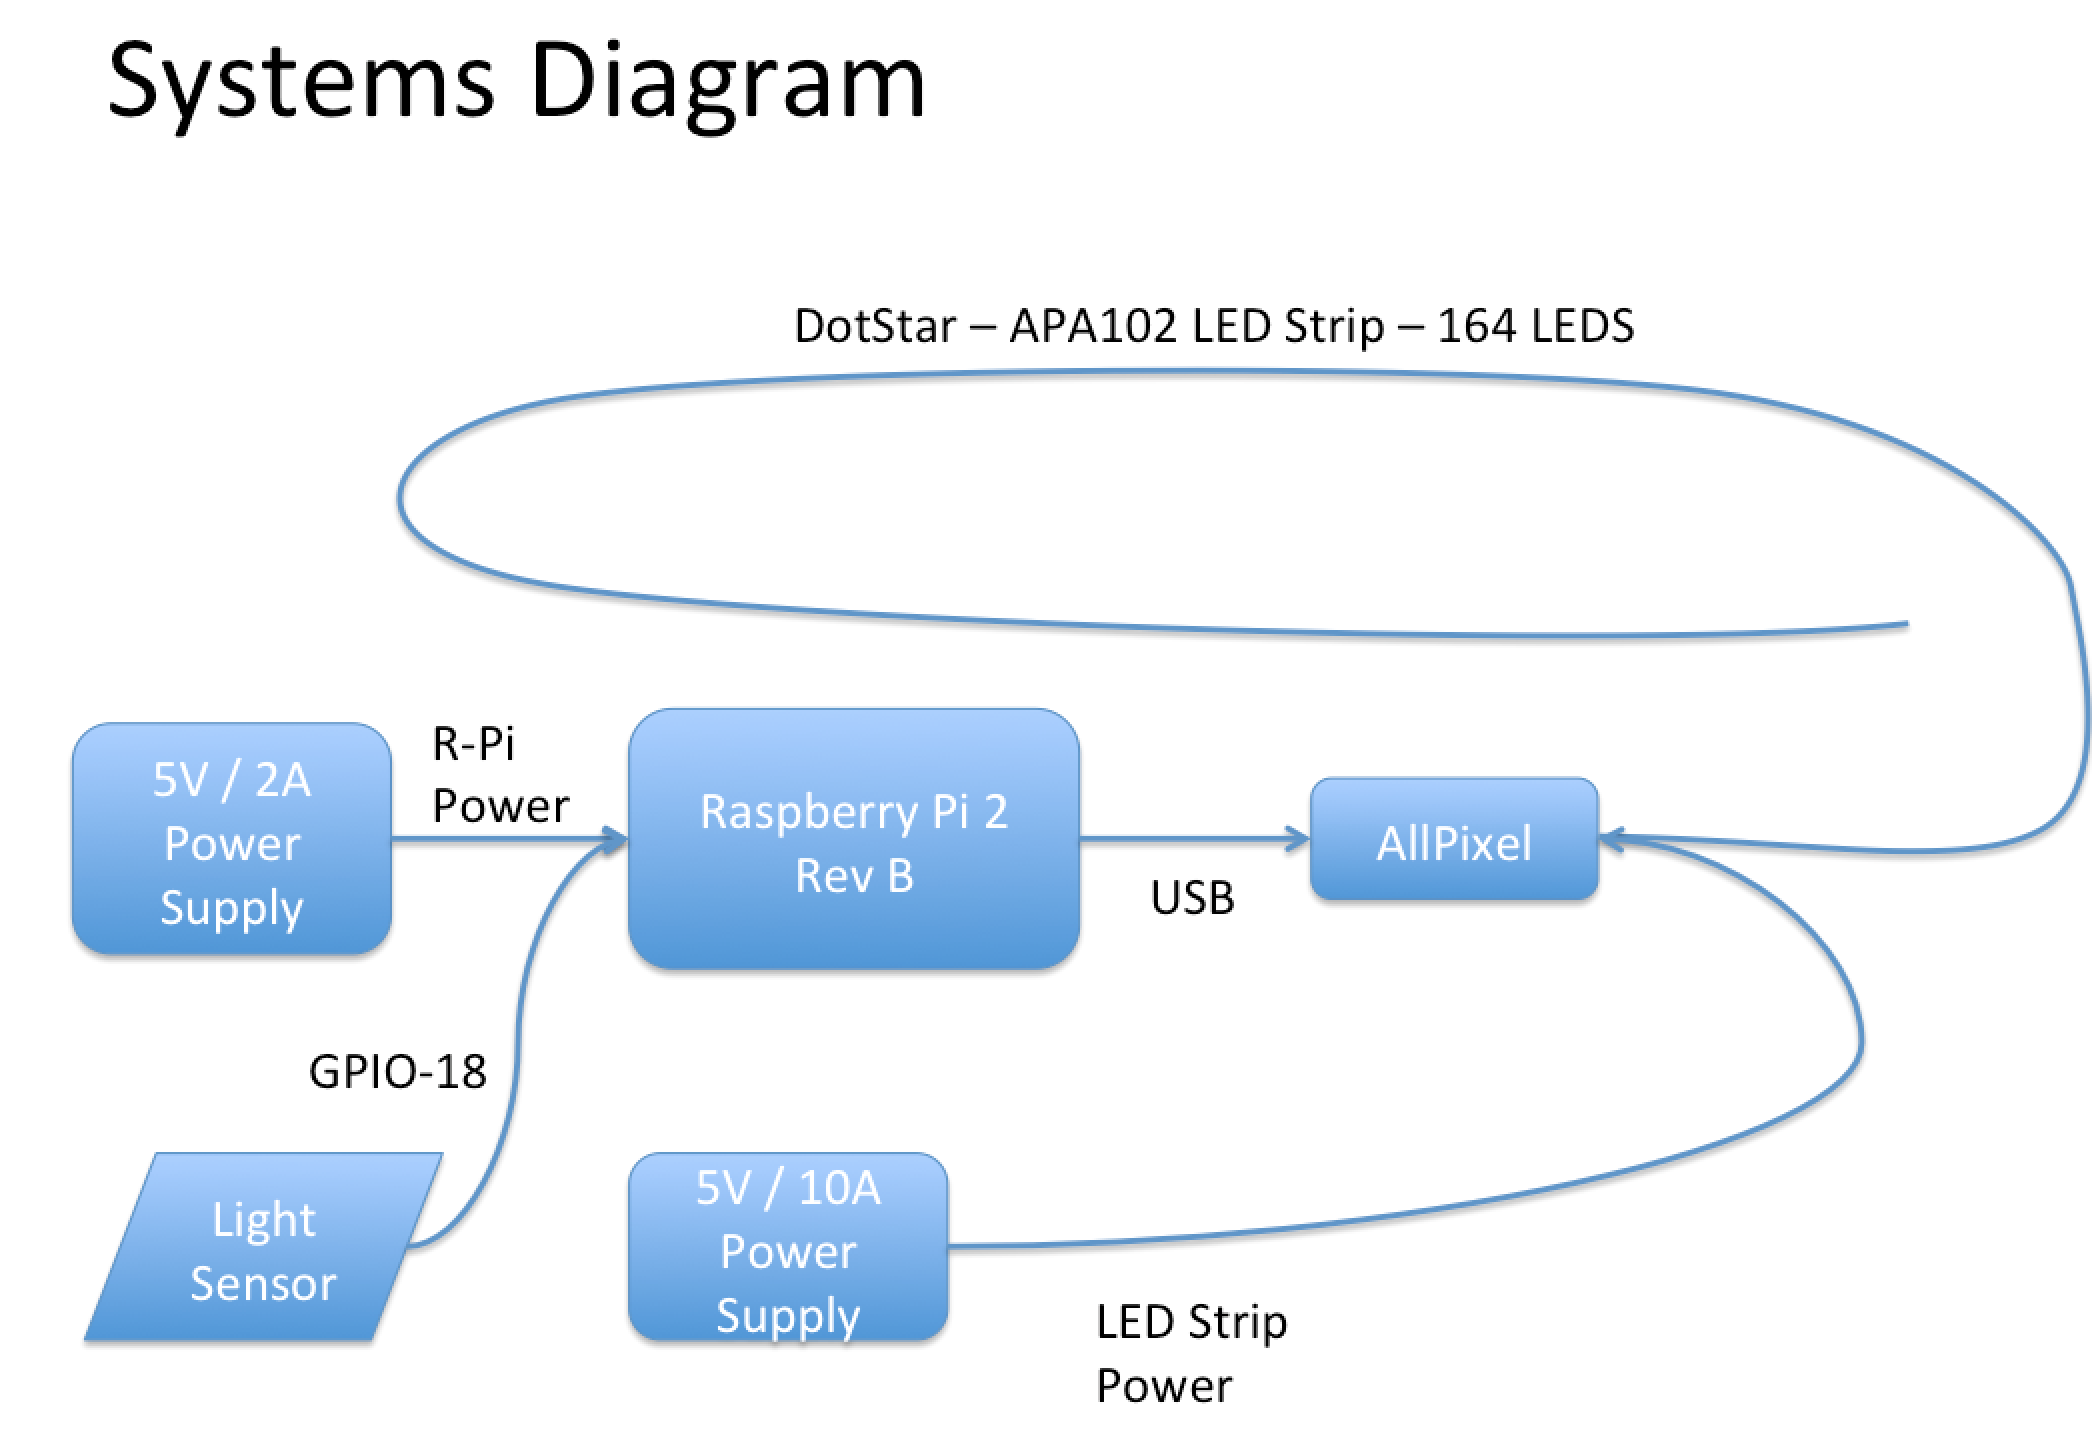
1) AllPixel - this is a very cool little device that makes it easy to send commands to LED strip and matrices. AllPixel is the hardware piece that connects a Raspberry Pi to the LED strip and translates commands written to the BiblioPixel library into the commands understood by many different programmable LED technologies as detailed here.
2) Raspberry Pi - I had told myself that I would never get one of these machines preferring the simpler Arduino. However, the BiblioPixel examples were all in Python and parsing the weather API responses was easier in Python than C. In the future, I also want to play with some data sources like Twitter that require a more serious processor. I ordered a Pi resolving to hide it in the drawer so nobody could see what I did.
I decided to go "headless" with my Pi from the start. I struggled with this until I found this excellent step by step tutorial on RaspberryPi.org. If you have a USB keyboard, mouse and HDMI monitor, it makes getting started easier. Like they say, "you can save time or money - but not both".
Once set up, you can use a VNC viewer to access the RasperryPi's desktop over your home network (see comments in tutorial above for how to set this up). I started out using this approach but the slight video lag and font sizes were too painful. The best solution I found was to use Adafruit's awesome WebIDE for programming and testing my code. This IDE also has a scheduler so you can set your code to run at a certain time each day.
Late at night, the bight lighting coming out from behind the TV distracted from viewing and highlighted heretofore unseen flaws in our sheetrock. I needed a light sensor so the program could progressively dim the LEDs to match the ambient light. The simplest approach for this was to add a photo-resistor to the Pi and adjust the brightness of the strip accordingly. I followed Adafruit's tutorial on this topic but instead of using a breadboard, I simply crimped female headers on the wires and soldered the photoresistor and capacitor into the cable.
3) Power - Each LED on the strip can conceivably consume 60mW of power when displaying white at full brightness (20mW for the red, green and blue emitters). So, I needed a 10A power supply and 20 AWG or thicker wires and connectors. I also put a 1000uF capacitor across the power and ground pins. Adam Haile points out that you may need to connect the power supply wires at both ends of the strip if you see the color change. Luckily, I did not see this effect so I only used one end for power.
4) LED Strip - I decided to hide the LED strip in the 1" gap between the wall and the entertainment center. I did this by sticking the strip (mine had an adhesive backing) to a 1/4" rounded molding available at any home improvement store. This put the LEDs facing outward but tucked neatly inside the perimeter of the entertainment center. They were offset by about 6" and this was enough that the discrete LEDs bled together into what looked like a continuous glow.
Software:
The programming for this effort was surprisingly easy especially considering I had never programmed in Python before. After a short tour of CodeAcademy's course, I knew enough to be dangerous. I took the sample code that came with the BiblioPixel library and started to make my modifications. When I got stuck, I went to the Maniacal Labs User Forum and found all the answers I needed. My plan was to accomplish the following:
- Turn on the strip at 6:00am
- Sense the ambient light and adjust the brightness every minute or so
- Check and display the current weather forecast every hour during the day
- Cycle though some calming colors at night
- Shut off the LED strip at 11:00pm
You can download my code from the Github repository in the Software section and please feel free to leave comments on how I can do a better job programming in Python. Here are some lessons I learned along the way:
- The WeatherUnderGround has an awesome and free API. Follow this link to sign up and put your API key, state and city into the code to get your local weather.
- I love the way that the JSON libraries for the Pi make parsing these results easy
- PYTHONPATH is a mystery and one that I decided not to try to figure out especially since each user has their own path and the Adafruit WebIDE has a user account. I simply put any required files into the same directory as my main script.
- Rather than having the script run forever, I have it ending each day and use CRON to schedule it to run again in the morning.
- I struggled to find a way to display weather data visually and eventually settled on the solution below. I am very open to suggestions on how to do it better. Also, I would love to hear your suggestions for other data visualizations - like your favorite team's current score during football season?!


Comments
Please log in or sign up to comment.