The idea of this project is to build an audio amplifier circuit and read the output using the ADC of the STM-32 Nucleo.
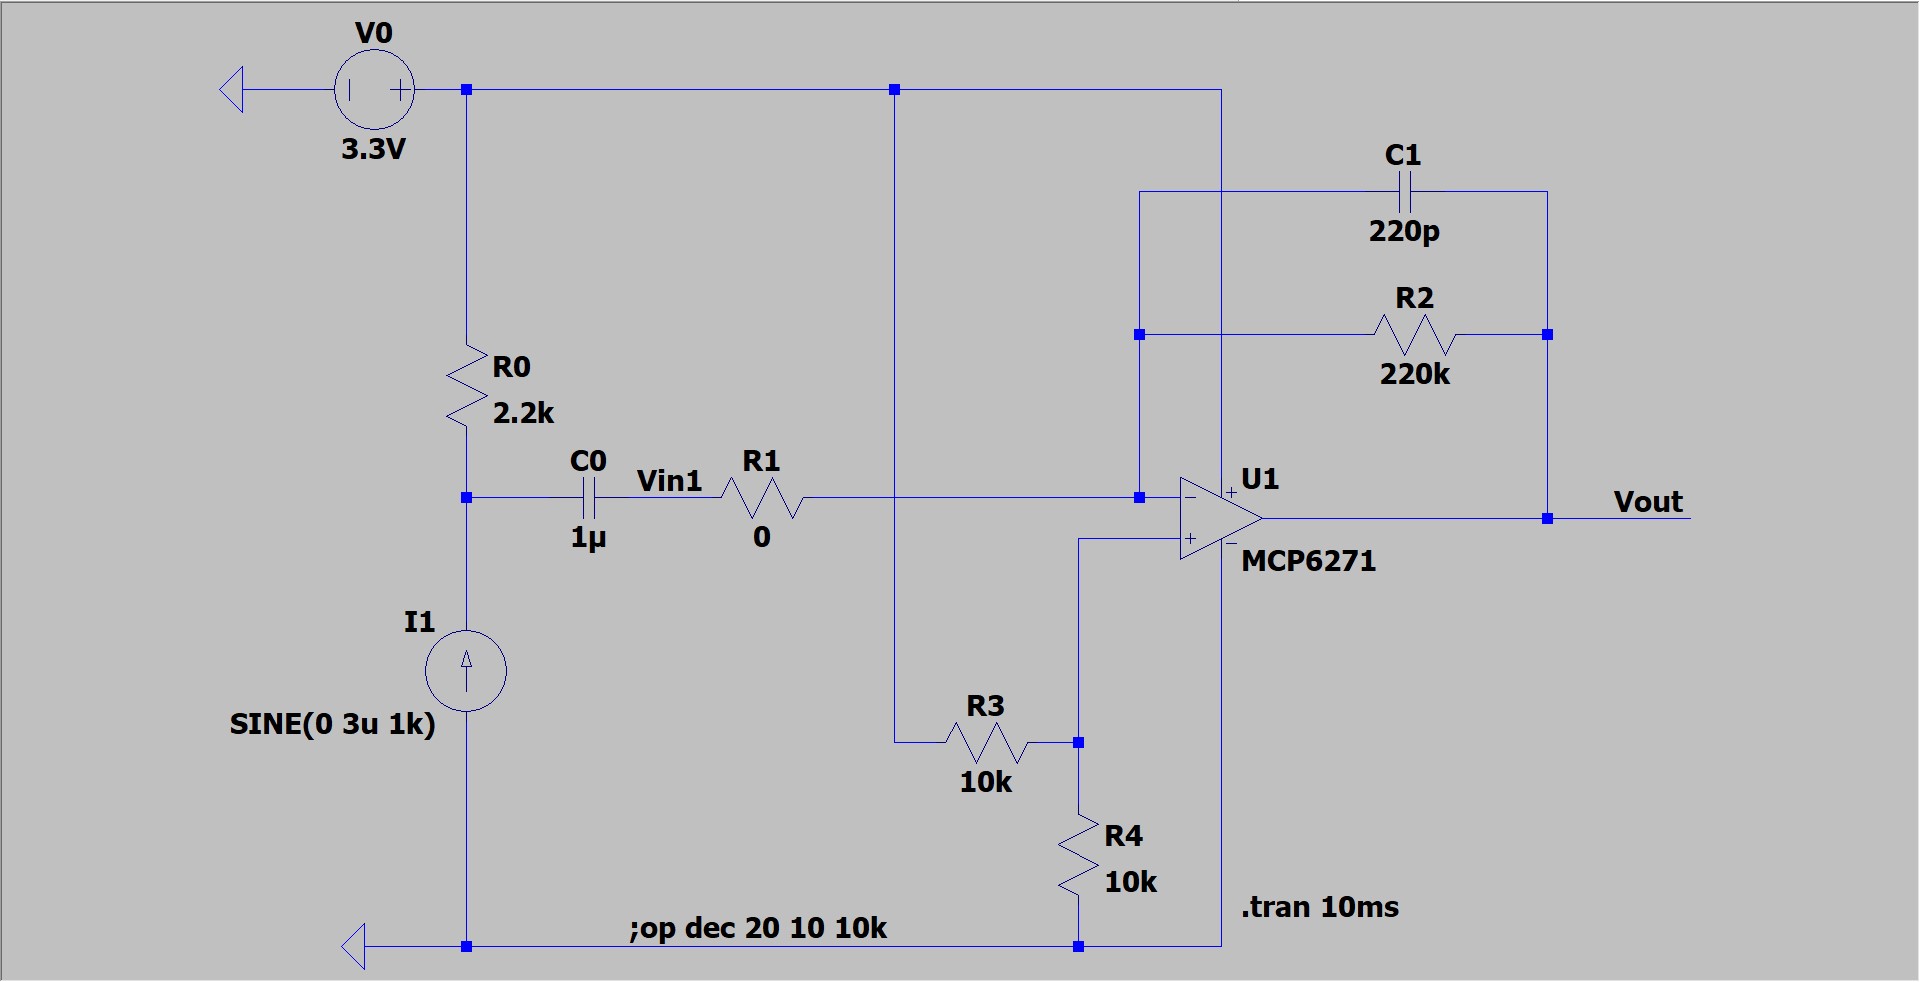
1. The Audio Amplifier circuitThe audio amplifier will amplify low current microphone signal using a simple operational amplifier circuit. To design the circuit, I simulated the circuit in Ltspice to test out individual components to see if they will be suitable for the circuit. Below is the circuit I simulated in LTspice for the audio amplifier. The microphone is represented as a current source in the circuit below.
Audio Amplifier circuit schematics
The op-amp I used in this circuit is the MCP6271. The component values can be changed as long as output is 1.1v peak to peak for good audibility. Since op-amp will be connected to adc on the STM-32 Nucleo 64, available power supplies are only 0 and 3.3V. The positive input to the op-amp must be close to half of 3.3v to maximize voltage swing. Capacitors C0 and C1 are used to reduce the gain outside speech range 300Hz - 3.4 kHz (narrowband), to amplify audio above 300Hz and filter frequencies above 3.4kHz, thus cut-off frequencies associated with C0 must be close to 300Hz and cut-off frequencies associated with C1 must be close to 3.4kHz.
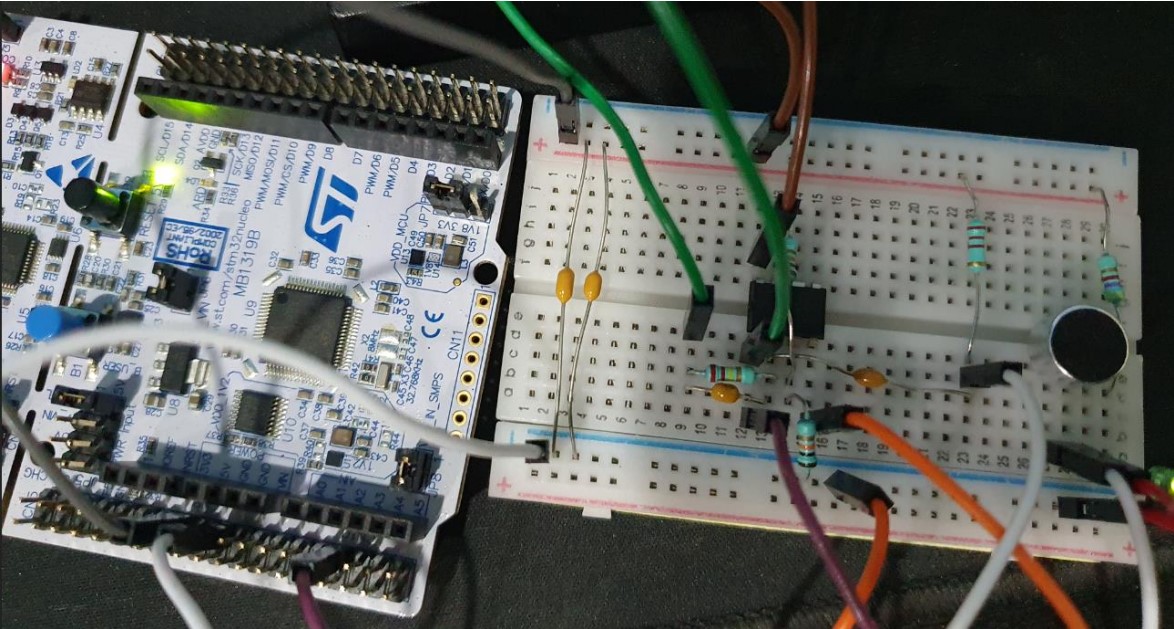
2. Testing the circuit in breadboardAudio Amplifier connected to the nucleo board ADC
I added a decoupling capacitor in the right side of the circuit and an led on the left side to reduce noise and check if power is supplied.
To first test if the breadboard is built correctly, I programmed the nucleo board to act as an oscilloscope. What this program does is it uses the pin A2 as an ADC to measure voltage of a specific point in the breadboard. Then it uses the serial port USART 2 to communicate over usb cable to your computer. Thus serial data can then be read through a terminal client (in this case I used the PuTTY terminal). To configure the putty terminal to be able to read the serial data correctly, first configure speed to 115200 baud rate and choose the serial line that is connected to the Nucleo board
PuTTY session configuration
In windows, you can check which serial port is connected in device manager, in Mac OS, the serial port will be in 'tty', to check this, type 'is/dev/tty*' in the terminal window. To look for the Nucleo board tty number, compare the list of terminals before and after connecting the nucleo. The oscilloscope program source code for the Nucleo is attached. The transmission speed is set to 115200.
PuTTY can also save the output in the terminal to a text file. This can be done in the options section controlling session logging.
3. Recording DataAfter testing the breadboard is correct, I used another program similar to the oscilloscope program to record the output of the amplifier circuit. This time, the MSI clock frequency is set to 16000kHz and the baud rate is set to 500000 to print data sampled to putty more rapidly. Prescaler is set to 16-1(=15) this means that the counter counts up in steps of one at a rate of 1/16 times the main clock 16/16 = 1Mhz. The counter period is set to 125-1(=124) period of 125 microseconds. The program is set to print the data of 24000 samples with 1 millisecond delay to print every sample to the putty terminal. Since the counter period is 125 microseconds, and there are 24000 data samples, the audio recording will be 3 seconds long, however, since storing the data sample takes time and there is a 1 millisecond delay to print the sample, it will take almost 1 minute to print all the data to putty.
4. Post-processing data in MATLAB After the data has been recorded and saved into a text file, import it to MATLAB as a column vector type.
Importing the data to matlab as column vectors
Since the data sampled in putty are in the range of 0-4095, I had to convert the data to arange of -1 to 1 so that Matlab can create the audio file. Since a data sample of 0 here is -1 and 4095 here is 1, we can devide the whole data sample by half of 4095 and subtract 1 from it. VarName1 in the image below is the data sample that has been imported as column vectors in Matlab. Using the audiowrite function, the data can be converted to a wav file by inputing, the filename, the transformed data, and the frequency of the audo. Since the counter period was 125 microseconds, the frequency of the audio should be 8kHz.
MATLAB code convert imported data to audio
MATLAB code to plot the audio graph
A video tutorial has been uploaded to my youtube channel which includes the process of the recording and the audio output.
Video


Comments
Please log in or sign up to comment.