/*
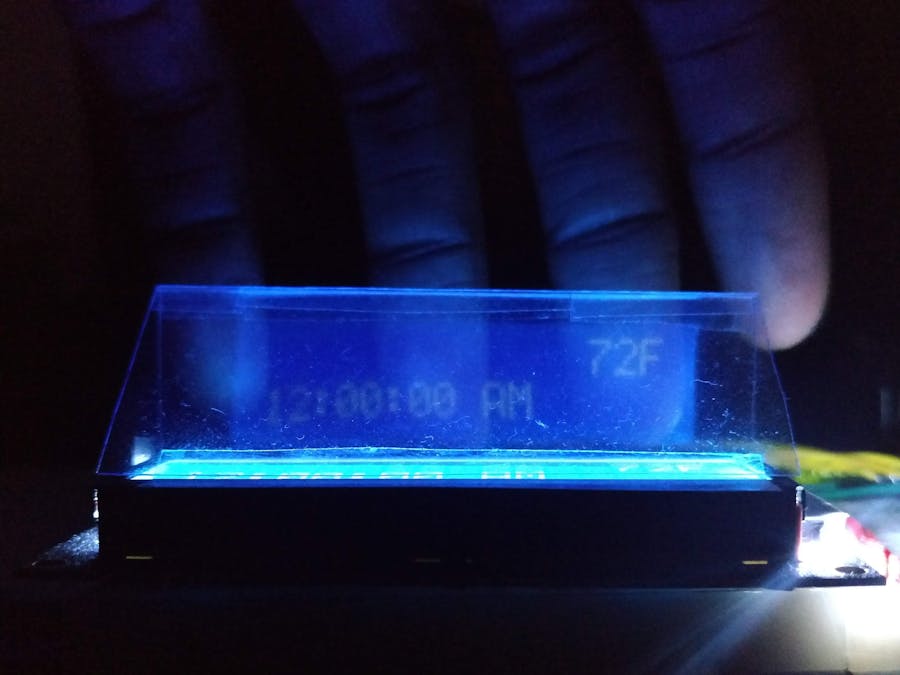
* Program: Alarm Clock and Local Weather Display
* Author: Chukwuemeka Osaretin Ike
* Description: This program uses an ESP8266 and mBed board in collecting and displaying the local time and weather
* for Lake Charles, LA. It can be modified, albeit with a few involved steps, to work for any location.
* Credit: Jim Hamblen - The setup for the ESP8266 was heavily based on his original code at:
* https://os.mbed.com/users/4180_1/notebook/using-the-esp8266-with-the-mbed-lpc1768/
*
*
*
*
*/
#include "mbed.h"
#include "TextLCD.h"
TextLCD lcd(p14, p21, p15, p17, p18, p19, p20, TextLCD::LCD16x2); // Initialize the LCD object
// Set the universal baud rate for all serial connections (ESP & PC)
#define baudRate 115200
DigitalOut myled(LED1); // Declare the LED as an indicator of proper operation. Put more LEDs to indicate different things.
Serial pc(USBTX, USBRX); // PC Serial terminal
Serial esp(p28, p27); // ESP TX and RX pins
DigitalOut reset(p26); // ESP RST pin
Timer t;
// ----------------------------------- Enter Access Point Credentials Here -------------------------------------------------
char ssid[32] = "Your WiFi"; // enter WiFi router ssid inside the quotes
char pwd [32] = "Your Password"; // enter WiFi router password inside the quotes
// The HTTP requests for the time and weather from ThingSpeak
char timeAPI[] = "GET /apps/thinghttp/send_request?api_key=GPZOQ1CYCORFIET5 HTTP/1.1\r\nHost: api.thingspeak.com\r\n";
// Replace with a GET request to your specific API
char weatherAPI[] = "GET /apps/thinghttp/send_request?api_key=IRXOT0ZPTZLRPFT0 HTTP/1.1\r\nHost: api.thingspeak.com\r\n";
// Replace with a GET request to your specific API
char closeConnection[] = "Connection: close\r\n\r\n";
char httpPort[] = "80"; // Set HTTP port
// ThingSpeak IP Address. Confirmed this with an ICMP ping request
char thingSpeakIP[] = "34.237.32.84";
// Variables necessary for comms with the ESP.
int count;
int ended;
int timeout;
// Containers for commands and comms responses (Server and ESP)
char buffer[1000];
char payload[1000];
char currentTime[14];
char currentWeather[14];
char snd[255];
// Declare the necessary functions for working with the ESP
void sendCMD();
void getReply();
void ESPconfig();
void ESPSetBaudRate(int);
// Functions for acquiring the current weather and time
void getTime(void);
void getWeather(void);
void thingSpeakConnect(void);
int main()
{
reset = 0; // Hardware reset the ESP8266
lcd.cls();
pc.baud(baudRate); // Set up pc terminal with appropriate baud rate
lcd.printf("Hello.");
pc.printf("\f\n\r-------------ESP8266 Hardware Reset-------------\n\n\r");
wait(0.5);
reset = 1;
timeout = 2;
getReply();
esp.baud(baudRate); // Set up ESP serial communication
// ESPSetBaudRate(baudRate); // Set the ESP's baud rate
ESPconfig(); // Configure the ESP8266
thingSpeakConnect(); // Use the AT+CIPSTART command to connect to the thingspeak ip address
getTime(); // Send the HTTP request for time to ThingSpeak's server
getWeather(); // Send HTTP request for the weather to ThingSpeak's server
}
// ---------------------------------------------- Sets the ESP8266 baud rate -------------------------------------------------
// This function has not been implemented at this time.
void ESPSetBaudRate(int a)
{
char* bRate;
sprintf(bRate, "%d", a);
strcpy(snd, "AT+CIOBAUD=");
strcat(snd, bRate);
strcat(snd, "\r\n");
sendCMD();
}
// ------------------------- This is for ESP8266 config only, run this once to set up the ESP8266 ---------------------------
void ESPconfig()
{
// Send 'AT' to the ESP twice to confirm that serial communication has been established
wait(0.5);
strcpy(snd,"AT\r\n");
sendCMD();
wait(0.5);
strcpy(snd,"AT\r\n");
sendCMD();
timeout=1;
getReply();
wait(1);
pc.printf("\f---------- Starting ESP Config ----------\r\n\n");
pc.printf("---------- Reset & Get Firmware ----------\r\n");
strcpy(snd,"AT+RST\r\n");
sendCMD();
timeout = 1;
getReply();
pc.printf(buffer);
wait(1.5);
pc.printf("\n---------- Get Version ----------\r\n");
strcpy(snd,"AT+GMR\r\n");
sendCMD();
timeout = 2;
getReply();
pc.printf(buffer);
wait(1.5);
// Set CWMODE to 1 for Station, 2 for Access Point, 3 for BOTH. This method needs only the station mode.
pc.printf("\n---------- Setting Mode ----------\r\n");
strcpy(snd, "AT+CWMODE=1\r\n");
sendCMD();
timeout = 1;
getReply();
pc.printf(buffer);
wait(1.5);
// Set CIPMUX to 0 for Single connection mode, 1 for Multiple connections. 1 is beneficial for this project, but not necessary.
pc.printf("\n---------- Setting Connection Mode ----------\r\n");
strcpy(snd, "AT+CIPMUX=1\r\n");
sendCMD();
timeout = 1;
getReply();
pc.printf(buffer);
wait(1.5);
pc.printf("------- Connecting --------\n\rssid = %s \n\rpwd = %s\r\n", ssid, pwd);
lcd.cls();
lcd.printf("Connecting...");
// Send the ESP the credentials of the WLAN to connect to.
strcpy(snd, "AT+CWJAP=\"");
strcat(snd, ssid);
strcat(snd, "\",\"");
strcat(snd, pwd);
strcat(snd, "\"\r\n");
sendCMD();
timeout = 3;
getReply();
pc.printf(buffer);
wait(3);
pc.printf("\n---------- Get IP & MAC Addresses ----------\r\n");
strcpy(snd, "AT+CIFSR\r\n");
sendCMD();
timeout = 5;
getReply();
pc.printf(buffer);
wait(1.5);
pc.printf("\n---------- Get Connection Status ----------\r\n");
strcpy(snd, "AT+CIPSTATUS\r\n");
sendCMD();
timeout = 3;
getReply();
pc.printf(buffer);
}
// ------------------------- sendCMD serially prints the current command in the snd array to the esp. ----------------------
void sendCMD()
{
esp.printf("%s", snd);
}
// ------------------ This function gets the contents of the ESP's memory and places them in the buffer array --------------
void getReply(void)
{
memset(buffer, '\0', sizeof(buffer));
t.start();
ended = 0;
count = 0;
while(!ended) {
if(esp.readable()) {
buffer[count] = esp.getc();
count++;
}
if(t.read() > timeout) {
ended = 1;
t.stop();
t.reset();
}
}
}
// ---------------------------------- Set up IP connection with ThingSpeak's server --------------------------------------
void thingSpeakConnect(void)
{
pc.printf("\r\n------------ Connect to ThingSpeak --------------\r\n");
strcpy(snd,"AT+CIPSTART=0,\"TCP\",\"");
strcat(snd,thingSpeakIP);
strcat(snd,"\",");
strcat(snd, httpPort);
strcat(snd, "\r\n");
sendCMD();
timeout = 5;
getReply();
pc.printf(buffer);
timeout = 5;
getReply();
pc.printf(buffer);
}
// ---------------------- Get the current time ------------------------------
void getTime(void)
{
pc.printf("\r\n----------- Acquiring Current Time ---------------\r\n");
strcpy(snd, "AT+CIPSEND=0,96\r\n");
sendCMD();
timeout = 5; // was 5
getReply();
pc.printf(buffer);
strcpy(snd, timeAPI);
strcat(snd, "\r\n");
sendCMD();
timeout = 5; // was 5
getReply();
//pc.printf(buffer);
//pc.printf("\n\n\n");
for(int i = 0; i < 1000; i++) {
payload[i] = buffer[i];
}
for(int i = 0; i < 14; i++) {
currentTime[i] = payload[674+i];
pc.printf("%c", currentTime[i]);
lcd.printf("%c", currentTime[i]);
}
pc.printf("\n\n\r");
}
// ------------------------- Get the weather -----------------------------
void getWeather(void)
{
pc.printf("\r\n----------- Acquiring Current Weather ---------------\r\n");
strcpy(snd, "AT+CIPSEND=0,96\r\n");
sendCMD();
timeout = 5; // was 5
getReply();
pc.printf(buffer);
strcpy(snd, weatherAPI);
strcat(snd, "\r\n");
sendCMD();
timeout = 5; // was 5
getReply();
//pc.printf(buffer);
//pc.printf("\n\n\n");
for(int i = 0; i < 1000; i++) {
payload[i] = buffer[i];
}
lcd.locate(0,1);
for(int i = 0; i < 14; i++) {
currentWeather[i] = payload[695+i];
pc.printf("%c", currentWeather[i]);
lcd.printf("%c", currentWeather[i]);
}
pc.printf("\n\n\r");
}


Comments
Please log in or sign up to comment.