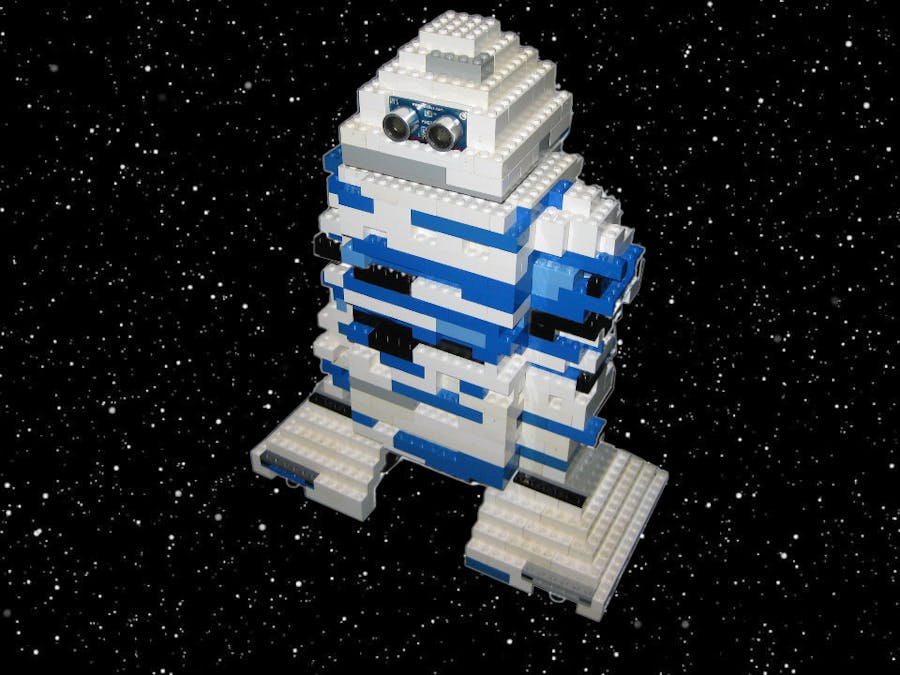
The kids and I wanted to build a star wars themed droid out of toy bricks over Christmas break. This is what we came up with,
Now, let's take a look at demonstration:
Hope you enjoy this project.
BasicsThe Droid has 3 modes:
- Autonomous / Self Drive
- Manual
- Cantina
Manual Mode (the user controls how the droid moves with with a mobile device), Self Drive Mode (the droid autonomously drives around avoiding obstacles and mapping its movements), and Cantina Mode (the droid dances around the room with random movements).
How it worksWhen the Particle Photon boots up using the BrickDroid.ino file (provided in code section below), it will setup 3 REST services:
- Service 1: To set Droid Mode
- Service 2: Commands to control Droid movement (when in Manual Mode)
- Service 3: To provice tracking information (when in Self Drive Mode)
The HTML page acts as a client application to these REST services. Using JQuery to call the REST services when buttons are pressed, the HTML page will control the droid using these services (HTML page's code is also provided in the code section below).
SetupStep 1: Setup Particle Photon
Setup your particle photon using the Getting Started Guide on their site. Go thru the examples of blinking an LED light and then blinking an LED light over the internet. Very good tutorials. When going thru the 'Blinking an LED over the Net' demo, make note of your Photon Device ID and your Particle.io access token. We will use those later.
When you setup your Particle Photon, be sure to notedown it's Device ID and Access Token. It will be required in Step 5 when we setup HTML WebPage Client.
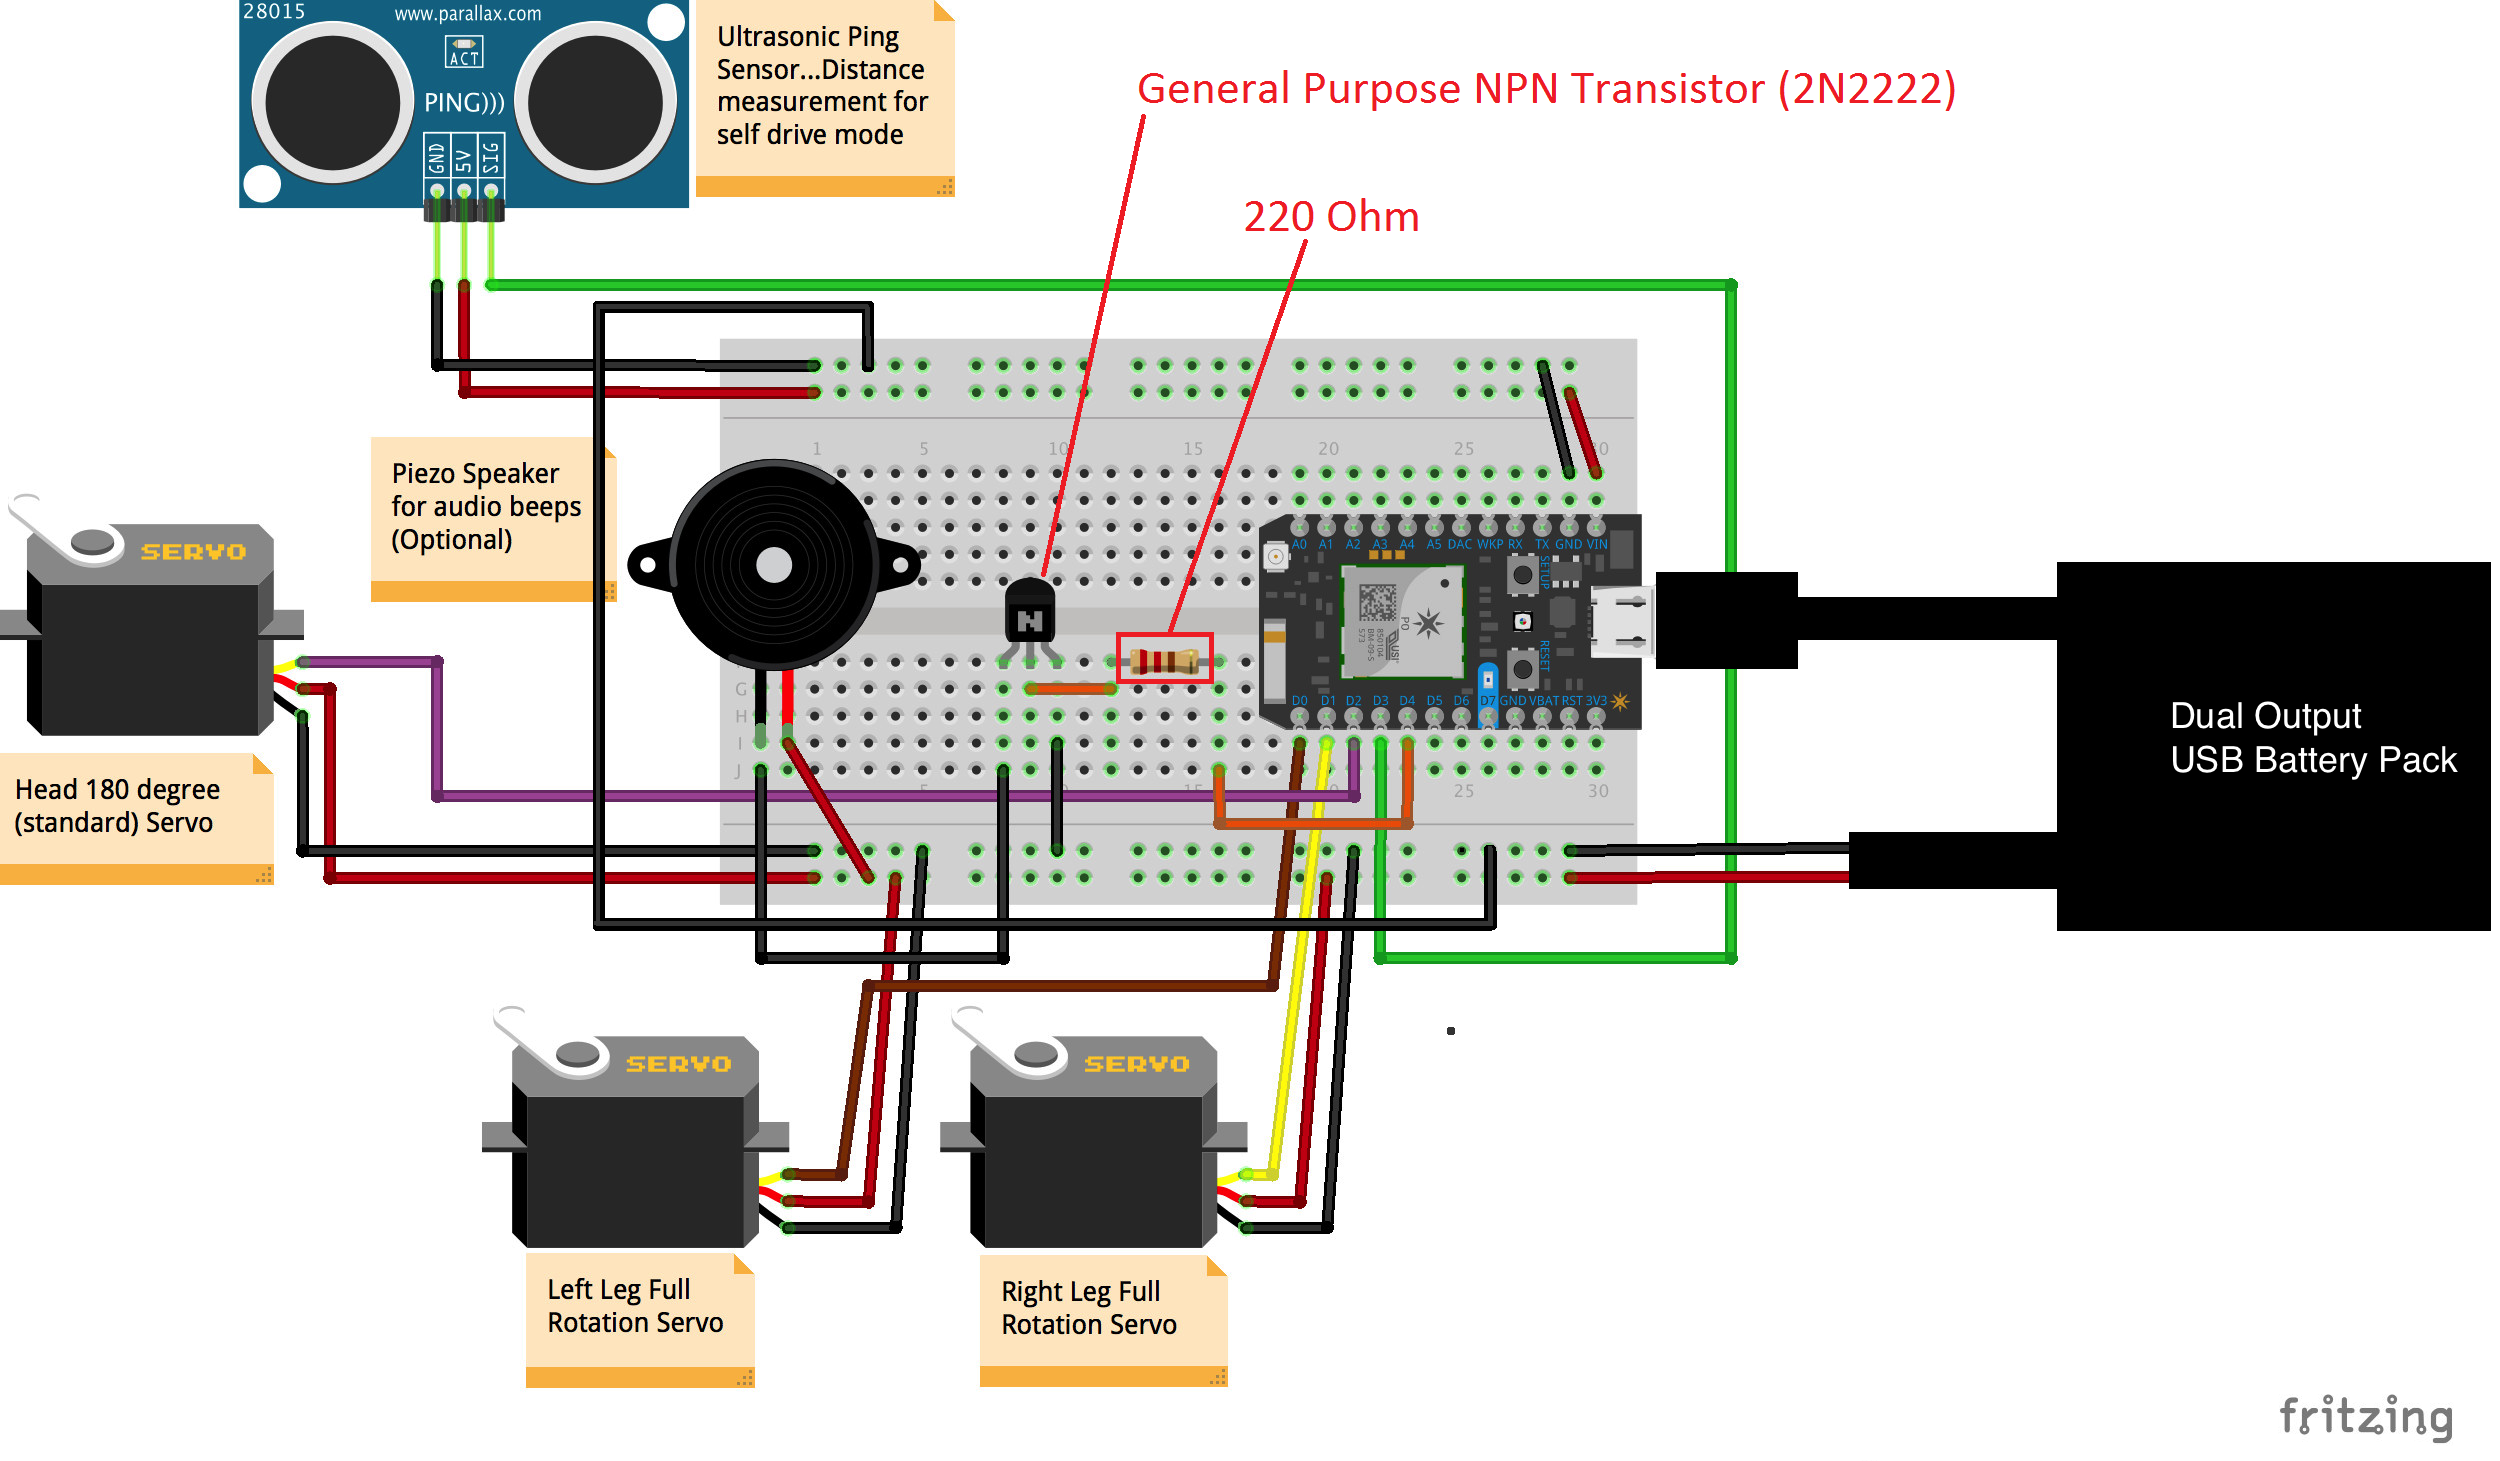
Step 2: Wire Up
Wire up the servos, speaker and ping))) according to circuit diagram below:
Step 3: Compile Sketch & Flash Photon
Compile and push the BrickDroid.INO file to your photon (either using the Web IDE or the local Particle Dev IDE).
After flashing your Photon, when it boots up, the piezo speaker should beep and the LED on the particle photon should be "breathing" cyan. Whenever the droid starts up or changes mode, it will beep to identify "ready".
Step 4: Assemble Droid
Assemble the Droid as you want it to be. Here are some snapshots of my assembly:
Before assembling your droid and placing wires and motors into the droid, test out your wiring by loading the included HTML file (either on your phone or on your computer). This will verify that once you get everything assembled, you will be able to communicate and control everything.
Also test it out using your fully charged battery power supply (see below on setting up the battery power supply to the breadboard), just to make sure you are getting enough power to all your devices, motors, and sensors.
Powering your droid with a battery pack requires creating a simple USB cable Type A to breadboard inputs (Red/Black). To do this you can either:
- OPTION A: Use the Sparkfun Micro Breakout board. With this, use a simple micro to type A USB cable and only connect the ground (negative) and VCC (positive) from the breakout board to your breadboard (ignore the other connections from the breakout board).
- OPTION B: I found a simple "power only" USB type A to USB micro cable that came with my wireless headphones. It only had 2 wires in it (red and black). I cut the micro end off and stripped the red and black wires down to expose the copper (Red is positive, black is negative/ground). Then I cut one end off of two basic breadboard jumper wires and striped them down to their copper. I soldered (or you can just twist/elec tape) the stripped jumper wires ends onto the ends of my now stripped USB Type A cable and seal the connections with electrical tape to make it easy to connect the USB type A to the breadboard (see image in slide show). ) Assemble your droid with all wires, sensors, motors and batteries and give it a go.
Design and build your droid using the toy bricks however you wish. We put our idea on paper first to make sure we had room for everything and that the droid will still be balanced. I provided images of us building ours and how we mounted the servos and castors. I used a hot glue gun to connect certain bricks to the motors, breadboards, and servo horns (see photos).
NOTE: In the Bill of Materials I listed some wheels, but I only used the rubber rings of the wheels. I put those on the circular horn (the geared thing that attaches to the servo...each servo comes with a variety of horns: Straight, cross, six way, wheel) and it made a nice snug fit. I thought this was easier then trying to find a way to attach the wheels to one of the other horns using screws. See image slideshow for a closeup on the wheels to get a visual.
Assembling Slideshow
Sealing up
Step 5: HTML WebPage Client
Save the BrickDroid.HTML file (provided in code section below) to your local computer and modify the HTML page to replace the "DEVICE ID HERE" and "ACCESS TOKEN HERE" with the information you got from Step 1 when you went thru the demo of 'Blinking a LED over the Net'.
Now, open the webpage we just modified with Particle Photon ID and Access Token. You can also host this web-page via XAMPP so you can access it over mobile devices, too.
Unaware with XAMPP? Refer this tutorial.
Once the file is rendered in a browser, you should see motors spinning and speaker making noise when you click buttons on the HTML Page.
Troubleshooting Tidbits:
- To load the BrickDroid.HTML file on your iphone or ipad, I used Dropbox. Their App allows you to load an HTML page from the cloud and view it locally...since the IPhone and Ipad dont allow you to copy HTML files locally and load them into a browser.
- To load the BrickDroid.HTML file on your android phone or tablet, just copy it over to the SD card (maybe into the downloads folder) and load it up into Chrome using the URL: file:///sdcard/Download/BrickDroid.HTML
- When running into problems with the photon this REST route came in handy in seeing what data has been pushed to the photon and what REST routes are exposed: GET https://api.particle.io/v1/devices/YOUR_DEVICE_ID?access_token=YOUR_API_TOKEN using a tool like POSTMAN in Chrome makes troubleshooting much easier.
- The Forums for particle were a big help in troubleshooting issues. Searching the forums found many people who ran into the same issues I did with Key files, reclaiming device IDs, changing WIFI passwords, re-setting up your photon, and what the different flashing colors of the Photon LED mean.


_3u05Tpwasz.png?auto=compress%2Cformat&w=40&h=40&fit=fillmax&bg=fff&dpr=2)
Comments
Please log in or sign up to comment.