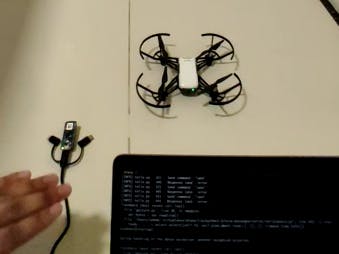
The Arduino Nano 33 BLE Sense has an onboard sensor that can identify gestures. Gestures recognition and using gestures to perform tasks can not only make our lives easier, but the lives of differently abled persons easier as well. In this project, I will use the gesture sensor on the Arduino Nano to perform some simple flight control of the Tello Drone.
SoftwareThere are two steps we need to be able to finish this project: The first step to control the drone is to be able to recognize gestures and the second is to send those commands to the drone. Let's start with the first step:
Gesture Recognition
The APDS9960 sensor is used to detect gestures. First you need to install it's library. We will read 4 types of gestures: Up, Down, Right and Left. Below is a sketch that detects those 4 gestures and then prints them to Serial. To make sure that the correct gestures are being detected, it will also change the colors of 4 LEDs based on what gestures is detected.
#include <Arduino_APDS9960.h>

void setup() {
  Serial.begin(9600);
  pinMode(LED_BUILTIN, OUTPUT);
  pinMode(LEDR, OUTPUT);
  pinMode(LEDG, OUTPUT);
  pinMode(LEDB, OUTPUT);

  while (!Serial);
  if (APDS.begin()) {
    Serial.println("Error Initialising sensor");
  }

  Serial.println("Detecting Gestures");
  digitalWrite(LEDR, HIGH);
  digitalWrite(LEDG, HIGH);
  digitalWrite(LEDB, HIGH);

}

void loop() {
    if (APDS.gestureAvailable()) {
    int gesture = APDS.readGesture();

    switch (gesture) {
      case GESTURE_UP:
        Serial.println("Detected UP gesture");
        digitalWrite(LEDR, LOW);
        delay(1000);
        digitalWrite(LEDR, HIGH);
        break;

      case GESTURE_DOWN:
        Serial.println("Detected DOWN gesture");
        digitalWrite(LEDG, LOW);
        delay(1000);
        digitalWrite(LEDG, HIGH);
        break;

      case GESTURE_LEFT:
        Serial.println("Detected LEFT gesture");
        digitalWrite(LEDB, LOW);
        delay(1000);
        digitalWrite(LEDB, HIGH);
        break;

      case GESTURE_RIGHT:
        Serial.println("Detected RIGHT gesture");
        digitalWrite(LED_BUILTIN, HIGH);
        delay(1000);
        digitalWrite(LED_BUILTIN, LOW);
        break;

      default:
        // ignore
        break;
    }
  }
}
There is a delay of 1 second between each gesture detection. This allows the drone some time to react to each gesture and also prevents the sensor from reading multiple spurious gestures.
You should first test that this is working. In my testing, the gesture recognition works really well, but only if your hands are close to the sensor. Additionally, I found that sometimes Right or Left gestures were being detected as UP. Both of these have to be accounted for in the next version of this project.
Next we need to send these gestures to the drone.
Sending Commands To The Drone
To control the Tello Drone programmatically, you need a way to connect to its WIFI network and send it commands. Even when controlling the drone using its app, you need to connect your phone to its WIFI network.
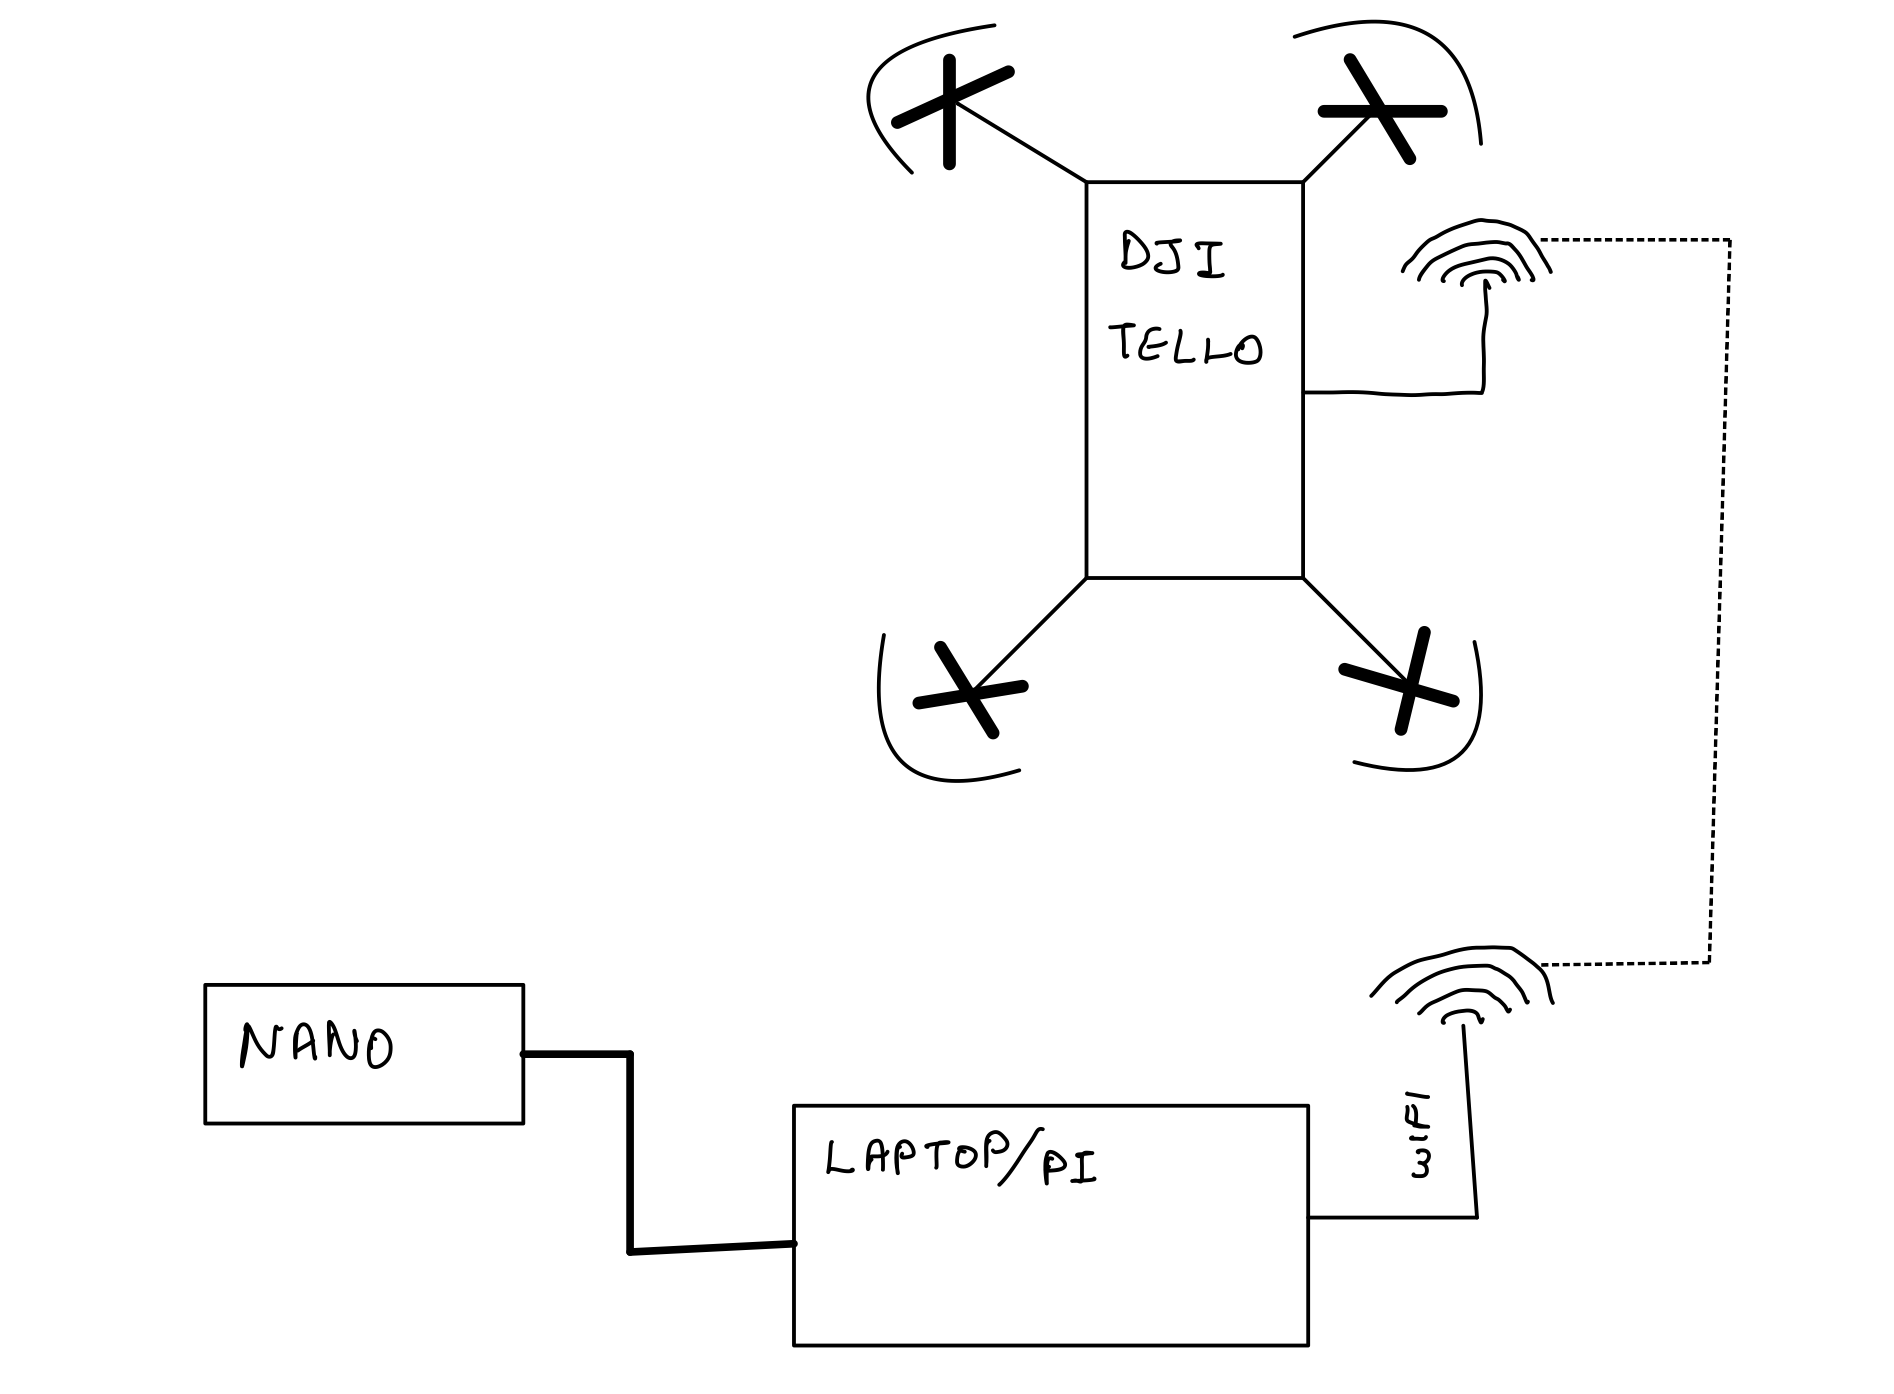
The DJI Tello Drone has a very simple python API to control it as well, but since you need to WIFI to send commands to it, you cannot use the Nano 33 BLE Sense since it does not have a WIFI module on-board. Instead, we will need to read the detected gesture value from the board's serial output in a laptop or a Raspberry Pi.
Before that, you will have to install the python package: DJITelloPy to control the drone and the serial reader:
pip install djitellopy pyserialBefore running the code (below), you need to connect your laptop/pi to the drone's wifi which will look like TELLO-XXXXXX.
from djitellopy import Tello
import time
import serial

ser = serial.Serial('/dev/cu.usbmodem142401')
# Remove two lines below to toggle safety feature 1
ser_bytes = ser.readline()
ser.flushInput()

tello=Tello()

tello.connect()
print(tello.get_current_state())
print('Starting')

flying=False

start=time.time()
while True:
    try:
        ser_bytes = ser.readline()
        decoded_bytes = str(ser_bytes[0:len(ser_bytes)-2].decode("utf-8"))
        print(decoded_bytes)
        if 'UP' in decoded_bytes and not flying:
            tello.takeoff()
            print('Takeoff Done')
            flying=True
        elif 'DOWN' in decoded_bytes and flying:
            tello.land()
            print('Landing Done')
        elif 'LEFT' in decoded_bytes and flying:
            tello.move_left(50)
            print('Moved Left')
        elif 'RIGHT' in decoded_bytes and flying:
            tello.move_right(50)
            print('Moved Right')
        # Remove lines below or increase the 20 value to increase flight time
        if time.time()-start>20:
            tello.land()
            print('Landing Done')
            flying=False
    except:
        print("Keyboard Interrupt")
        tello.land()
        print('Landing Done')
        break
The drone will move only 50 cm when moving left and right. You can customize this value to suit your needs.
For safety reasons (and also because I tested this indoors in my home), I have included some safety features that you can toggle:
- To prevent any random UP gestures from causing the drone to take-off, the drone will only take-off on the second gesture (which has to be UP. The first gesture can be anything). You can remove this by removing these lines in the beginning:
ser_bytes = ser.readline();ser.flushInput() - The drone will automatically land after 20 seconds of receiving the first gestures. You can remove this or increase the flight time by removing the second if statement in the while loop
- The drone will land if you shut down the python script. THIS IS IMPORTANT and you should NOT REMOVE this since there is no way to control a flying drone if you exit out of the program.
The hardware connections you need to make to get this to work is simple: Connect the Arduino to your laptop or Raspberry Pi which you need to connect to the drone via WIFI. Below is a schematic:
This is not a complete solution and more features can be added to it. Here are some ideas I have for future versions:
- Using gestures is kind of clunky and you can only move it in increments of 50cm (or whatever value you set). I want to use the onboard IMU/Accelerometer to move the drone instead.
- Since the Nano does not have WIFI onboard we currently need a wifi capable device in addition to it. I want to remove that dependency by using a Nano RP2040 instead that has wifi onboard.
I am currently working on these and you can check out the code or contribute in github here.
Full Code and QuestionsYou can find the full code here under blogs/part_1. If you have any questions, leave a comment here, or create an issue on github!


Comments
Please log in or sign up to comment.