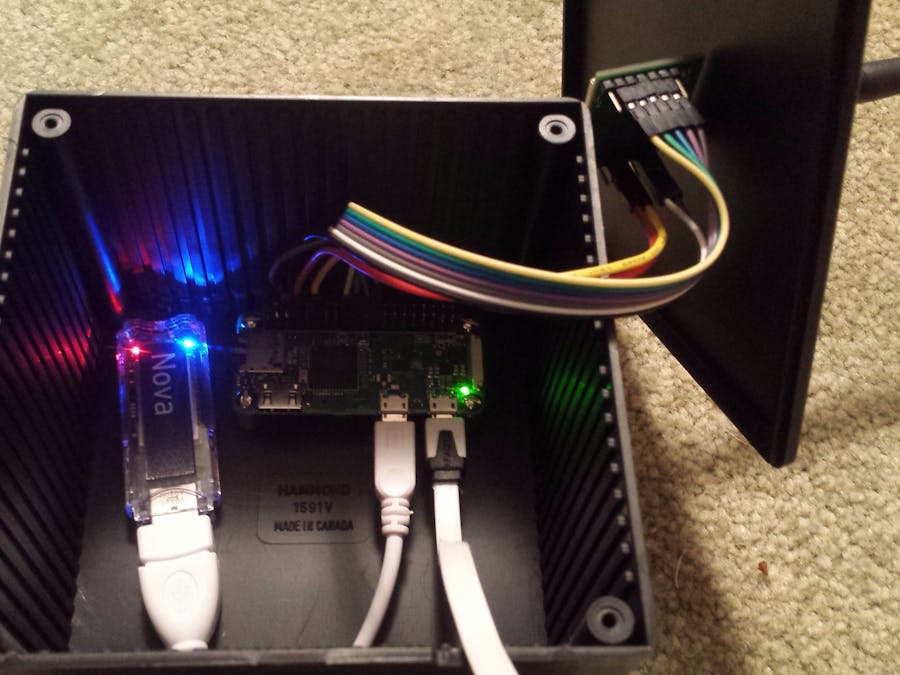
The Hologram Nova on a Raspberry Pi Zero W turned out to be a lot easier to use than I imagined. Just follow the instructions in this project and you can get a new internet interface in Raspbian by simply running "hologram modem connect" which installs a ppp0 device, easy peasy! With general, all purpose Internet available the rest is a simple matter of recreating a Raspberry Pi Single Channel Packet Forwarder for LoRa radio devices which The Things Network still supports (for now!). I also chose for maintenance to use the wifi interface of the Raspberry Pi Zero as an access point using hostapd and udhcpd, in addition to the availability of the Hologram SpaceBridge that allows you to ssh into the device with a simple port forwarding connection. I have the hologram connect and a nodejs pm2 process monitor spawning the single_chan_pkt_fwd process running out of /etc/rc.local so you just power on and wait and it comes up listening for any LoRa devices in the area.
If you know LoRa (Long Range) WAN you know that area can be miles! The amazing thing of low power, long range albeit slow bitrate LoRa is that very low power devices can transmit bits of telemetry like temperature, water level or quality, or my favorite, soil moisture readings from a Chirp! capacitance measuring device, over distances of several miles. My longest transmission achieved was 7.72 miles (12.4 Km). With a cell enabled gateway and a network of sensors the possibilities for environmental monitoring is enormous.
Refer to Pi Zero GPIO pinout and the inAir9B pinout . The inAir9B uses the Semtech SX1276 and uses the SPI bus and a few IO pins to communicate with the RPi and the single channel gateway software to forward messages on to The Things Network. Using the default settings in the code:
// SX1272 - Raspberry connections	 (SX1276 is improved SX1272)
int ssPin = 6;	GPIO 6
int dio0  = 7;	GPIO 7
int RST   = 0;	GPIO 0
and double female ended jumpers the connections are
As mentioned above, use the already well written instructions to get the Hologram Nova installed and running on your Raspberry Pi Zero W.
Use raspi-config to enable SPI. Use apt-get to install wiringpi.
After the hardware is wired up, clone the (warning: no longer maintained) Single Channel Packet Forward project into /home/pi/src/ with
$ git clone https://github.com/tftelkamp/single_chan_pkt_fwd.git
edit main.cpp and set the values under "Configure these values! " - leave the pins as they are to match our wiring above, and set options like
// Set spreading factor (SF7 - SF12)
sf_t sf = SF10;   // was SF7, I'm using 10 for better range, slower speed
// Set center frequency
uint32_t  freq = 912500000; // in Mhz! (912.5) Channel 51
// Set location
float lat=37.8267;
float lon=-122.423;
int   alt=10;
/* Informal status fields */
static char platform[29]    = "RPiZW Single Channel Gateway";  /* platform definition */
static char email[40]       = "winners@hackster.io";                        /* used for contact email */
static char description[64] = "Hackster.io Hologram Contest";                        /* used for free form description */
#define SERVER1 "13.66.213.36"     // for North America 900MHz router.us.thethings.network
One thing the RPiZW has trouble with in the code is generating a unique TTN gateway id - it's hard coded for 'eth0' - find and change that to 'wlan0' and you'll get an good id to use in registering your gateway with TTN. The Hologram's ppp0 won't work as it has no mac address!
The single channel freq and spreading factor sf must match your nodes to get any packets from them! When done compile with 'make' and get a single binary 'single_chan_pkt_fwd ' that you can run as it is, in a 'screen' session or under pm2 to forward packets from your nodes on to TTN.
There are more details about the setup in this similar project.


Comments
Please log in or sign up to comment.